Categories

10 Simple Ways to Reduce Dust in Your Home

Tangible solutions for an irritable problem

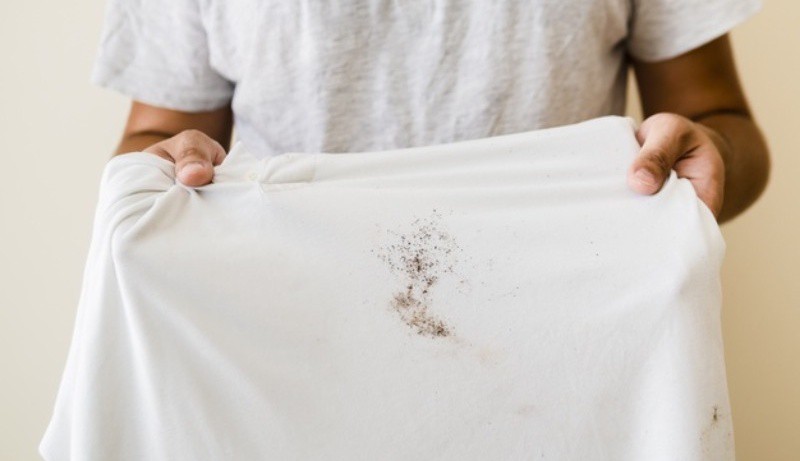
Whether you’re living in a home, apartment, dorm room, or studio there is one constant factor that continues to persist as an irritating factor that needs to be tackled daily and that is dust. Dust can accumulate everywhere from surfaces, corners, furniture, and small or hard to reach crevices.

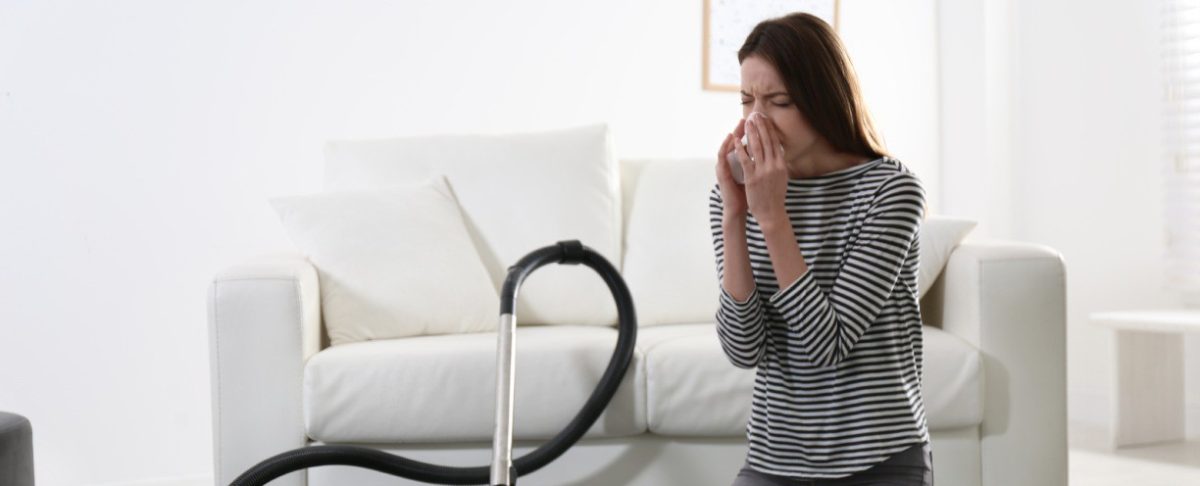
Dust can result in nasal issues or general toxic air pathogens being within your vicinity.

To eliminate dust from home, many consider using a duster and cleaning the area thoroughly. However, while that diminishes the dust problem it doesn’t quite tackle the source on how to prevent dust from accumulating. This could keep a home from looking polished and spotless, leaving most homeowners scrounging for answers.

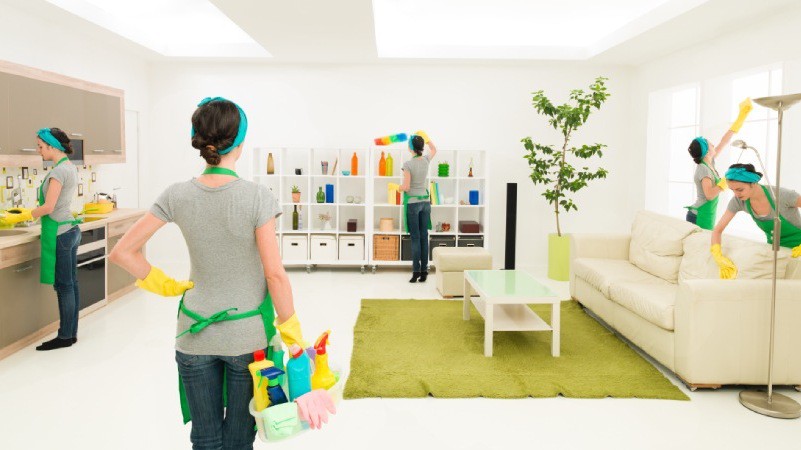
Some homeowners even go as far as hiring a home cleaning service to make their cleaning woes disappear without lifting a finger. But others who struggle with money are left in the dust looking for answers on their own. Fear not, there are possible pathways towards a dust-free space.

Cleaning the dust from your home can result in better quality air and lessen the possible allergy triggers that come with having this minuscule debris blocking your surfaces. To have a clean home requires persistence and awareness.

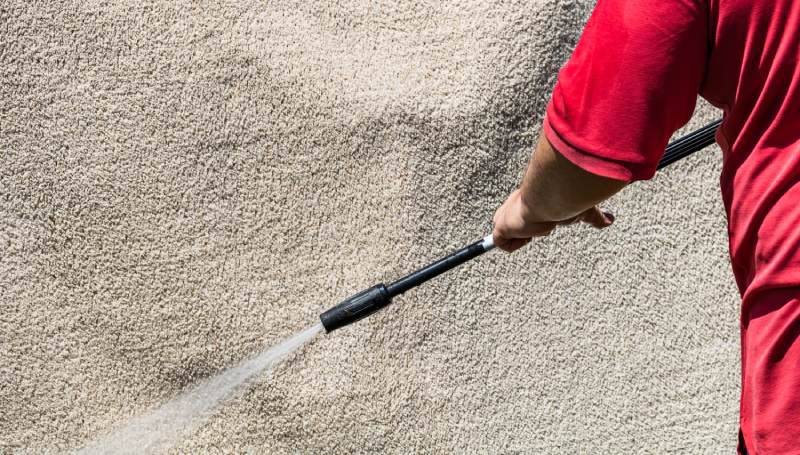
Often, the places that get the most dust are cloth drapes, curtains, rugs, couches, and AC units. That is why it is critical to be observant of these particular surfaces to tackle the problem quickly before it gets out of hand.

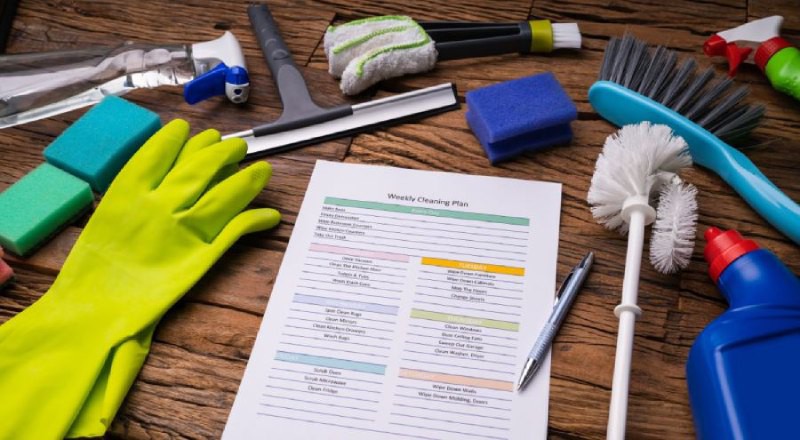
For those who consistently ask themselves how to reduce dust in the house, we have comprised a top ten list needed to execute a solution for your cleaning woes. The following are some tips to reduce dust in home and maintain the shine that your home had when you moved in.

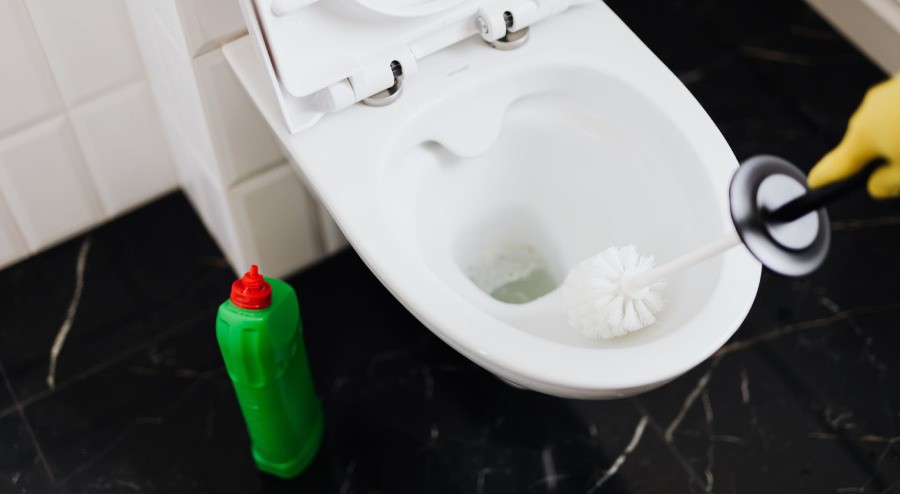
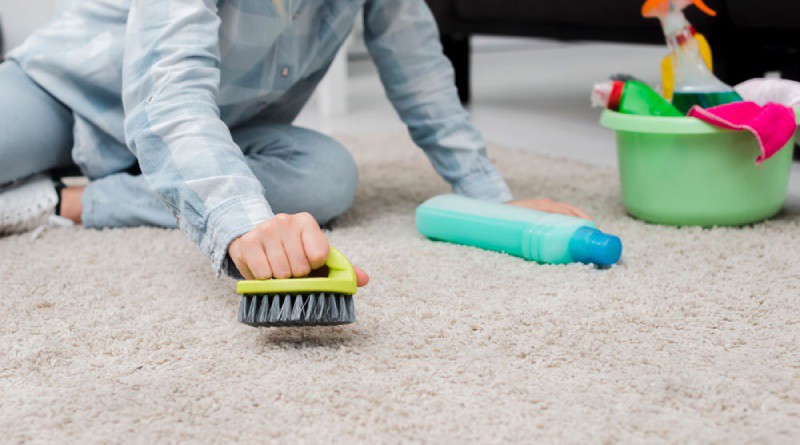
1. Cleansing Your Home Thoroughly

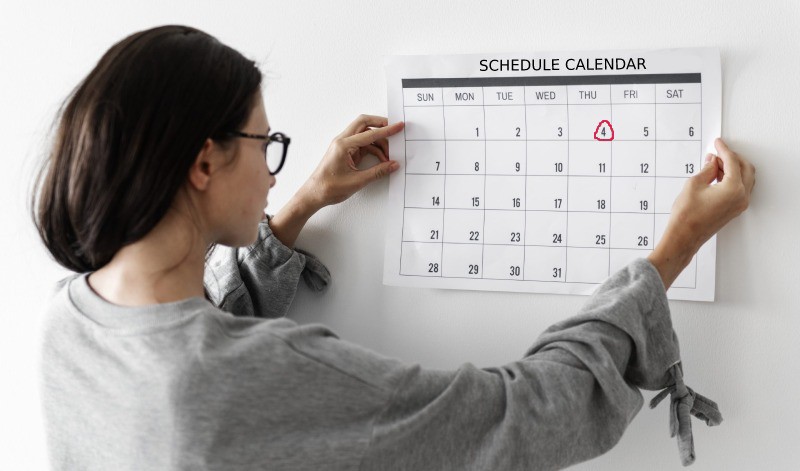
The importance of cleaning your home weekly or daily

Although sometimes cleaning seems like a chore, it is a prominent part of owning a home. Many who develop a resistance to cleaning end up sourly complaining that their home is not up to part or lacks in shine.

Cleansing-Your-Home-Thoroughly

That’s why it is important to be consistent when it comes to cleansing your home as it can be the difference between a polished home and a lackluster one. Dust will always prevail if there is no persistent cleaning.

When you’re trying to clear out the dust, it is important to keep a steady cleaning schedule. Whether that be weekly or daily, it can make a huge difference in your household as well as positively affect your mental health.

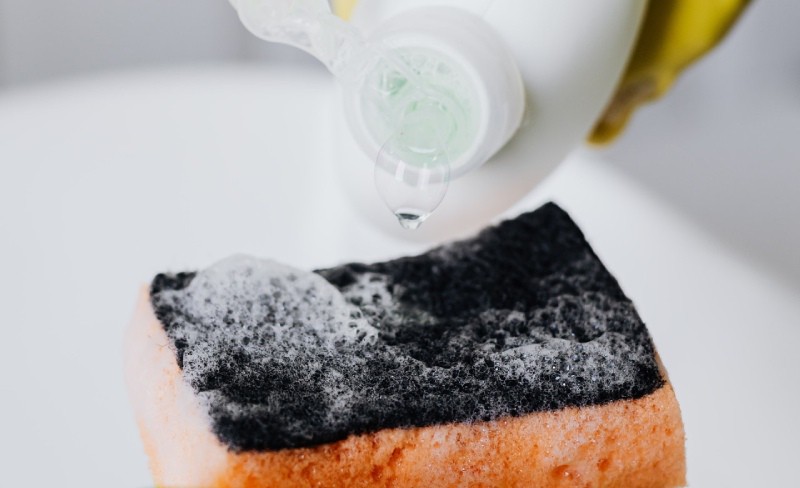
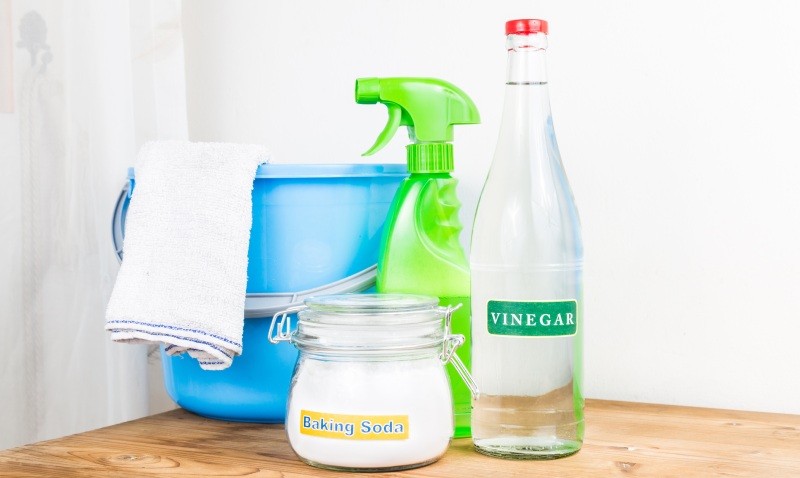
For cleaning, you will need to have the following items:

  • Vacuum
  • Mop
  • Liquid cleaner for surface
  • Bucket
  • Microfiber cloth
  • Duster

These tools will help with the cleaning process and help get rid of dust mites in your living space.

2. Using a Doormat

Why are doormats necessary?

Many homeowners tend to make the simplistic mistake of stepping all over their home with the shoes they wore outside of the house. This then leads to others being allowed to do the same, whether it is their family members or outside visitors. Unknowingly, this causes dirt to be smothered around whether it be a carpeted, wooden, or tiled floor.

Using-a-Doormat

These small dirt particles then lead to an overwhelming amount of dust making it harder for the homeowner to later clean every time. When it comes to this issue, many ask their guests to take off their shoes before stepping into the house. However, not many are willing to abide by the rules and some tend to forget.

For these measures, we suggest investing in a doormat. When you have a doormat, whether it be inside the house or outside, many guests or family members will need to wipe their feet clean before stepping into the home.

A large part of maintaining your home clean is making sure that no dirt or debris from the outside is let into your home. This will make it easier for many to ask themselves how to keep dust out of your house. With a doormat, you can also add a bit of décor to the front of your home.

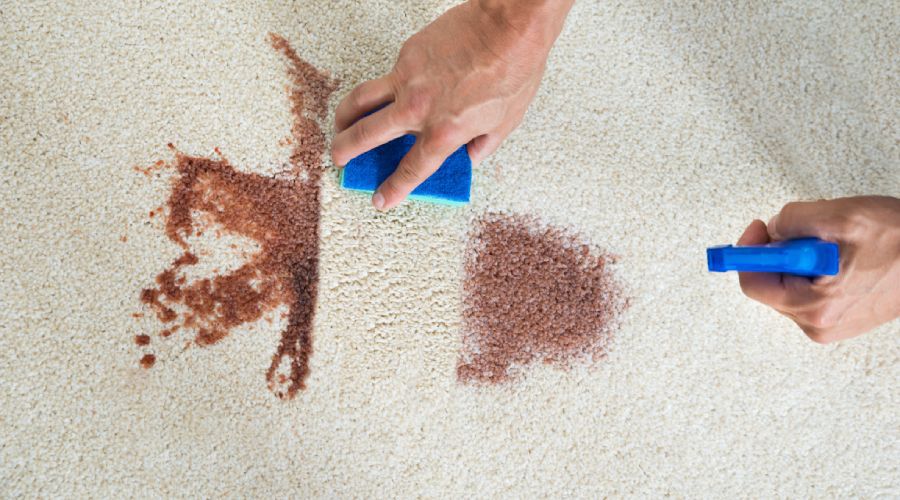
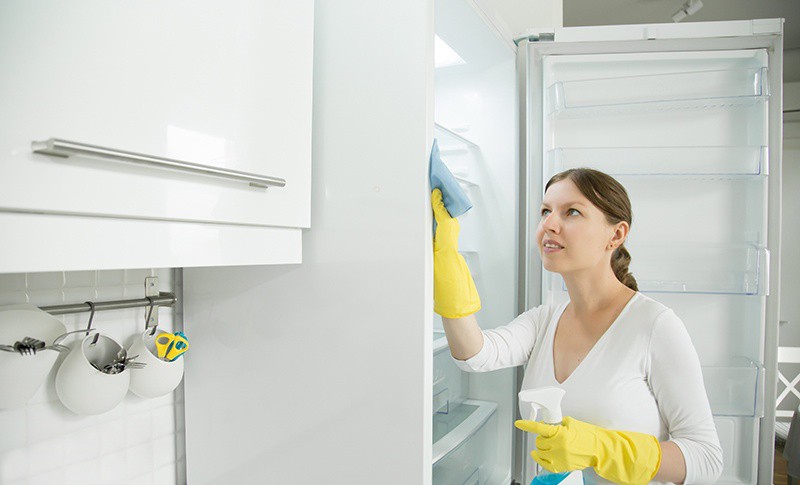
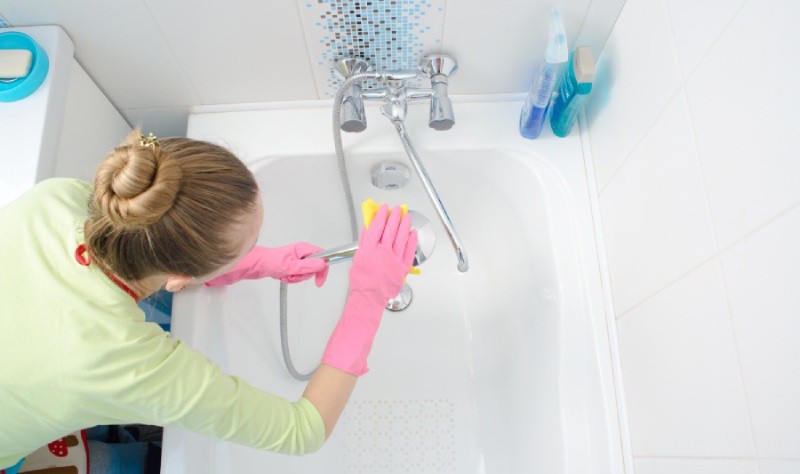
3. Clean Every Surface

Why is it important to clean and wipe every surface?

Dust is very much a surface issue. Whenever it accumulates in clumps, it’s usually beneath furniture or small corners of the home as it is not very eye-catching so it can accumulate further and further.

mopping-stick-and-buckets (1)

That’s why it is important to wipe down all surfaces with a liquid or water-based cleaner. For dust, water is its natural enemy. That is why liquid cleaners are preferable when it comes to eliminating this nuisance from your home.

When it comes to cleaning surfaces, it’s important to check every nook and cranny of your home, specifically the smaller areas that tend to go unnoticed. We suggest a deep cleaning session to eliminate all dust particles from your home.

After using a liquid cleaner, it is necessary to wipe it down with a microfiber cloth to remove any leftover dust particles as well as dry the space you cleaned. Doing a deep cleaning on your home can also lessen issues such as spider webs which tend to nest in corners of the home.
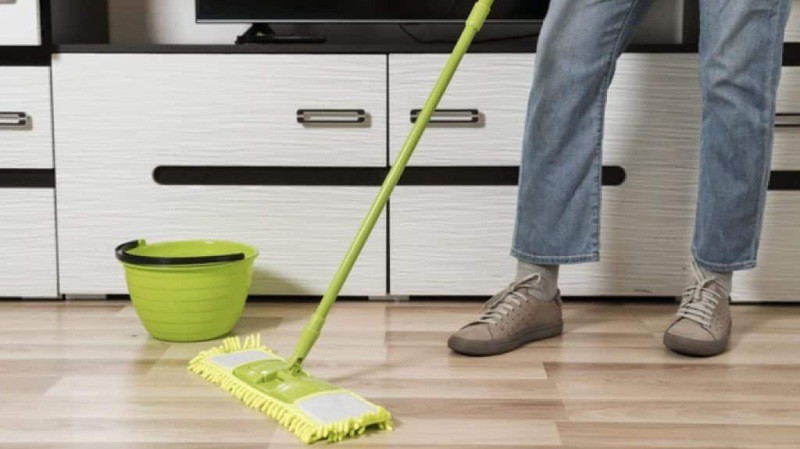
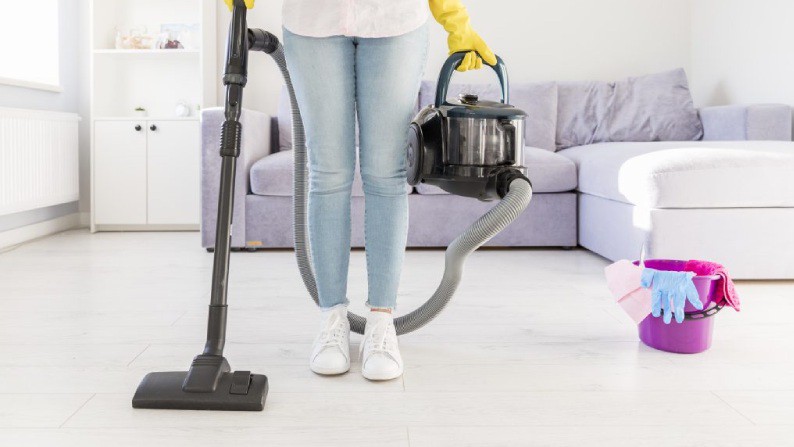
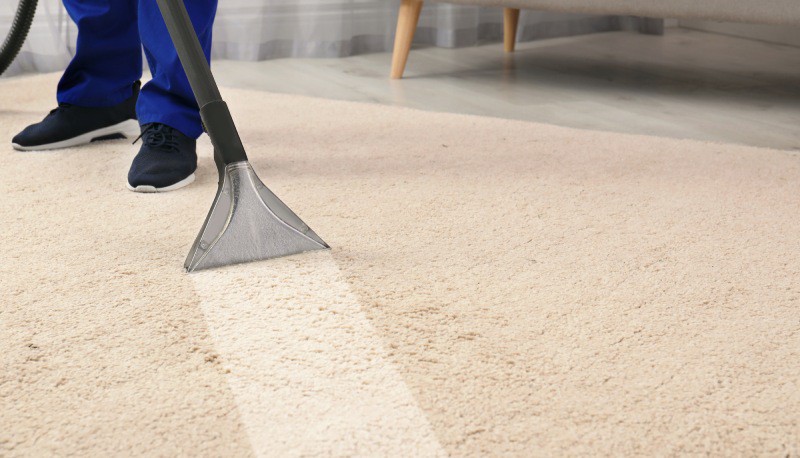
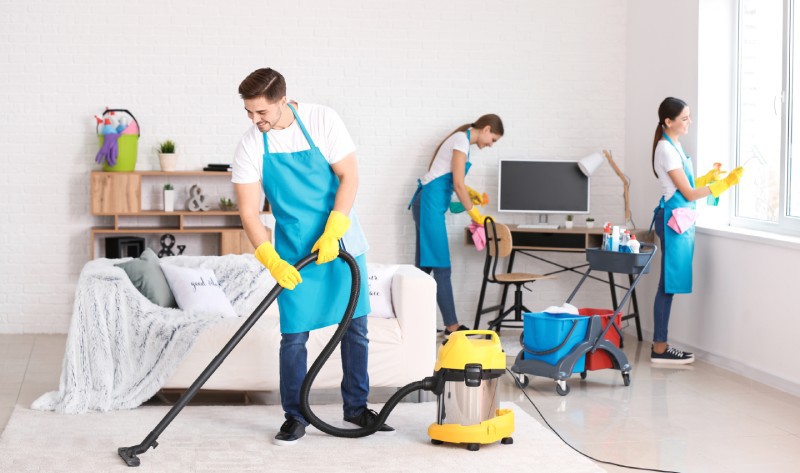
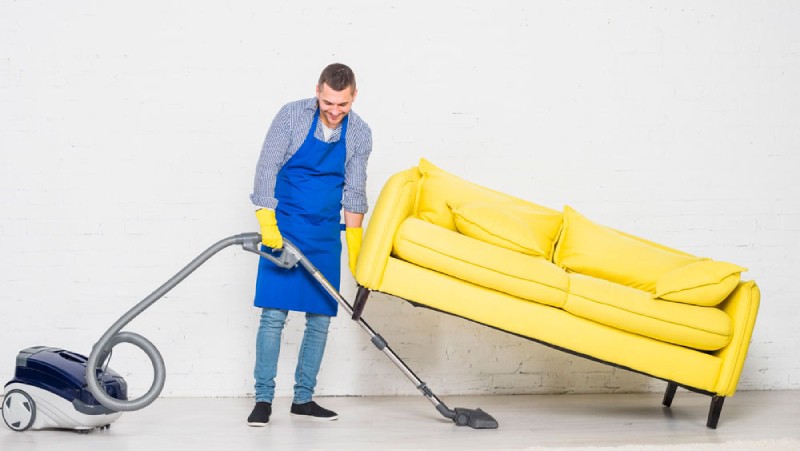
4. Using a Vacuum

Why is vacuuming an important step when it comes to cleaning?

While using a liquid cleaner on surfaces is important, wiping down your entire floor can be incredibly exhausting. An important step to getting rid of dust is to thoroughly vacuum your home.

Vacuum-cleaner (1)

A vacuum will suck up all the dirt, debris, dust, and other particles that accumulate throughout your home. As time goes on, there has been a significant improvement when it comes to this cleaning tool. Technology has made it so much more efficient to use and more powerful so that there are little reasons why your home can’t have a spark.

Vacuuming your home can also save you money long term. Many who invest in rugs or carpets can see that over time the carpet will acquire dust and dirt particles which can make them look unsightly or older than they are. At this point, homeowners decide to throw away their rugs and buy new ones so they don’t have to deal with the cleaning process.

However, vacuuming can throw away those excess costs as it can diminish all the dust and dirt particles on these carpets. Anyone that has a pet knows the shedding season for pets who have long coats can mean hair everywhere. This can also lead to allergic reactions, asthma issues, or any lung-related conflicts for those who have trouble breathing.

Vacuuming is the answer to these persistent issues and it can also serve to bring a cleaner space that will ultimately boost your mental wellbeing and your mood.

5. Tackle the Upholstery

Curtains 

Many new homeowners make one grave mistake when it comes to maintaining their home, skipping the dusting part, and cleaning the surface. Dusting upholstery is a critical part of the cleaning process, if it’s not done it results in a less than a clean home.

Tackle-the-Upholstery

Although you may not see the dust particles or they aren’t as eye-catching as other dirty areas of your home, it can slowly affect your lifestyle as a toxic air pathogen, and inhaling dust over time can affect your lungs. One of the dustiest areas of the home is the curtains.

When buying curtains, a lot of homeowners or individuals are unaware of how to clean them. This leads to the curtains racking up dust particles over time. Wiping them down with a microfiber cloth can help, vacuuming them, or simply beating them the old-fashioned way.

Lampshades

Lampshades are another home item that tends to attract dust and fabric lampshades have persistent dust particles that stick to the fabric. Cleaning them can be tricky as wiping them down can worsen the problem and smother the dust in the fabric.

Lampshades-Cleaning

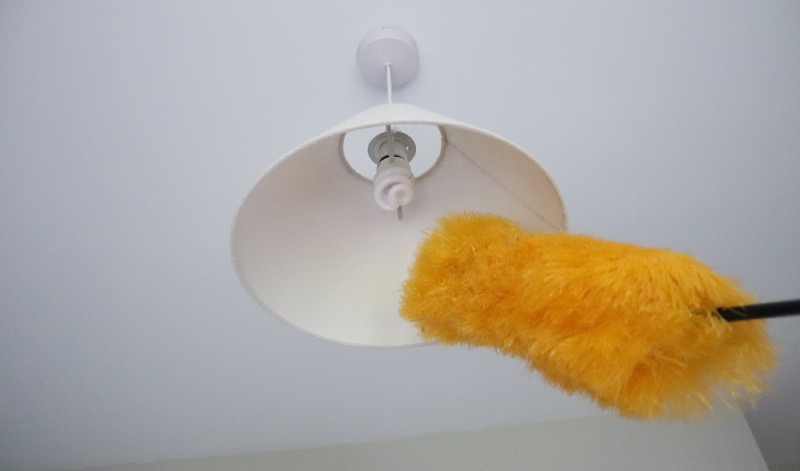
Vacuuming lampshades can be next to impossible due to the minuscule size, although it can be done it can also be a complex activity. In this case, it’s best to use a lint roller to remove the dust as it can stick to the roller and easily remove the dust without exerting too much of your energy. Easy as 1, 2, 3! Afterward, you can wipe it down as you please with a damp towel or dry microfiber cloth to get any excess out.
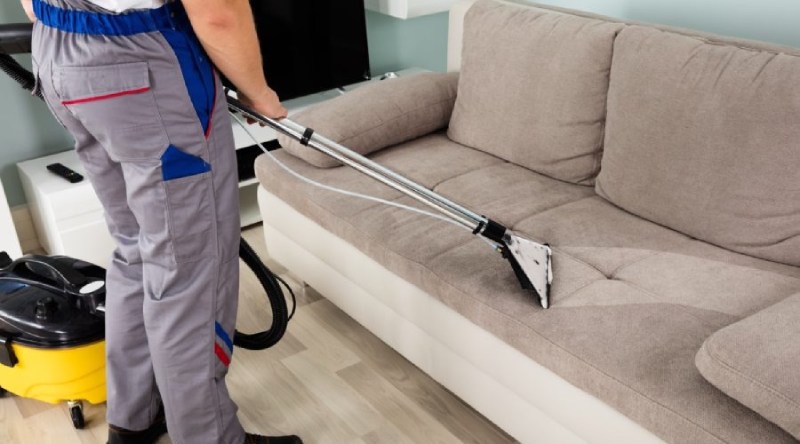
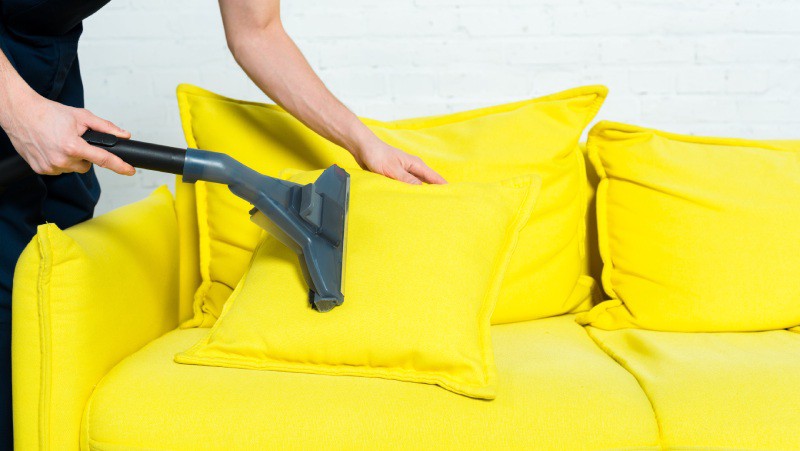
Couch

The couch is one of the most popular places to relax in a household. However, it can also be a place with extreme dust particles over time. This is especially true for those that own upholstered couches. Over time these couches not only attract dust but also all kinds of dirt or bacteria.

Vacuum-the-surface

While it is important to wash the upholstery, it is also important to dust or vacuum the couch to maintain cleanliness. Steam cleaning is a popular method that can eliminate all dust particles, bacteria, or stubborn dirt that accumulates on the fabric.

You can also manually remove the dust with a lint roller or duster if you’d like a quick fix. It is important to note that the couch should be maintained every two weeks or once every month due to its continued usage.
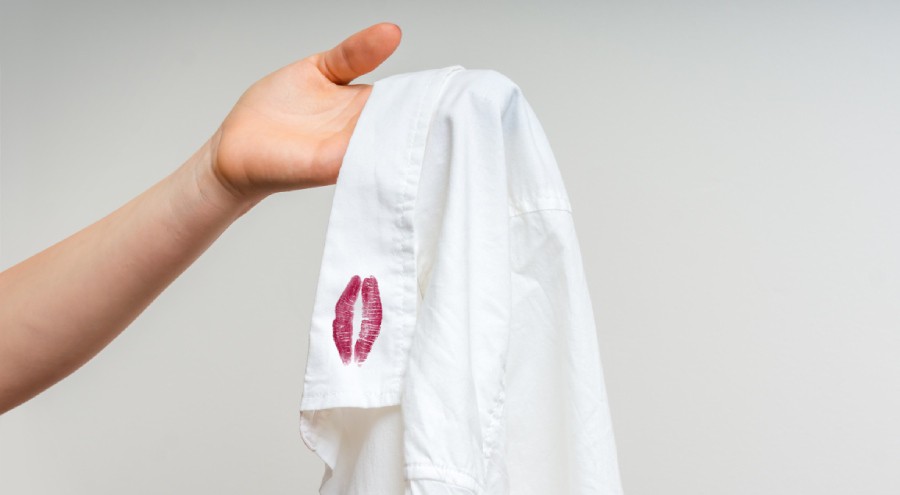
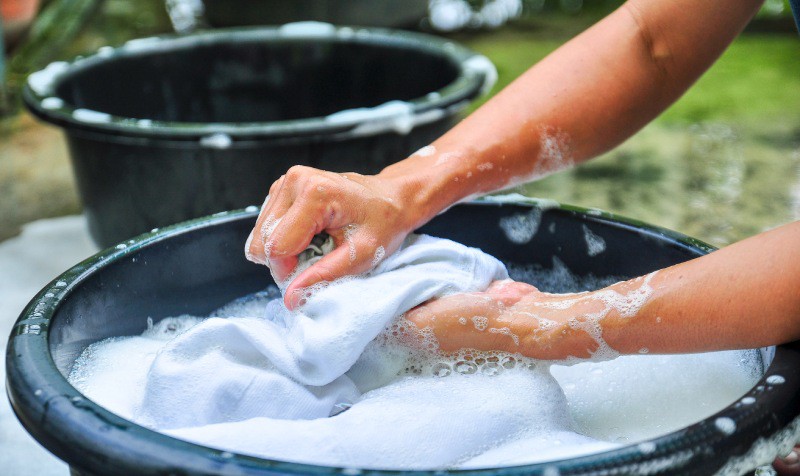
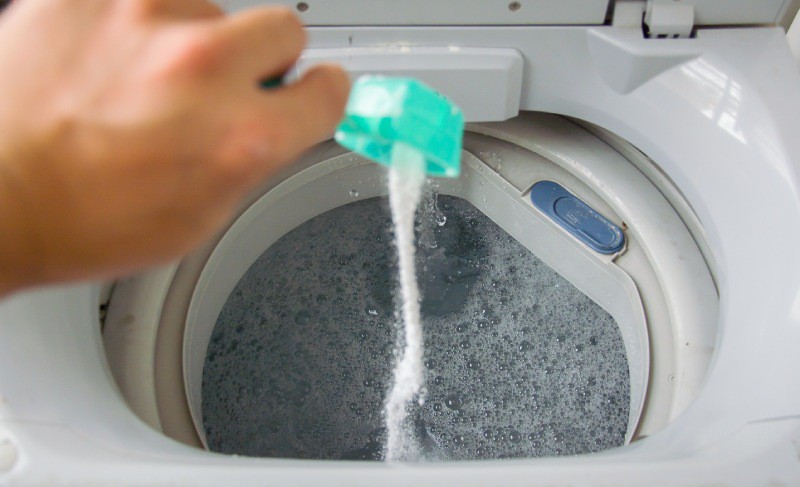
Throw Pillows

Throw pillows can become dusty over time as well. Due to mainly being used for décor on a couch or bedroom, these pillows can acquire an exaggerated amount of dust and it is important to have them thoroughly washed or wiped down as often as possible.

Throw-Pillows-Cleaning

Throw pillows can be washed with detergent by hand or they can be put into the washing machine. If you don’t have the time, you can also access or your nearby dry cleaners to get the job done.

6. Pet Care

Grooming your pets

Not many individuals are aware that dead skin cells and loose hair are components that lead to excessive dust. If you own a pet with a medium length or long coat, you know the frustrations that come with it. The shedding season can escalate these issues and bring an even more turbulent atmosphere to your home when you start seeing hair just about everywhere.

Get-Rid-of-Pet-Stinks-and-Furs

We suggest bathing and grooming your pet as often as possible to minimize hair loss. If you have a cat, it can be daunting to find that the litter box is also an area that tends to hoard dust over time. For this matter, it is important to keep the litter box covered to keep the rest of the house clean.

7. Keeping windows closed

How does keeping your window closed to prevent dust from coming into your home?

Although sometimes it may seem beneficial to open a window for fresh air, it can lead to dust, pests, or other airborne pollutants coming into your home when left open for long periods.

Protective-wear

The dust will then accumulate and settle on your windowsill or anywhere in the surrounding area. We suggest to keep your windows closed, or if you need to open them, pat your windowsill with a microfiber towel or liquid cleaner after closing it.
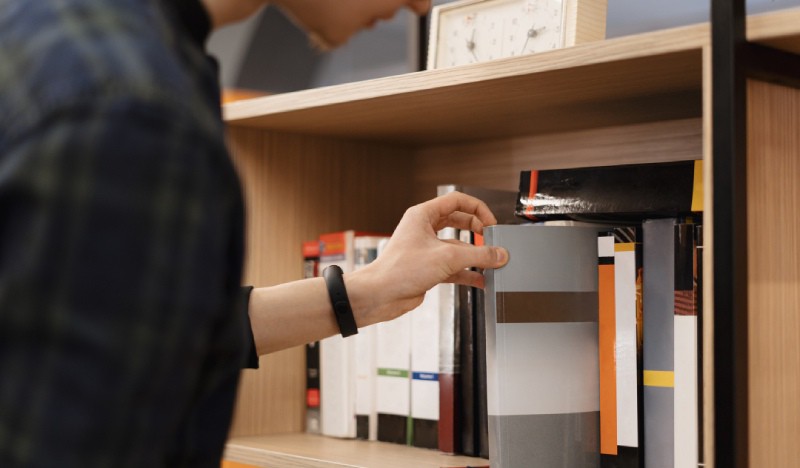
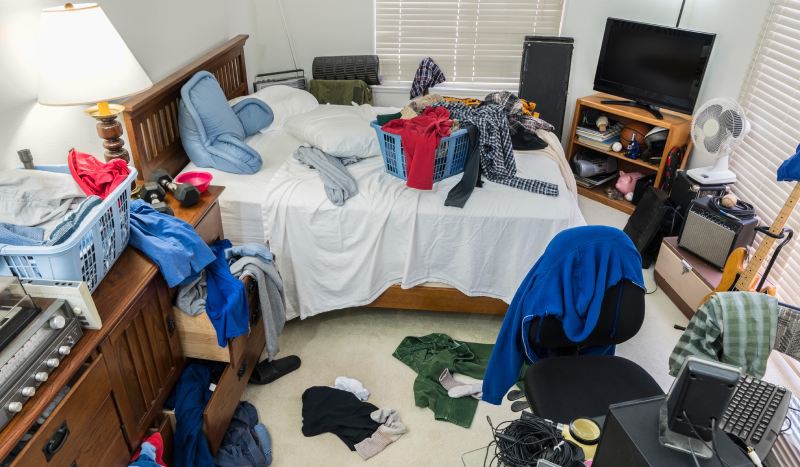
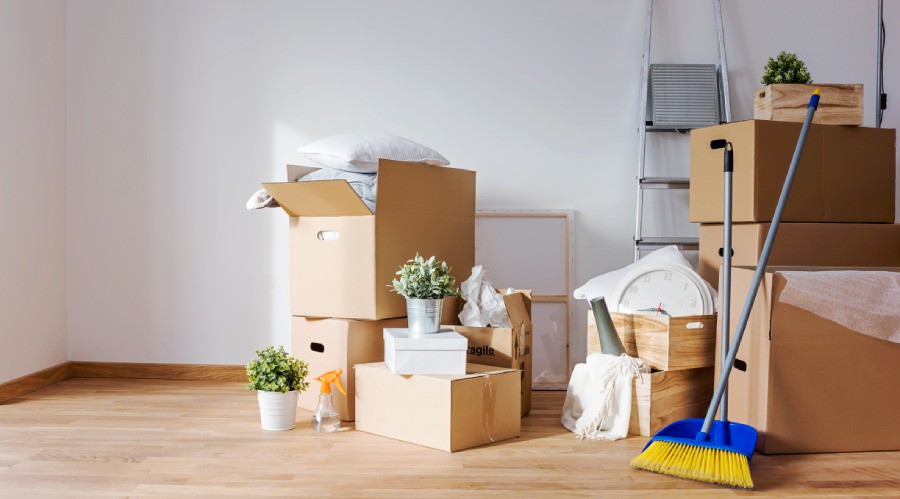
8. Removing Clutter

How does removing clutter benefit you with a dust-free home?

We understand, sometimes it’s hard to keep your home clutter-free at times and it can be stressful to maintain a spacious home when you have little to no time for maintenance. However, one of the many benefits of keeping your space clutter-free is the lack of dust that comes with it.

Clutter-be-gone

Dust particles can easily be enhanced by the number of products you have in your home. If you store a lot of boxes, this can be a hideaway place for dust to accumulate over time. It’s important to keep a small inventory of things so that you don’t have this issue frequently, while also keeping your space minimalistic and looking polished.

9. Invest In an Air Filter

How do air filters help reduce dust in the air?

Air filters do just what their namesake explains, filter the air that circulates your living space. This could help with reducing toxic air pathogens or airborne pollutants like dust mites, pollen, pet dander, and any other bacteria.

Invest-In-an-Air-Filter

Investing in a high-efficiency air filter can also be helpful when preventing allergic reactions as it will keep the air flowing and clean any airborne substance. Pair this with daily vacuum cleaning and you can prevent any dust from settling onto your living space.

10. Beating The Dust

Do it the old-fashioned way!

Most of the time, beating carpets, rugs, or upholstery to remove dust can be seen as antiquated or something you would see in a black and white movie. However, this practice emphasizes the removal of dust more so than a simple wipe down can.

Beating any fabric or upholstered product enough can remove dust if done properly. For example, if you are doing this practice it would be best to do it outside as the dust would settle back into your home otherwise.

Investing in a rug beater can go a long way, and it would also help you take out some stress at the same time. Don’t beat around the bush, go get one of these handy dandy rug beaters now!

TESTEST
Categories

10 Dorm Room Cleaning Tips for College Students

The beginning of independence

The journey to college or university is a rigorous one that is filled with anticipation, including the independence that comes along with it. Moving into your new dorm can be extremely exciting, brimming with feelings of decorating your space and making it your lair.

For some this experience also brings lifelong friendships and comradery if you’re moving in with a roommate. However, this period can also be a huge learning curve for those young adults that haven’t experienced independent living.

When you live on your own, one of the most critical of responsibilities is taking care of your home or living space. This can be especially true when it comes to your dorm room.

Many students scrounge for answers on how to clean the dorm room or look for dorm room cleaning tips. While some students end up flustered and seeking a home cleaning service, we’re here to remind you that it is completely possible to do the cleaning on your own.

We understand that you may not always have all the answers and solutions to simple day to day responsibilities like student dorm cleaning. It is important during this important period of your life when you should be dedicated to your studies and living your life to the fullest, that cleaning can be a breeze.

A student’s dorm is the sanctuary needed to improve their knowledge and excel in their studies. Most of the time spent in their dorm is for growth, a particular obstacle that could stand in their way is a dirty study space. This can hinder even the most focused of students, which is why it is important to tackle this obstacle before it is far out of reach.

Here are the top 10 dorm room cleaning tips for college students:

1. Making a strategic cleaning schedule

What is the best time to clean?

As a college or university student, your academic schedule can be incredibly difficult to squeeze in any leeway for other activities whether they be social or for maintenance purposes. Time management is a part of the cleaning process. This rings especially true if you have a roommate and need to compromise with the time needed to clean your dorm.

Room-Cleaning-Tips

Those who need to wash their bed sheets or other clothing items and don’t have a washing machine in their vicinity will also find it painful to have to do these particular responsibilities at night due to the wait time.

It is recommended for a college student to get seven or eight hours of sleep for maximum productivity and awareness. Cleaning time during the night can leave a student exhausted and out of energy that their sleep will be affected.

We suggest finding a time within your study schedule that won’t put pressure on your other daily responsibilities like studying or doing homework. Also compromising with your roommate or others in your immediate surroundings so that they are not disturbed by any cleaning noises.

2. Make a Checklist

What needs to be cleaned and washed in the dorm room?

When you start to clean your room, it can be daunting to figure out what needs to be cleaned or what needs to be organized while you’re already doing these tasks. We suggest making a dorm room cleaning checklist to focus on the most important tasks and then work your way into the minimal spaces that need cleansing.

Scheduling-Your-Deep-Cleaning

It is important to recognize that you not only need to clean the surfaces but also de-clutter your room if it is packed with items. Usually, dorm rooms can be small size and require a more minimalistic touch to not look unsightly. However, some students let their books and school material overtake the room, making little to no space for anything else.

It is critical to also remove any unnecessary objects and materials for more comfort or easier access to furniture. That is why making a checklist will help separate what is needed and what needs to be thrown away.

What materials are needed to clean your dorm room?

It is impossible to clean your dorm room without the right tools. If you are new to the cleaning process, it is important to note that some products will help ease your way through new territory. Some of these products are cost-effective and will also serve a purpose in the future if you buy in bulk. The products needed are:

  • Antibacterial wipes
  • Dish soap
  • Vacuum
  • Broom and dustpan
  • Mop and bucket
  • Paper towels
  • Air freshener
  • Filing materials

These materials will serve to not only clean your dorm room but can also be helpful for the rest of your life whether you move into an apartment or home. Investing in these products now will save you a lifetime of cleaning blues.

3. Keeping your bed tidy

Why is it important to keep the bed area nice and tidy?

For many dorm rooms, the bed is usually the focal point of the room. Whenever you have a guest or visitor, the number one thing they will notice is how you keep your bed area. If your bedsheets are constantly tussled and not neatly folded it can lead anyone to believe that you have a disorderly lifestyle.

Bedroom-Deep-Cleaning-Checklist (1)

To keep your room clean, it is important to wash your bedsheets and keep your bed made whenever you wake up in the morning. Washing your bedsheets is important as it will also prevent pests like bed bugs away from your bedroom. Making your bed will allow a more presentable look into your dorm room and immediately make for a more impressionable space.

4. File and organize your student materials

How can you keep your dorm room more organized?

We can’t stress enough the importance of organization when it comes to student life. Being a college student means having loads and loads of books or paperwork in your dorm area. It can be hard to manage if all of these materials are all over the place. It can also lead to more stress if it’s hard to find a certain book or paper when the time comes to deliver it.

File-and-organize-your-student-materials

Investing in a filing system or filing cabinet can benefit you and your time in the university. If you can’t invest in a filing cabinet, it is important to organize your materials for a tidier atmosphere within your dorm room. The organization is a big part of being a student, it can propel you towards success and also help you allocate items in your dorm without any stress.

5. Clean all the surfaces

What surfaces need to be cleaned?

The natural outcome when you postpone cleaning your dorm room for some months or weeks is the overwhelming dust that can pile up on the surface. Dust can lead to allergic reactions or persistent coughing if not tackled. It can be easy to forget about maintaining your dorm room as being a student can come with time constraints or an overwhelming amount of productivity for the university.

mopping-stick-and-buckets

It is no wonder that dust happens occasionally in your dorm room, which is why it is important to wipe down every surface. This includes countertops (if you have a kitchen), furniture, walls, refrigerator, etc. Cleaning these surfaces can help keep your room clean and dust-free.

How to wipe down kitchen surfaces and keep the kitchen clean

It is also important to remember to clean the kitchen tops If your dorm has one as the kitchen area can accumulate a lot of bacteria or food crumbs. Having a refrigerator in your dorm can be great for storing away leftover food, however, it can also be problematic if you are not constantly removing the expired food or wiping down the inside as it can accumulate mold easily.

This could further lead to toxic air pathogens that could affect your lungs or cause cold symptoms. It is important to stay on top of these areas to avoid any illness or possible pests invading your dorm room.

6. Taking care of the Dishes

Why is it important to wash the dishes in your dorm room?

We’ve all been there, you get to your dorm room after a long day of studying only to then have a warm meal to yourself and quickly start to doze off. After eating the meal, washing the dirty dishes sounds like a chore that you don’t have time for when you’re extremely tired.

Taking-care-of-the-Dishes

However, did you know that if you keep the dishes in the sink it can lead to unpleasant odors and creepy critters working their way into the kitchen? While washing the dishes can exert physical activity, it is critical to maintaining your dorm room clean.

Leaving the dishes in the sink can also make washing them the next day difficult, as the food or sauce will stick to the plate afterward. If you are pressed for time, we highly suggest leaving the dirty dishes in warm water so they could soak and make It easier for cleaning.

For those who don’t have a sink in their dorm rooms, we suggest buying a plastic tub or washing the dishes in the bathroom sink. However, if you use the latter it is important to double-check that no bits of food go down the sink as it can clog the drainage.

7. Keep your bathroom sanitized

Why is cleaning your dorm room bathroom important?

The bathroom is easily the most bacteria-infested room within a household or living space. This can be especially true if you have a shared bathroom in your dorm room. Keeping your dorm room free of bacteria can be optimal when you have minimal space as it can reduce the chances of illness or infections spreading.

natural-cleaner-for-the-bathroom

The bathroom is a largely moist area and can build mold in corners that could later lead to toxicity in the air you breathe. To avoid these issues and mold build-up, it is recommended to clean the bathroom frequently. Diving the work between you and your roommate can help with productivity if your schedule ever becomes unmanageable.

This way the bathroom will remain clean as often as possible and minimize the threat of illness or allergic reactions. The toilet and sink are two areas that need to be deep cleaned and sanitized as often as possible as they are huge bacteria hot spots.

8. Remove all trash in your bedroom

Why is it important to throw away garbage in your room?

While being independent comes with a guaranteed privilege to freely do anything you would like without any repercussions, it can also lead to continuous bad habits. Some students are likely to forget their plastic cups from their favorite fast-food restaurant near their bedside and then question why there is a pest invasion in their dorm room.

Remove-all-trash-in-your-bedroom

The answer is relative, you keep your trash in the bin without throwing it into the collective garbage disposal, eventually, you will run into this issue. However, removing all trash from your dorm room can keep away any infestation.

Trash can also lead to foul odors that will surely disturb you as you try to study for the big exam you have the next day. We suggest spraying an air freshener after cleaning out the garbage so that the odor can quickly disappear.

Why continue to live with this burden when you can tackle the problem quickly? Keeping the trash in your dorm room is a dangerous game, but luckily it can be diffused once you clean it out.

9. Clutter be gone!

Why is removing clutter important?

When you have a small dorm room, it is easy for furniture and other products to overwhelm the room if you don’t have enough space. Having a cluttered dorm room can easily affect your overall mood and mental health.

Clutter-be-gone (1)

While most students accept the messy lifestyle that living independently can bring, it can lead to repercussions that can also affect your studies. When you have a clean desk and workspace, everything will feel more cohesive as well as minimalistic.

Bringing in minimalism to your dorm room will help keep the space tidy and increase concentration.

10. Frequent Vacuuming and mopping the floor

Hygienic practices that will benefit you

The last step in keeping your dorm clean is also the most important, as cleaning your dorm room starts with keeping it sanitized. Vacuuming your dorm room will help clear away any accumulated dust or debris that can accumulate over a lengthy time.

Vacuum-cleaner (2)

We suggest vacuuming your dorm room once or twice a week to build up a cleaning habit as well as to keep the space looking polished. After vacuuming, it is important to mop if the room has tiles or wooden floors. This will ensure that your room will continue to be spotless and it will help build good habits for your future home.

TESTEST
Categories

How to Get Paint Out of Clothes – Easy Guide

We’ve all been there—you’re freshening up a room with the perfect shade of paint, and you accidentally bump the wall with your elbow. Or worse, you lean against the entire thing, and you’re left with a huge smear of color on your shirt.

Suddenly, the perfects watch you selected for a peaceful ambiance is now a huge hassle, and now you have to put an already time-consuming process on hold to deal with the stains.

Or maybe you’re working on a skilled art project, and you’re prone to getting a few smudges here and there. Your masterpiece might turn out beautiful, but you don’t want to have to compromise your clothing along the way! Whatever the situation, you’ll be wondering the same thing: how do you get paint out of these clothes?

If you’re careful, a paint stain doesn’t have to be a permanent accident. However, some cases are a little more complex to remove than others. Before you get carried away with renovating your living room or completing your next art project, make sure you’re prepared in case the unfortunate possibility arises.

Step 1: Know Your Paint

There are a variety of different paints out there, and they will each require their own proper cleanup method.

Know-Your-Paint

The paint you use on your walls will be different than the ones you use for arts and crafts, so one solution won’t be right for every situation. In order to be better prepared to get paint out of your clothes, let’s take a look at the different types.

Acrylic Paints

Acrylic paints are chemical-based, which allow them to have more elasticity than other options. This flexibility means that it can hold up well in temperature fluctuations, weather changes, or changes in moisture. These are also a common type of paint used for art and craft projects.

Latex and Water-Based Paints

Water or latex paints are the most common, and are the kind often used on interior surfaces like walls and ceilings that don’t receive a lot of contact. It’s easy to apply and dries quickly, but it can be a little more prone to peeling. Luckily, these paints are commonly easier to remove!

Oil-Based Paints

Just as it sounds, oil-based paints are made with natural or synthetic oils. The drying time is much longer than water-based options, but they are much more durable.

That’s why these paints are commonly used on high-traffic surfaces, like floors, trim, or furniture, but they’re also a common specialty art paint that provides a beautiful, glossy finish. Cleanup for this type of paint definitely requires a bit more attention.

Step 2: Work Smarter, Not Harder

A key first step to getting paint out of clothes is to act fast. Instead of ignoring the mess and putting it aside for later, put your home reno on hold and focus on cleanup.

The second you notice that you’ve ended up with a stain, take off the item while making sure not to spread any of the paint to other areas of the garment. If you let the paint dry, it will solidify into the fibers, making it much more difficult to remove.

The Dish Soap Method

While the paint is still wet, the first thing to do is make a trip to the sink. If necessary, scoop off any excess paint that might be sitting on top of the affected area. This helps lower to possibility of paint being spread further across the fabric. Then, make sure you have warm water ready to wash the stain.

The-Dish-Soap-Method

If your stain is from acrylic paint, you want to first rinse the area with warm, running water. Then, with a mixture made up of half water and half liquid dish soap, use it to sponge the stain. Keep dabbing up and down, being careful not to scrub too vigorously and wear down the garment. The paint should begin to lift from the fabric.

When the stain is removed, rinse thoroughly, and then you can throw your clothing item in the wash as usual. If your stain is from latex or water-based paint, you can use this same method for removal, but try working from the back of the fabric instead.

The Rubbing Alcohol Method

Rubbing alcohol can actually be a great ingredient for removing paint from clothes and other fabric. For this method, you also want to begin by saturating the area with warm water. Then soak a rag, cotton ball, or toothbrush with rubbing alcohol and use it to scrub away at the stain.

wash-cloth-with-alcohol-

Continue flushing the area with warm water throughout the scrubbing process. When enough of the stain has been removed, rinse the area once again and machine wash your garment. You can also use acetone with this method, but be sure that your specific clothing fabric doesn’t contain acetate or triacetate, because it can melt those fibers!

This technique works great with stains from acrylic paint, but be sure to do a spot test before going directly to the problem area. You want to be sure that the rubbing alcohol won’t damage the fabric or bleed the color. A seam allowance or back collar are some inconspicuous areas to test out the solution.

The Vinegar and Ammonia Method

With this technique, you’ll need to mix a solution of one part salt, two parts white vinegar, and two parts ammonia. Just like before, you can use a rag or toothbrush to scrub the mixture into the stain. While scrubbing, be careful not to stray too far outside of the affected area, because it could transfer the lifted paint further.

White-Vinegar-as-a-Disinfectant-Method

Continue to rinse the stain as you go with warm water, and when you’re satisfied with the results, you can then machine wash your garment.

Removing Dried Paint From Clothes

Sometimes while painting, we get carried away and just don’t notice the big stain on our sleeve right away. Getting dried paint out of clothes is a little more difficult than when it’s wet, but it’s not always impossible. It’s always worth a try!

Removing-Dried-Paint-From-Clothes

First, scrape off any loose, dried paint from the garment. However, you don’t want to pick at the paint too intensely, as it can tug at the fabric and permanently stretch the fibers.

Make a solution of one part warm water to one part laundry detergent, and soak the affected area with the mixture. As the paint starts to soften up, use a rag to blot the area aggressively. The stain should begin to break down, but if it’s being stubborn, you can try following it with the techniques above.

Removing Oil-Based Paint From Clothes

If your stain is from an oil-based paint, it can be a bit more difficult to remove. Begin by quickly blotting the area with a dry towel to remove as much of the paint as possible, and then rinse the affected area with water. Next, create a padding underneath the garment with clean paper towels or rags, and lay the fabric face-down on top.

oil-stain-clothes

Here, you can now blot the area with turpentine or paint thinner, but be careful! Make sure to read the labels to ensure that you’re using the correct product—some can damage delicate or synthetic fabrics.Some paint containers will list a recommended brand of paint thinner.

Continue to blot the fabric until the paint is no longer lifting. You can then apply some liquid dish soap and leave the area to soak. Then, rinse again and launder the garment as usual.

Although most of these methods are pretty gentle, there’s still a possibility that spot cleaning could accidentally damage your fabric. All fabrics are unique, and each will require different methods of care.

Always make sure to do a spot test on your fabric before getting carried away and to make sure you aren’t risking any permanent damage. Delicate fabrics like silk will chafe if rubbed instead of blotted, while others could fade if using the wrong solutions.

Step 3: Leave It to the Pros

If all else fails, you can always rely on a laundry service or dry cleaning service to help you out. After all, that’s what they’re here for! Besides, some fabrics can be extremely delicate or difficult to clean, so it’s better left in the hands of a professional.

commercial-dry-cleaning

When a stubborn stain prevails, a laundry or dry cleaning service will treat it with the proper care—and if your garment label says “dry clean only,” then that’s your best bet. You’ll thank them later.

With all that in mind, it’s always important to be delicate with your clothing as too much aggression and friction when washing can easily damage the fabric. Also, don’t get carried away with any crazy washing techniques without researching it first.

It’s always a good idea to wear an old t-shirt or apron that you don’t mind getting dirty while painting, so you can be comfortable knowing a nice clothing item won’t get ruined. Next time you break out the paint and can’t help but get a little messy, refer back to this guide and you’ll get that paint out of your clothes in no time!

TESTEST
Categories

How to Get Coffee Stain out of Carpet – Simple Guide

Sometimes, you find it difficult to remove coffee stains from your carpet. However, stain removal principles that apply to your clothes should also apply to your carpet.

The best thing to do is to remove as much liquid as you can before you start your attack on the stain on spillage. However, you may discover an old coffee stain on your carpet. Do not panic.

How to Get Coffee Stain out of Carpet

First, you need to prepare mentally for some task. For someone with a shag carpet, the job may be more difficult. Shag carpets tend to have some long fibers, which make it hard to remove stains.

It would help if you also do not put too much liquid on the carpet. You should also make sure that your stain remover does not change or damage your carpet’s color. Ammonia and some common stain removers have been known to damage the color of woolen carpets.

Here are the steps to follow for you to clean coffee stains from your carpet in case you do not contact professional cleaners to offer professional house cleaning service:

Wet the Stain

Applying warm water on the stain can help loosen the dried coffee stain. You can then use a white cloth to blot the area that has the stain. The best idea for you to avoid spreading the stain further is to start from the stain edges and move inwards. You should do this repetitively until you cannot see any more transfer of the coffee stain from the carpet to the white cloth.

Wet-the-Stain

An important tip to have is that you can use your home supplies to make your solution, which works just as well as commercial stain removers. Commercial products are sometimes expensive. For an effective homemade stain remover, you need liquid dish soap, white vinegar, and warm water.

The ratio for combination is usually one tablespoon of liquid dish soap, the same amount of white vinegar as the liquid dish soap, and two warm-water cups. You can place the home supplies in a dish then use a spoon to stir.

Use the Stain Remover

Using a clean cloth, you can apply your stain remover. As the procedure was in getting to wet the stain, you also should start from the edges and move inwards.

Brushes

You also should be careful so that you do not have the stain spreading to a wider area on the carpet. After dipping the cloth back into the bowl with the stain remover, you can use a dry towel to clean the carpet’s coffee stains.

For stains that are sticky due to cream and sugar in the coffee, you can use enzyme laundry detergent and a cup of warm water in another dish. Make sure to stir so that they all blend well. You can use a new cloth to apply the solution to the stain to break the stickiness of the cream and sugar.

Rinse the Carpet

Once you have removed the coffee stain, you can use cold water to rinse your carpet. Apply as much water as you can to completely rinse the carpet, then make sure to air-dry it. You should not walk on the area that had the stain until the carpet dries completely.

Rinse-the-Carpet

As seen with the procedure above, removing coffee stains from your carpet may take a lot of your time. However, you can trust professional carpet cleaners’ services then use that time in other productive activities. Also, stubborn coffee stains may be difficult to remove by yourself effectively. Besides removing coffee stains from your carpet, professional cleaners will carry out deep house cleaning and do laundry service.

Generally, you need deep house cleaning services at scheduled intervals.

What is Deep House Cleaning?

Whenever you clean your house, there are areas in the house that you will always leave out. These areas come to accumulate dirt over time. Deep house cleaning takes care of these areas. For an overall clean house, deep cleaning services will cater to those needs, especially the things you usually ignore.

Scheduling deep house cleaning largely depends on the number of people living in your household. You can carry out deep house cleaning at intervals of three to six months. The larger the number of people living under your roof, the more frequently you should carry out deep house cleaning.

What is Included in Deep House Cleaning?

Generally, you need several things. You can incorporate some of your home supplies. For instance, you need baking soda, vinegar, scrub brushes, rubber gloves, and some other supplies.

Scheduling Your Deep Cleaning

A deep cleaning schedule will help you clean every part of the house that needs cleaning. A program will enable you to know how to plan your tasks, and you will execute the tasks in an organized manner. The most important thing is ridding your home of clutter.

Scheduling-Your-Deep-Cleaning (1)

When things are lying everywhere in an untidy fashion, you will need a lot of time to organize them and dothe deep cleaning. You should also make sure that you turn off all the electrical appliances. Focus on the areas you always ignore when cleaning your house.

Make sure to clean the bedroom, kitchen, and bathroom. Any other part you are generally likely to ignore should also be on your house cleaning list.

Deep Cleaning your Bedroom

Generally, you do not wash bedroom linen as frequently as garments when doing your cleaning. Your bedroom deep cleaning checklist should include items like duvets, pillowcases, and curtains. The manufacturers always provide you with instructions. Follow the instructions while washing.

Bedroom-Deep-Cleaning-Checklist (1)

Since you cannot wash duvets and comforters frequently, you can choose to flip them from time to time. You can also use your drier to freshen them.

Also, you should clean the furniture in your bedroom. You can clean the bed, chairs, and dressers using a damp microfiber cloth. Make sure to clean underneath the bed. Make sure that there is no clutter in your dresser.

Deep Cleaning Your Kitchen

After you have unplugged all electronic kitchen appliances, you should clear all the food from your kitchen. This can be a chance to throw away expired food. You can use warm water and dish soap to clean the cabinets and eliminate any grease and oil that may have built up.

Kitchen-Deep-Cleaning-Checklist (1)

Make sure to clean the interior and exterior parts of the kitchen fridge. While at it, read the instructions by the manufacturer. Other kitchen furniture should also be cleaned, including tables and chairs. Trash cans can be cleaned using soap and warm water.

You can clean the dishwasher by first emptying it, then cleaning the filter. You can then set it to the hottest possible temperature and run a cup of vinegar through it. You can repeat using baking soda. You can clean the exterior by using a microfiber cloth to wipe.

Your microwave is another appliance to clean. Use an appropriate cleaning product, fill a microwave bowl with a cup of water, and add half a vinegar cup. Place the bowl on the microwave and heat it until the microwave window is steamy.

After you turn it off and it cools down, open the door so that you can remove the bowl. You can use a sponge to wipe the interior, then scrub the exterior with a sponge and soapy water.

Make sure to clean countertops and sinks using soapy water. You can also scrub stovetops using a brush and warm soapy water to clear all the grease and oil. Baking soda is also effective.

Deep Cleaning Your Bathroom

The bathroom is another place you are likely to ignore, but it will accumulate dirt over time. Deep cleaning the bathroom involves cleaning bathtub, soap scum, rust on the shower heads, and cleaning the curtains.

bathroom-cleaning

Cleaning the showerhead may need you to use approved cleaning products or use your home products like vinegar. The showerhead coating determines how long the vinegar solution stays on the showerhead, but it should be approximately 30 minutes.

The bathtub may also accumulate stains, and you can use baking soda and water to make a paste that removes the stains. Use a brush to scrub after applying the paste. Use clean water to rinse. Also, make sure to clean bathroom walls and floors using an all-purpose cleaner.

Other Parts of the House

After cleaning the furniture and other accessories in the living room, you may need to focus on the house’s different parts. Make sure that you wipe and clean all the windows using a glass cleaner.

Parts-Of-The-House

Clean your ceiling and light bulbs. You can also check for any cobwebs and use a cloth tied on a long broom to clean.

Bottom-line

Carrying out deep cleaning for your house may be an intensive activity. You may need the services of a professional house cleaning company. The professional house cleaning checklist makes sure to clean your house thoroughly.

They get rid of all the dirt and stains, including stains on your carpet. Generally, a professional house cleaner knows what is included in a deep house cleaning, and they will leave your house clean and safe.

TESTEST
Categories

10 Benefits of Move-In Move-Out Cleaning Service

The big move 

When you’ve lived in a home for some time, it’s easy to admit you’ve anchored yourself to your surroundings. With hard work, your interiors are brought to life through sheer innovation, design, and time invested in putting the right pieces together. Sometimes when we’ve adapted to certain places, moving out can be a real pain.

Physically it can wear you out and cause immense stress thinking about all of the steps needed to take in the process. Doing it by yourself? Even more, anxiety-inducing endeavor. Not knowing whether you will be able to take care of everything by yourself is a thought that crosses your mind for weeks.

The last thing on your mind is the cleaning duties that you need to partake in once you’ve moved out and before you move into your new home or apartment. However, these duties are not to be taken lightly as there are many move-in move-out benefits. This is especially true when you’re moving out of an apartment, as a dirty or unproperly treated space will keep you from receiving your deposit or worse, not getting it back at all.

Why break your back doing everything at once? When you can hire move-in move-out cleaning serviceEveryone needs a helping hand every once in a while, don’t let your pride or do it yourself attitude stand in the way of obtaining what you deserve with these services.

Not only do move-in move-out cleaning services do a thorough cleaning job from top to bottom but they will make sure that you are satisfied with the finished look before leaving. They are dedicated to providing excellent professional cleansing and will leave your home polished as if you never lived there in the first place.

Here are 10 benefits of move-in move-out cleaning services:

1. Efficient and Stress-Reducing

How do move-in move-out cleaning services reduce stress and anxiety?

Moving out brings a range of emotions that you may or may not be ready for. With the highest of highs and the lowest of lows during the preparation process, it can be daunting to think of cleaning out the apartment.

Efficient-and-Stress-Reducing

Bringing the furniture outside can lead to an incredible amount of dust and some areas will end up surfacing as unclean. This makes the cleaning process slightly more difficult than daily cleaning.

While you are moving, you also have to think about the limited amount of time you have to accomplish all of these tasks, leading to even more stress. That is where move-in-move-out cleaning services come in handy.

Not only do they work to assess all the areas that need to be heavily cleaned, but they will also organize home themselves to get everything done efficiently after moving out. You won’t have to think twice about leaving your home without proper cleaning.

You may ask yourself, what is included in a move-out cleaning? They will take care of all of your interiors, including:

  • Bedrooms
  • Bathrooms
  • Kitchen
  • Living room
  • Guest Room
  • Hallways

All of this in a timely fashion so you don’t have to worry about last-minute cleaning or last-minute arrangements to have your home or apartment looking better than ever.

2. Getting Your Deposit Back

How does the move-in move-out cleaning service help with obtaining your deposit?

When you first move into your new apartment, typically you sign a contract in which you are meant to pay a deposit. This money is usually for security purposes such as any wreckage or damages that ensue after you’ve lived there. Usually, if the apartment looks the same as when you moved in, this money is then granted back to you.

Getting-Your-Deposit-Back-1

This money can usually be helpful for any new costly furniture or simply to stay afloat during any economically hard times. However, many homeowners aren’t aware of the critical impact that cleaning has on your landlord’s final decision.

If the landlord sees that the apartment is not up to par when it comes to being polished and like new, the possibility of them taking money from the deposit or withholding the deposit is entirely likely to happen.

Now, what does a move out cleaning include? if you hire move-in move-out cleaning services, consider your deposit an easy win as they will guarantee an apartment that looks completely identical to the initial move in.

3. Appealing to Prospective Buyers or Renters

How does move-in move-out cleaning service help appeal to potential home buyers or renters?

When your home is up for sale it can be somewhat difficult to find someone to purchase your home. It can be even more exhausting if your home is not in a condition that would appeal to those prospective buyers.

Appealing-to-Prospective-Buyer-or-Renter

Most prospect buyers look for a home that’s sleek and dazzling, but when they step into a home that’s not nearly as tidy, they will evade purchasing the home or renting the space.

Hiring a move-in move-out cleaning service can be just the decision that will get the attention of buyers and numerous phone calls for inspections from prospects. While cleaning by yourself can be effective, hiring a company to help will bring a cataclysmic change to your interiors you won’t be able to achieve otherwise.

Boosting the appearance of a home can help your sale as well as take a load of pressure off your back if you’re having trouble persuading others to invest.

4. Assistance for Landlords

How does move-in move-out service assist landlords?

Like homeowners, landlords who are looking for prospective tenants need to be able to show off the apartment in mint condition to appeal and get them to rent. It is important to note that at times, the previous tenant could have left the apartment in less than acceptable conditions.

This means that you will need an intensive or deep cleaning to prepare for the next tenant. Many prospective tenants who inspect apartments look at everything from the floor up, if they were to see any unsightly dust, grime, or pests it can easily lead them to avoid this apartment and turn down the offer.

Once the last tenant has moved out, even though they may have cleaned, chances are they did the bare minimum or simply a surface cleaning due to time constraints. Also, if the apartment hasn’t been occupied for some time, it could have accumulated enough dust that it becomes unsightly to any visiting prospects.

The landlord needs to hire a move-in move-out cleaning service to do a thorough job and get the apartment to look appealing to the eye of all who are interested in renting.

5. Assistance for New Renters

How does move-in move-out service assist renters?

As for new renters, it is likely that before moving in your furniture and other home supplies, you may not have scaled the area as far as how much cleaning will need to be done.

Usually, if the old tenant recently left, they may have left residual dirt, grime, and dust behind without much awareness. This means that new renters need to not only begin the moving process but do a thorough cleaning which could lead to incredible stress.

It is important to look over the area and deep home clean before moving in the bulky furniture as it will be more difficult later on. That is why hiring a move-in move-out cleaning service can be effective on this occasion.

The company will transform the dull and boring interiors into a sparkling space that will be full of excellence for your expected move-in date. Don’t settle for surface-level cleaning and call a company to help restore life into those interiors for guests and family to be impressed with your new apartment space.

6. They Will Clean Every Nook and Cranny

What is included in a move-out cleaning?

Although every company is different, many move-in move-out cleaning services have unlimited service and detailed spot cleaning. But what you can expect is for the company is to utilize their tools to do a thorough cleaning that you won’t get by doing it yourself.

They-Will-Clean-Every-Nook-and-Cranny

Many who take on the role of cleansing their apartment could attest to how incredibly exhausting it could be, especially if you’re moving out of your old apartment and it could seem as though on the surface it is clean. But when you move out, there could be small openings and areas that haven’t been cleaned or touched in some time.

Some homeowners go months without a deep cleaning and this can give way to mold or other dangerous bacteria that linger in the air or surface. Usually, the move-in move-out cleaning service companies tackle these areas, such as the:

  • Kitchen
  • Bathroom
  • Sinks
  • Bathtub
  • Light fixtures
  • Cabinets
  • Ceilings
  • Floors

These areas are usually the more prominent locations that these companies decide to cleanse, however, if there are specific places that you wish to cleanse, they will be able to consult with you and operate as you desire.

7. Long-Term Cleanliness

Why is a move-in move-out clean service good for keeping your house clean for a longer period?

When new tenants or homeowners do a surface cleaning in their home, it can usually last up to a week or so before they have to get back to work again. This unfortunately is always the case when you do a small sweep or mop before moving in.

Long-Term-Cleanliness

The furniture that is brought into the home usually contains dust or grime itself and can just dirty up the floors again easily. However, due to the special tools, practices, and techniques that many cleaning professionals have, it tends to continue to be clean for longer periods.

This is due to the deep cleaning that they do, it can be the difference you need when you’re trying to get ready for your big move-in celebration or having guests over to look at your new apartment.

Deep cleaning will help restore value in your new apartment and give it a shine that will impress others and make for an eye-catching appeal that you’ll have been happy to invest in. Call a move-in move-out clean service to enhance your space.

8. Customize The Service

Can a move-in move-out cleaning service do a custom cleaning?

While many homeowners or tenants hire these services to do a full cleaning of the space, others just require certain rooms or areas to be properly clean. For example, you may have moved into your place and noticed that the landlord already cleaned most areas but didn’t deep clean the bathroom or kitchen.

At times this happens when there is a time constraint or there were no move-in move-out cleaning services hired before you moved in. You don’t have to worry; most companies have a customizable cleaning option. This means you can just ask them to deep clean the places that need it.

This will target the problem areas and the spaces that you feel require heavy-duty work that would make your life a tad bit stressful during the move in.

9. Professional Cleaning Rather Than DIY

Why is a move-in move-out service better than doing it yourself?

You may have memorized every trick in the book when it comes to cleaning a home, but sometimes you just can beat the professionals. The reasoning behind this statement is due to the hardware, tools, and years of experience that these workers have operated.

While it is surmisable to get a clean look if you clean your new space yourself, the lengths that the company workers will go to ensure that your interiors look spotless. Their hard work and dedication are worth taking note of, as they will not stop until you are completely satisfied with the result.

These services aren’t only valuable as a helping hand, but as a revolutionary step for your interiors to look spectacular and ready to be lived in. They will have a move-in move-out cleaning checklist they will abide by and will finish off the job within the designated or desired time.

10. A Fresh New Start!

How does hiring a move-In move-out cleaning service offer a fresh start?

When you’re beginning a new period of your life, you often wish that your new apartment matches your spirit of inner renovation. At times, if the new apartment doesn’t live up to its name, it can end up being a disappointment.

Taking the step to hire a move-in move-out cleaning service company can be the stepping stool you need to clean out space and welcome in a breath of fresh air. When you transform your home inside and outside, it is a sign of transformation as well as growth.

These services hold the key to a lighter mood that you will immediately feel as soon as the cleansing process is finished. Stop daydreaming about the perfect refurbished and clean home, and start living it! Hire a move-in move-out cleaning service company to provide you with one of the key elements to your new life.

TESTEST
Categories

How to Get Lipstick Out of Clothes Fast – Simple Guide

How it starts

Picture this: you’re getting ready for a date or a big celebration. You pick out your outfit with considerable time and effort. Then you do your make up, after this you are looking sharp and dazzling. Once you’re at the event, you look down at your clothing and realize you somehow have a stain from your lipstick on your sleeve.

At this point, you become frantic and least likely to start a conversation with others in an attempt to minimize the focus on yourself. This leads to stress and anxiety, as a woman it is impossible to say that we’ve never been there.

As women, we have the natural tendency to want to accentuate our lips with a color that is sure to be eye-catching or enhance our sensuality. However, it is easy for these small mistakes to happen on a night out with friends, loved ones, or colleagues.

At this point, many women scrounge to find the answer that plagues their mind after the unsightly stain, how to get lipstick out of shirt/top? It is simple when you realize it. There are many ways that you can remove your lipstick stain without having to ax it and buy a new one.

Some women end up increasing the stain or damaging their clothing due to their unawareness. The main thing is not to panic or do anything drastic that would damage the shirt even further. While many take their clothing to the dry cleaning place, there are better do-it-yourself options that you can do right in your own home.

We have comprised the following list that will not only work effectively in how to get lipstick out of shirt, but you won’t have to waste hours upon hours scrubbing away with the simplicity of this guide.

1. Read The Tag First!

The most crucial yet prone to avoid step is reading the fabric label on the shirt or clothing before washing it. While many go by instinct, it is critical to first find out what you can and can’t do depending on the type of fabric it is.

Tag-information-and-dress-shirt-maintenance

Many who skip this crucial step end up causing gradual wear and tear in their clothing fabric. It is important to note what needs to be done before starting the washing process as it is important to find out how to properly wash the clothing. For example, the following is advised:

  • Bleach is better used on cotton rather than polyester fabrics, as it can end up causing a yellow-like-stain on that fabric type
  • Find out whether the fabric is dry clean only before washing, as washing these fabrics can end up worsening through a normal wash
  • If it is wool fabric, it can be damaged by using anything from alcohol, acetone, bleach, or laundry detergent

The care tag could make a huge difference when it comes to the final product. Although it is possible to remove the stain, you could end up causing holes in the fabric or even worse loosen threads and ruin an expensive nightgown.

2. Immediate Emergency Tactics!

How can you lessen the lipstick stain right on the spot?

When you realize you have a lipstick stain, the smudge could worsen if you immediately try to remove it on your own with simple water and soap. It is important to know what to do in this case to make the aftermath of washing the fabric less complicated and easier to gently remove.

Immediate-Emergency-Tactics

If your blouse or shirt has excess lipstick, it can be incredibly dangerous to wash off immediately as it can spread to other areas. You want to be able to lessen the stain, this could be done with a card or tool to slightly scrape up the lipstick off the piece of clothing.

This could also help with a variety of other makeup faux pas as rubbing in a large chunk or piece of lipstick could end up in a worse disaster than you originally started with. It is important to remember if you follow this step, you could easily avoid hours of extra cleaning that could lessen your free time with your family or friends.

3. Nuanced Ways to Remove a Lipstick Stain

Dab with alcohol

While many decide to use more conventional methods like laundry detergent or bleach to remove lipstick stains before washing, there are more unique ways to remove lipstick from clothes.

wash-cloth-with-alcohol-

For example, dabbing the stain with rubbing alcohol is a gentle way of tackling the stain before throwing it in the washing machine. This helps reduce the stain by dissolving the ink off the fabric type.

This method works when you:

  1. Douse a cotton pad or cotton ball with alcohol
  2. Dab the stain gentle without scrubbing too hard to damage the fabric
  3. It is important to then rinse off the stain with cold water, only when most of the stain is gone
  4. Throw into the washing machine to finish the job.

This method is simple and doesn’t require much effort, it can reduce your time in the laundry room and also prepare you for your next outing in minimum time.

The Hairspray Method

Not very many people know about this method of removing clothing, as it is the most unconventional way. Those who first hear about it tend to speculate whether it is even possible and are hesitant to try it.

Hairspray-wash-cloth

But when you’re stuck with a situation where you may feel desperate or genuinely frustrated, it doesn’t hurt to try different things. The hairspray method works similarly to the alcohol method due to its alcohol component, in other words, it also dissolves the ink off any fabric.

It is important to get a hairspray that has the alcohol ingredient for this method to work. If your stain is recent or just happened, this method will work even better.

Much like the alcohol method, you will spray a bit of alcohol on the area that is stained and dab it gently until you see the stain fade away slightly or completely. Then you can wash it to get rid of any residual stains.

Or use shaving cream!

So maybe you don’t own hairspray in your home, and you ask yourself how to get lipstick out of clothes without hairspray? Another typical bathroom product you may own is shaving cream.

This one may sound a little strange as well, however it is also worth trying and it can save you precious time. Make sure that it is not a gel shaving cream before using. This time you will need to apply a heavy amount of shaving cream to the fabric and leave until it is dry.

Then you will throw it in the washing machine, as usual, this will continue to strip the stain from the clothing. However, before you dry the clothing it is important to triple check to make sure that the stain has been completely removed.

If the stain is not removed before drying it will only serve to enhance the longevity of the stain, making it extremely complex to remove.

4. The ole liquid detergent or hand soap trick

How does liquid detergent or hand soap help remove lipstick?

Many who have had this disastrous experience typically run to the bathroom and use hand soap to blot out the lipstick stain. This acts as another emergency tactic and eventually helps the complete removal of the lipstick stain later on in the washing machine.

White-Vinegar-as-a-Disinfectant-Method

Didn’t have time to do this method immediately! Don’t fret, as soon as you get home it will be easier and could work more efficiently if done right before washing as well. For this method, you will need to:

  1. Make sure that the clothing is laid down on top of a towel in case there is an extra spillage or so it doesn’t go through the clothing onto the location it is laying in
  2. First, put some water on the stained area
  3. Use the hand soap on the fabric
  4. Leave the liquid to dissolve and soak for approximately 10-15 minutes
  5. Then use a paper towel to blot the liquid. Make sure to not rub in as it can affect the fabric or affect the color of the shirt.
  6. Once you’re done double check if there is any stain left on the shirt, if you see that there is any residual mark you can continue the process.
  7. When the stain has completely disappeared, you can go ahead and wash the clothing item

This method could also work with liquid detergent or shampoo if you don’t have hand soap readily available. These products not only help remove lipstick but could also be used to remove anything from sauce, grease, oil, and ink stains.

Using these products to remove lipstick stains are popular due to their versatility, it is the first logical thought when the accident first occurs.

5. The Magic of Baking Soda

How does baking soda help remove lipstick stains?

When it comes to cleaning the household or spot cleaning areas of your home, there is one item that usually tends to do the trick and that is none other than baking soda. Baking Soda has an abundance of uses including health and hygienic reasons.

Baking-Soda-to-Wash-Cloth

It is no wonder that this ingredient can also work wonders when it comes to removing lipstick stains on clothing. It is important to dilute the baking soda either with water or lemon.

Note that lemon has a brightening effect which helps in the removal of stains, but can brighten colored shirts, so it is critical to make sure you use a small amount to not have any fabric discoloration as a result.

Make sure to mix equal parts baking soda to equal parts lemon, this will form a white paste-like substance. If it is an older stain, you will rub this substance onto the stain. Scrubbing will help slowly lighten and remove the stain. Then you let it sit for about thirty minutes or so.

After this step, you will remove the stain with a brush or cloth and double-check to see if the stain has been removed. If the stain is still persistent, you could use the same brush to rub the stain and see if it will come off.

However, if the fabric is delicate silk, you should not rub any further to not damage the fabric. This type of fabric is better off being dry cleaned or taken to dry cleaning services.

Once you see that the stain has been completely removed, you will proceed to the last step which is to wash the clothing and then before drying, making sure once again that the stain is completely gone.

6. Removing Lipstick Stains With Other Methods

Stain Removing Pen

Another emergency tactic that you could use when you’ve just had the accident happen is using a stain removing pen or agent. These products help break down the stain and they usually contain a microfiber pad that helps absorb the stain.

The best part about these products is the mobility and the easy to use factor. You can carry it in your pocket or handbag and take it out whenever a stain occurs, this is a revolutionary tactic as it helps aid stain removal and you don’t have to spend too much time cleaning it afterward.

Dry cleaning

While many decide to clean the lipstick stain on their own or at home, it is important to note that not every fabric can be rubbed in or blotted with the previous methods. Some fabrics need to be dry cleaned, such as:

  • Satin and silk
  • Wool
  • Chiffon
  • Leather
  • Suede

Dry cleaning uses liquid detergent that has no enzymes or other chemical-based liquid solvents to clean the clothing rather than your average laundry detergent. Some who don’t have the proper tools or have no awareness of how to dry clean end up taking their clothing to the dry cleaner or laundry service where they dry clean instead.

TESTEST