Keeping your home clean in a busy city like Chicago can be challenging. With long work hours, commuting, and daily responsibilities, maintaining a clean and organized home often becomes difficult. That’s why many homeowners and renters are turning to professional house cleaning services.
However, choosing the best house cleaning services in Chicago is not always easy. There are many companies offering similar services, but not all provide the same level of quality, reliability, or value.
This complete guide will help you understand everything you need to know about hiring a professional cleaning service in Chicago, including types of services, pricing, benefits, and how to choose the right company.
Why Hiring a Professional Cleaning Service in Chicago is Important
Hiring a professional cleaning service is more than just convenience. It directly impacts your lifestyle, health, and productivity.
First, it saves time. Instead of spending hours cleaning your home every week, you can focus on work, family, or relaxation.
Second, professional cleaners provide better results. They use advanced equipment and proven techniques to remove dirt, bacteria, and allergens effectively.
Third, it creates a healthier living environment. Regular cleaning reduces dust, mold, and harmful particles that can affect your health.
Finally, it offers flexibility. You can schedule cleaning based on your needs, whether it is weekly, bi-weekly, or one-time service.
Types of House Cleaning Services Available in Chicago
Understanding different types of cleaning services will help you choose the right option based on your needs.
Standard Cleaning
Standard cleaning is ideal for maintaining a clean home. It includes dusting, vacuuming, mopping, kitchen cleaning, and bathroom cleaning. This service is best for regular upkeep.
Deep Cleaning
Deep cleaning is more detailed and intensive. It includes cleaning inside appliances, scrubbing baseboards, removing tough stains, and cleaning hard-to-reach areas. This is recommended for homes that have not been cleaned professionally in a long time.
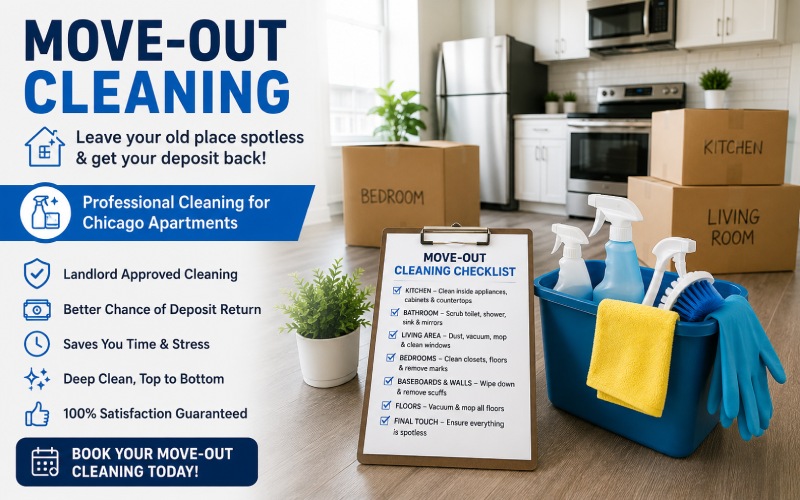
Move-In and Move-Out Cleaning
This service is designed for people relocating. It includes complete cleaning of an empty property, ensuring it is ready for new occupants or meets rental requirements.
Same-Day Cleaning
Same-day cleaning is useful for urgent situations such as unexpected guests or events. It focuses on quick and effective cleaning of essential areas.
Eco-Friendly Cleaning
Eco-friendly cleaning uses non-toxic and environmentally safe products. This is ideal for families with children, pets, or allergies.
Cost of House Cleaning Services in Chicago
The cost of cleaning services in Chicago varies depending on several factors such as home size, condition, and service type.
On average:
Standard cleaning costs between 100 to 250 dollars
Deep cleaning costs between 200 to 400 dollars
Move-out cleaning costs between 250 to 500 dollars or more
Hourly cleaning rates range from 40 to 80 dollars per cleaner
Larger homes or heavily soiled properties may cost more due to additional time and effort required.
For accurate pricing based on your needs, you can visit:
https://soji.us/home-cleaning/chicago/
Factors That Affect Cleaning Service Pricing
Several factors influence the final cost of cleaning services.
Home size is one of the biggest factors. Larger homes require more time and labor.
Property condition also matters. Homes with heavy dirt, stains, or clutter require deep cleaning, which increases cost.
Cleaning frequency plays a role as well. Regular cleaning plans are usually more affordable per visit compared to one-time services.
Pets can increase cleaning time due to hair, stains, and odors.
Location within Chicago may also impact pricing slightly depending on accessibility and demand.
How to Choose the Best House Cleaning Service in Chicago
Choosing the right cleaning service requires careful consideration.
Start by checking customer reviews and ratings. This helps you understand the company’s reputation and service quality.
Look for experienced professionals who specialize in residential cleaning.
Ask whether the company provides cleaning supplies and equipment. Many professional services bring their own tools.
Ensure pricing is transparent with no hidden charges.
Check availability and flexibility to match your schedule.
Choosing a reliable company ensures consistent and high-quality results.
Common Mistakes to Avoid When Hiring Cleaning Services
Many people make mistakes that lead to poor experiences.
One common mistake is choosing the cheapest option without checking quality. Low prices often mean lower service standards.
Another mistake is not reading reviews or verifying the company’s reputation.
Some people fail to understand what is included in the service, leading to confusion or dissatisfaction.
Avoiding these mistakes will help you choose a better cleaning service.
Benefits of Hiring Local Cleaning Services in Chicago
Hiring a local cleaning company has several advantages.
Local companies understand the specific needs of Chicago homes and apartments.
They provide faster response times and better customer support.
They are also more familiar with local housing types, including apartments, condos, and suburban homes.
If you are looking for a reliable local service, Soji cleaners.
Tips to Get the Best Results from Cleaning Services
To maximize the value of your cleaning service, follow these tips.
Declutter your home before cleaners arrive to save time and reduce cost.
Communicate your priorities clearly so cleaners focus on important areas.
Schedule regular cleaning instead of one-time cleaning for better long-term results.
Start with a deep cleaning if your home has not been professionally cleaned before.
Apartment Cleaning vs House Cleaning in Chicago
Cleaning needs differ based on property type.
Apartments are usually smaller and require less time, making them more affordable.
Houses are larger and may require more detailed cleaning, increasing cost and time.
Understanding your property type helps you choose the right service.
Frequently Asked Questions
How much does house cleaning cost in Chicago?
Cleaning costs typically range from 100 to 250 dollars for standard cleaning and can go higher for deep cleaning.
How often should I schedule cleaning?
Weekly or bi-weekly cleaning is recommended for maintaining cleanliness.
Do cleaning companies bring their own supplies?
Most professional cleaning companies provide their own equipment and cleaning products.
Is professional cleaning worth it?
Yes, it saves time, improves cleanliness, and creates a healthier living environment.
Final Thoughts
Finding the best house cleaning services in Chicago requires understanding your needs, comparing options, and focusing on quality rather than just price.
Professional cleaning services not only save time but also improve your home’s cleanliness and overall comfort. Whether you need regular cleaning or a one-time deep clean, choosing the right service can make a significant difference.