Categories

12 Simple Ways to Get Musty Smell Out of Clothes

That pesky smell 

Going to do our laundry can be therapeutic, the idea of washing away the weeks-old smells from clothing and coming back with soft lavender-scented threads can give a euphoric feeling.

It almost feels like you bought brand new clothing, doesn’t it? But what if you leave the laundry place with almost identical grotesque smelling clothes like when you first walked in? not only will you feel like you wasted your time but now you have to figure out a way to erase this foul odor.

This problem can arise with clothes that have been stored away for some time without washing. It happens to the best of us, sometimes we tend to forget about laundry day or put the plan on the back burner until we have a moment to go back and tend to that responsibility.

This can be especially true with some towels, bedsheets, or other household linen that you simply seldom wash when it comes to laundry time.

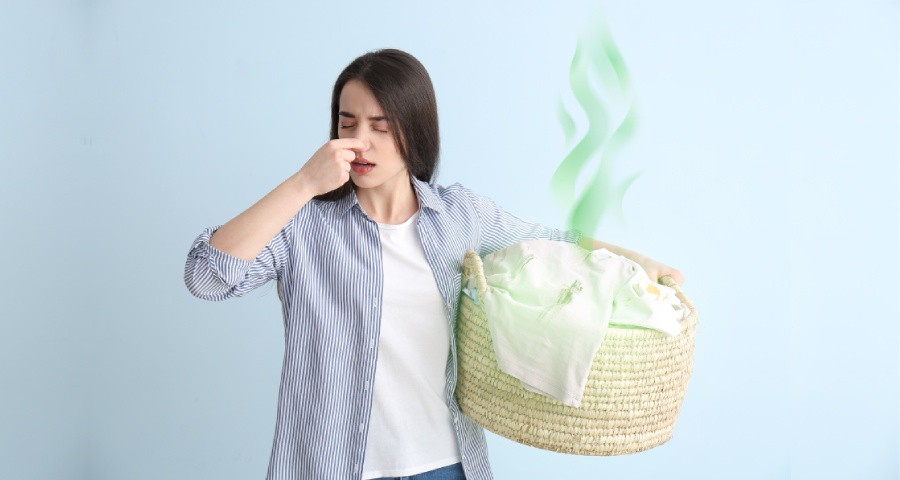
There is nothing more daunting than having a guest over and having them notice the particularly awful smell of musty clothing. While some may try to rack their brains and continue to ask themselves the question of how to get musty smell out of clothes, others pay for a laundry service elsewhere due to their unawareness of how to solve this issue.

You may try to remove the smell with a couple of washes, this will not only use up your detergent but leave you feeling frustrated if the smell persists. But don’t fret, we’re here to tell you that there are various answers as to how to get strong odors out of clothes. You will need the following products:

  • White vinegar
  • Baking Soda
  • Enzyme Odor Removers
  • Borax
  • Lemon Juice
  • Coffee Grounds
  • Alcohol
  • Essential Oils

Not only will we show you how to stop clothes smelling musty in your wardrobe but we will show you how to avoid them from becoming musty in the first place. Here are 12 simple ways to get the musty smell out of clothes:

1. White Vinegar

How does white vinegar help remove odor from clothes?

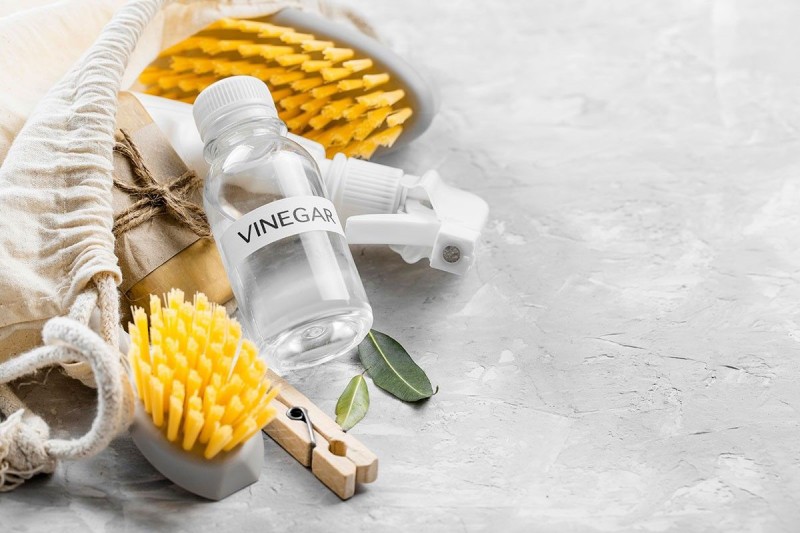
White vinegar has been known in the cleaning community as not only an effective chemical that removes stains and bacteria but it has a pungent odor that can easily erase as well as combat tough smells. This is due to white vinegar’s odor absorption power which can help you in a pinch.
White-Vinegar

So, if you’re wondering how to get mildew smell out of clothes quickly then white vinegar is the solution. Simply use white vinegar instead of softener when you’re going to do your laundry, we recommend adding one cup of vinegar per load.

If you’re having a tough time removing odor from towels, we recommend using hot water (which tends to remove all bacteria) and one cup of vinegar in place of detergent. This is a great way to instantly remove the mildew smell.

2. Alcohol and Water

How does the combination of alcohol and water helps remove foul odor from clothing?

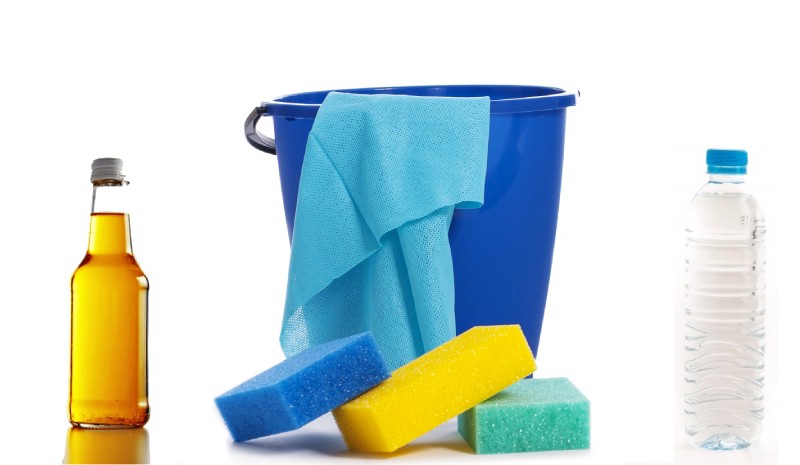
Although using alcohol and water seem unorthodox, you’ll be surprised at how incredibly potent this combination can be when it comes to removing foul smell from clothing. For this you will need to buy alcohol, however, we recommend not buying alcohol that is sweet or has sugar in it as it will be very sticky to remove afterward.
Alcohol-and-Water

It is best to use alcohol like vodka. You will need to do the following:

  1. Mix three parts vodka with three parts water
  2. Fill a spray bottle with this mixture
  3. Spray the odorous areas of your clothes

After these steps, you can go ahead and wash your clothing or let it dry in the sunlight. This mixture works as an antibacterial solution so you won’t only be getting rid of the putrid odor but you will also be getting rid of the microscopic bacteria that cling to the dirt and grime of your clothing.

3. Baking Soda

How does using baking soda help in the removal of musty-smelling clothes?

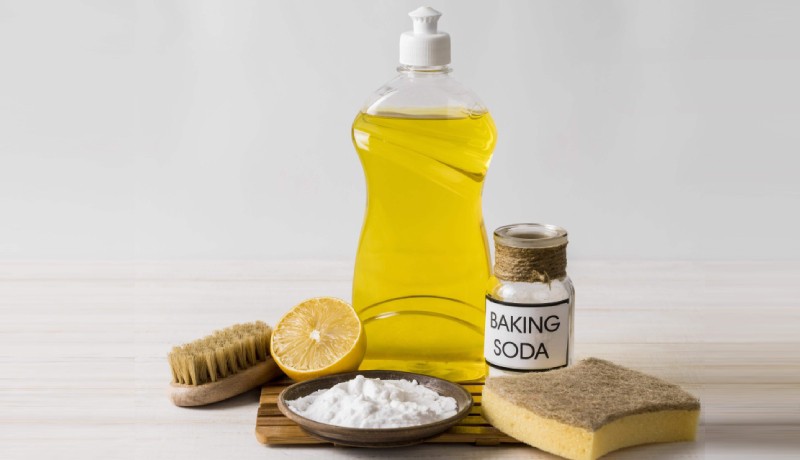
When asking yourself how to get remove bad odor from clothes, there is one product that many people tend to skip over without giving it a second thought and that’s baking soda. Baking soda has been around for decades as a secret ingredient when it comes to removing stains, odor, grime, dirt, or microscopic bacteria.
Baking-Soda

Although many have this in their home and find it fairly easy to use for cleaning, others are hesitant to use it due to its simplistic nature. However, baking soda is one of the most potent options on this list.

It is best to use baking soda with water to form a paste, when you do this, we recommend you spread it on the areas of your clothing that are odorous. After these steps, you will leave it dry for some time. You will then brush or remove the paste after it has hardened.

For others who have less time to casually spread this mixture, you can simply put the baking soda in a plastic bag with the odorous clothing and shake it plenty of times. When the baking soda has completely covered the clothing inside, you’ll let the clothing stand for approximately ten minutes for it to be more effective. Then you’ll remove or brush it off.

4. Lemon Juice

How does lemon juice reduce and destroy odorous musty smells in your clothing?

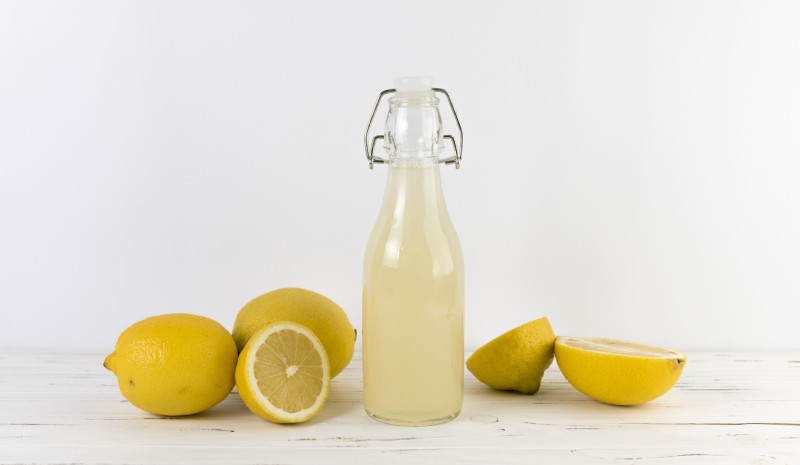
Lemon juice is not only a great way to reduce bacterial growth as well as cancel out the odorous smell, but it’s also a fundamental ingredient in making your clothes smell fresh like a detergent would.
Lemon-Juice

The reason lemon juice works so amazingly well in eliminating odor is due to the citric acid that breaks down the oils in any material. You can use lemon juice in various ways,

Including:

  1. Pour one cup of lemon juice into the laundry machine as a softener
  2. Mix lemon juice with water and soak the odorous areas, then leave it to dry in the sun or a dry area

Lemon juice works as well as any other ingredient on the list and you’ll be amazed at how wonderful it will smell after coming out of the washing machine.

5. Coffee Grounds

How do coffee grounds help in removing odor from clothes?

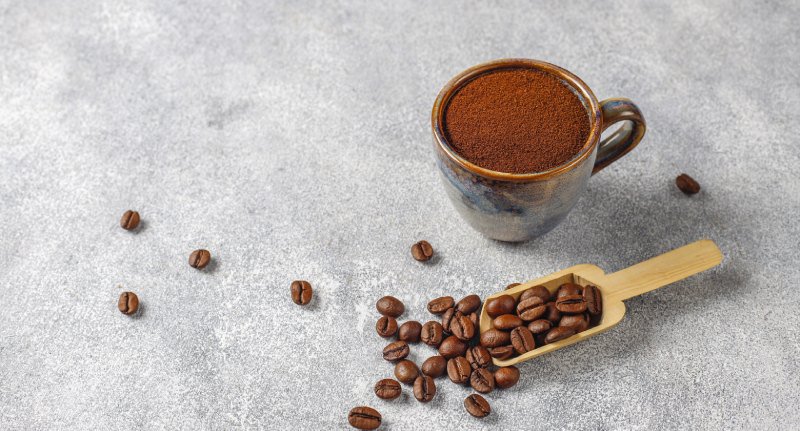
Had yourself a cup of coffee this morning? Well, don’t throw out the leftover coffee grounds just yet! Although this may sound a bit bonkers, you’ll never believe the effect coffee grounds can have against aggressive odors.
Coffee-Grounds

The best part of this method is the availability it has in every household, chances are if you are a coffee lover, you’ll find yourself delighted to use this strategy.

You can simply do the same technique as you did with the baking soda and place the clothing in a plastic bag with coffee grounds in your clothing. Except for this time, you don’t need to shake the bag as the coffee grounds will naturally absorb the smell. Make sure to leave the clothing in overnight for maximum efficiency.

When you remove the clothing from the plastic bag the scent of coffee can be a bit overwhelming so it’s important to air it out as much as you can afterward. The reason coffee is so effective in removing odors is due to its containing nitrogen. Nitrogen helps not only neutralize odor in your clothing but also the air quickly.

Coffee is the natural alternative to baking soda if you don’t have any at home. So, if you keep racking your brain and asking how to get old smell out of clothes, fear not! This is a simplistic solution that will work to minimize your efforts and remove the bad scent.

6. Essential Oils

How can essential oils help in the removal of bad odor on clothes?

Naturally, for some using perfume can be the first thing that comes to mind when thinking about removing foul odor when it comes to clothing. This is especially true for those that don’t have time to take their clothes to the laundry or for those who are in a pinch.
Essential-Oils

However, for those who have a sensitive nose, this smell can be extremely overwhelming. Some perfumes can even stain clothing leaving abysmal marks that only serve to worsen the clothing. So, if you ask yourself how to remove bad odor from clothes, we recommend using essential oils.

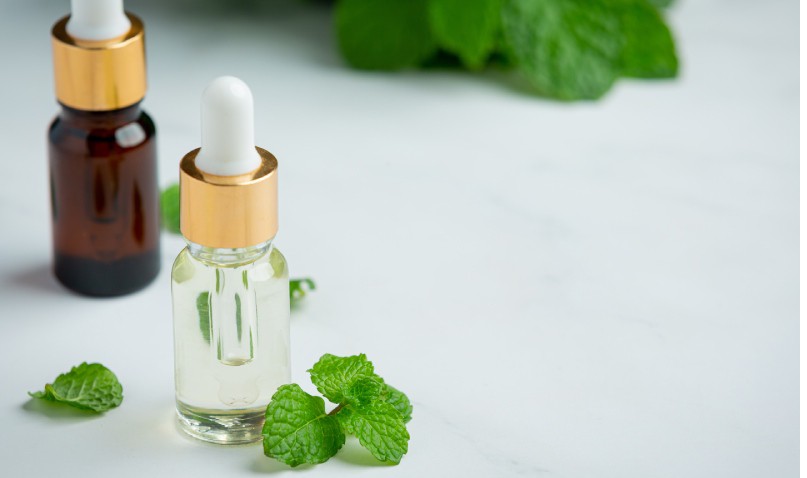
Essential oils are already a staple when it comes to making your home smell wonderful. The same could be said about clothing, all you need to do is mix a few small drops of oil with water in a spray bottle and then spray your clothing freely.

Since the essential oils are strong, they will take over and replace the foul odor with a much better one. We recommend using lavender, grapefruit, or lemon to combat the strong odor more efficiently.

7. Borax

How can borax help remove foul odor from clothing?

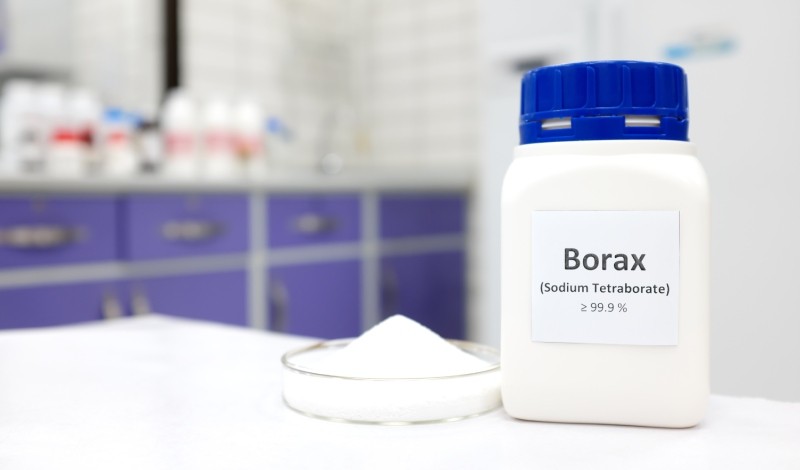
A popular cleaning staple in every household for stain removal is Borax. This powerhouse chemical works to remove any persistent stains and odor from your household. Usually used in habitually dirty places like the kitchen and bathroom, borax is known for its full-proof use in any grime-filled environment.
Borax

So how does that translate to clothing? Well, for starters, let’s say you have a lot of bulkier items in your repertoire. For example, towels, bedsheets, couch linen, and more could be a handful to tackle with all of these other methods when it comes to the musty smell.

Borax can be used in this case and it will be easier to spread out for the bigger items. You will just need to soak some or all of these items in a bathtub full of hot water and half a cup of Borax. Then after it’s soaked for a good amount of time, you can wash these items normally. This should remove any lingering smell for a good as new odor after washing.

8. Sunlight

How can sunlight help remove odor from clothing?

Say you just finished washing your clothing, and you start removing the clothing from the washing machine only to find out that a smell persists. Those who throw their clothing into the dryer will have a rude awakening and realize that the laundry smells bad after drying.
Drying-and-Reaping-the-rewards

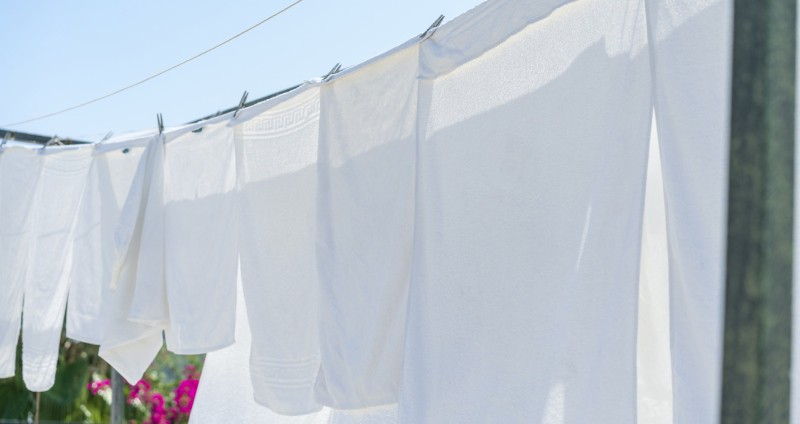
It will smell even worse when the clothing has dried completely. Believe it or not, one method of lessening a musty smell is sunlight. As a natural combatant for anti-bacteria, the sun not only works to remove the odor but also to extinguish any stain you may have as it also works as natural bleach.

This will not only save you energy but clothing that is dried in the sun will likely smell better than if using a dryer machine.

9. Freeze It!

How can you remove bad odor from clothing by freezing it?

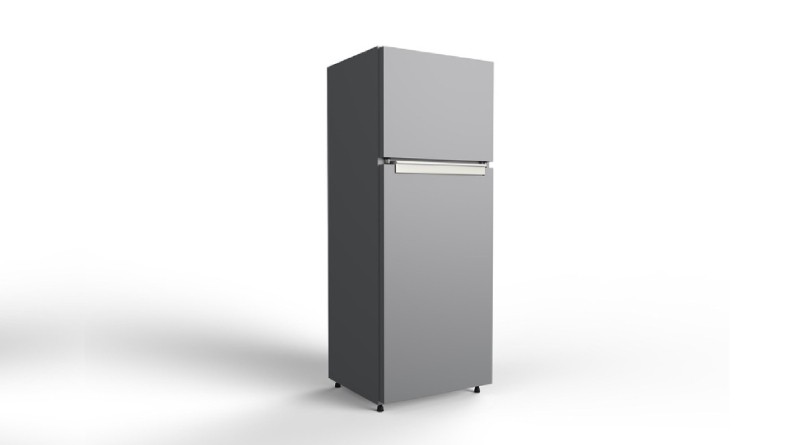
This one is going to sound like something straight out of a madhouse, but believe it or not, it works just as efficiently as the other methods when it comes to removing foul odors. Freezing your clothing by putting it in a freezer bag overnight or for a few hours can kill and fight the odor-causing bacteria in your clothing.
Freeze-it

Once you remove the clothing from the freezer, it will freshen up your threads and smell as good as new. We recommend leaving your clothing in the sun after airing them out from the freezer, this will also help in enhancing the delightful smell.

10. Open Your Closet Doors

How can you avoid a musty smell by opening your closet doors?

When it comes to preventive measures against the musty smell, an effective way is to open your closet doors. Musty smells occur when there is little to no airflow in your closet, so if there is clothing that hasn’t been washed and your closet is closed it will likely worsen over time.

Open-Your-Closet-Doors

This could also happen in the corners of the closet as it is the place with the least airflow, we suggest removing the clothing at least once a month or disposing of old clothing that is taking up space.

11. Use a Fan

How can a fan prevent a musty smell in your closet?

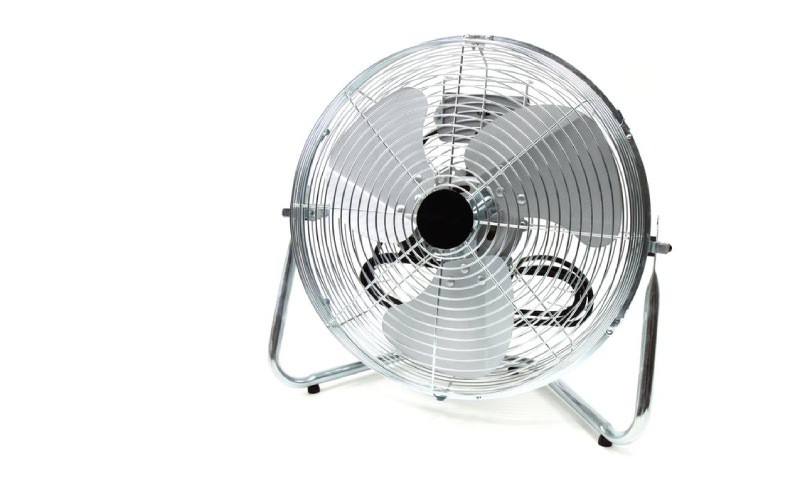
If you have the kind of closet doors that prevent any airflow like solid wooden doors, it can be problematic for the stored away clothing. The most efficient way to reduce moisture and foul odors are to let your closet breathe or use a fan to create airflow in your closet.
use-fan-

Whether you use a floor fan or tiny fans in your closet area, you can circulate air more efficiently and lessen the risk of harboring mold in your closet. So, your best bet is to continue to let air into your closet to avoid persistent odors.

12. Remove Old Clothing and Clean

How can you avoid chronic odor in your closet?

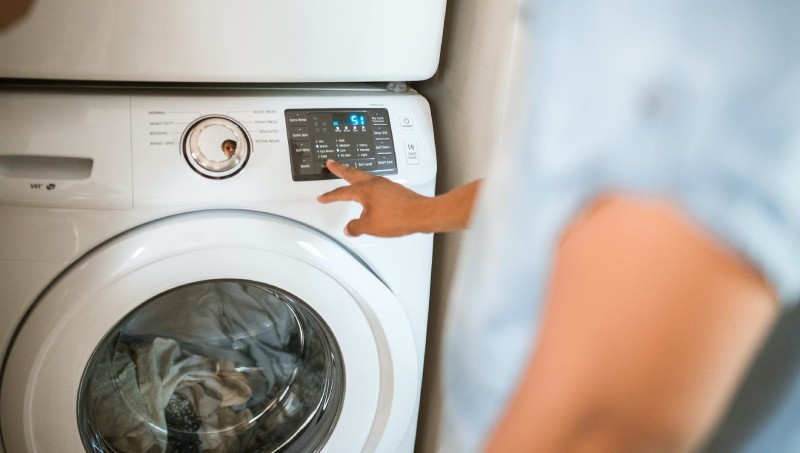
When thinking about the question, “How to get mold out of clothes?” you will need to tackle the root of the problem. When you leave your clothes without cleaning for a long period in your closet, without any airflow it is easy for mold to grow.
Remove-Old-Clothing-and-Clean

The perpetrators amongst your regular clothing are usually the older clothing which tends to not get touched, hence the less you will wash them.

This will eventually manifest as mold and it can easily transfer to your other clothing if it’s hanging next to them. That’s why we insist that you throw away old clothing from your closet and do a deep cleaning to prevent this issue from occurring.

TESTEST
Categories

How to Clean Ceramic Tile – 10 Simple Tips to Follow

A new sturdy design for the home

So, you decided to engage in a new floor plan for the home, and one of the changes includes the flooring. If you’re going from a wooden floor to ceramic tiles you have much to be happy about.

Ceramic tiles are not only sturdy but they are an aesthetically pleasing look for just about any home whether it’s big or small. However, while ceramic tiles can be ideal for longevity, when it comes to maintenance it can be a bit daunting if you’re not familiar with maintenance.

Some homeowners may skip the research and just go ahead and hire a home cleaning service to take care of their ceramic tile woes. But if you’re like most that want to save your extra pennies and go easy on the wallet, you’ll want to figure out how to clean ceramic tiles floors.

Many who have ceramic tiles sometimes go years without good cleansing, this could then lead to wear and tear as well as rust accumulating on your tiles. This will turn an aesthetically pleasing room into a less than appealing bedroom space.

Another issue that occurs to uncleaned ceramic tiles is that grout starts to form between the tiles. It can be confusing for some renters that recently move into their apartment and find that some ceramic tiles look darker than others.

This means that the prior renters didn’t do a good job of maintaining the apartment or cleaning before they moved. If it doesn’t get cleaned it can grow darker and darker as the years go by.

That’s why it is critical to know the best way to clean ceramic tile floors or generally how to clean ceramic tiles to keep your floor in tip-top shape and elevate your room or home in an instant.

Here are 10 simple tips to follow when it comes to ceramic tiles:

1. Vacuum

How can vacuuming help clean ceramic tile?

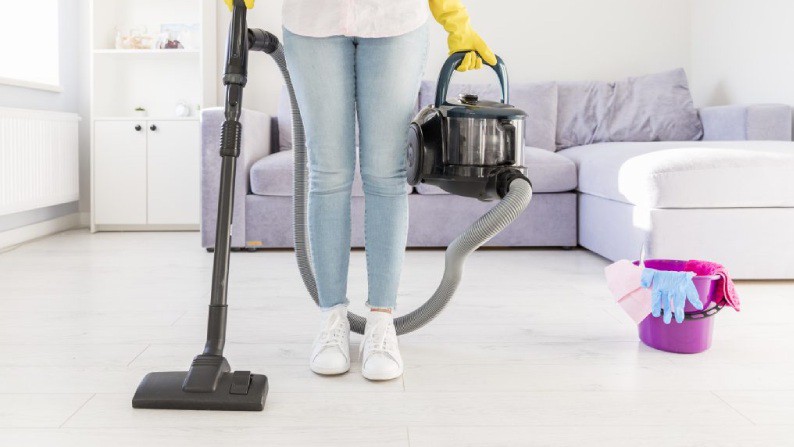
Although many people believe using a vacuum is for carpet floors only, it can help when it comes to cleaning ceramic tiles as well. If you’ve never cleaned your ceramic tiling or have recently moved into an apartment or home that hasn’t maintained its ceramic tiles it is difficult to evade the grout problem. Grout is years of muck, dirt, or grime that accumulates between your tiles.

Vacuum-cleaner

Some grout can take days of scrubbing to eventually remove the dirt. We suggest using a vacuum to lessen the dirt or debris that’s accumulated. If you don’t have a vacuum you can also use a broom to glide between the cracks to help loosen the surface dirt.

This will prepare you for the following steps and lessen the physical exertion you’ll need to eliminate the grout for the best possible results. It will also make the clean-up process easier.

2. Scraping the dirt

What items can you use to scrape the grout between the tiles?

Scraping-the-dirt

If you were able to loosen the dirt with a vacuum or broom, then this next step will be a piece of cake. First, you will need:

  • Credit card
  • Tooth Brush
  • Plastic putty knife
  • Stick substance

These objects will help you scrape the middle of the tiles to remove the dirt in the middle of the cracks with a bit of elbow grease. When using a credit card, hold at an angle going against the grout for maximum efficiency. The plastic putty knife will also be held similarly, this tool could be a safer option than using anything sharper as it is made of plastic.

If you use a sticky substance this could also benefit you by lessening the physical effort you will need to use to remove the grout. Sticky substances like goo will easily have the grout stick to them and will be exponentially safer as well.

3. Cleaning away the dirt

After removing a significant amount of dirt, how do you clean the rest?

White-Vinegar-as-a-Disinfectant-Method (2)

You’ll notice that after these steps, there will still be a significant amount of dirt on the surface of the ceramic tile. Once a good amount of dirt has been removed by scraping or vacuuming the grout, the next step is cleaning away the dirt. For this you will need the following products:

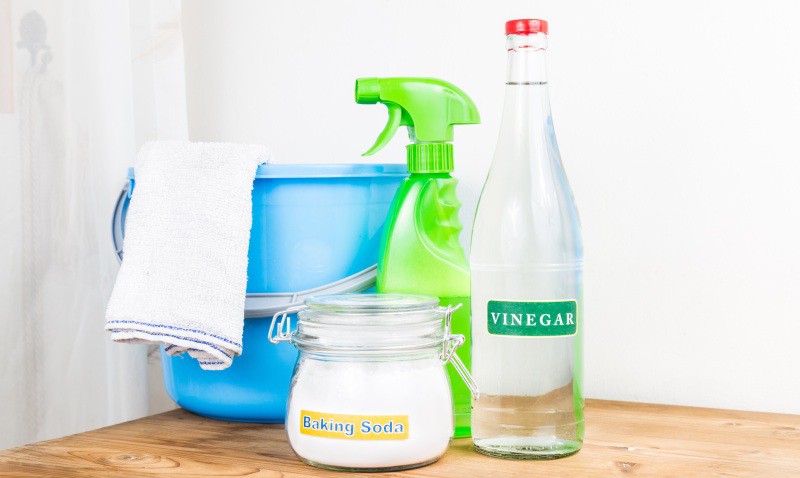
  • Vinegar
  • Dish soap
  • Bucket

Next, you will take the bucket and fill it with hot water. After this, you’re going to need a half cup of vinegar as well as a half tablespoon of dish soap. Make sure to use a small amount of dish soap, as it will then be hard to remove leaving behind a residue that will make your tiles look lifeless.

This mixture will help when it’s time to mop your floor and will get rid of the muck left over from cleaning the tiles in between.

4. Mopping the floor

How can you mop the floor properly with ceramic tiles?

mopping-stick-and-buckets

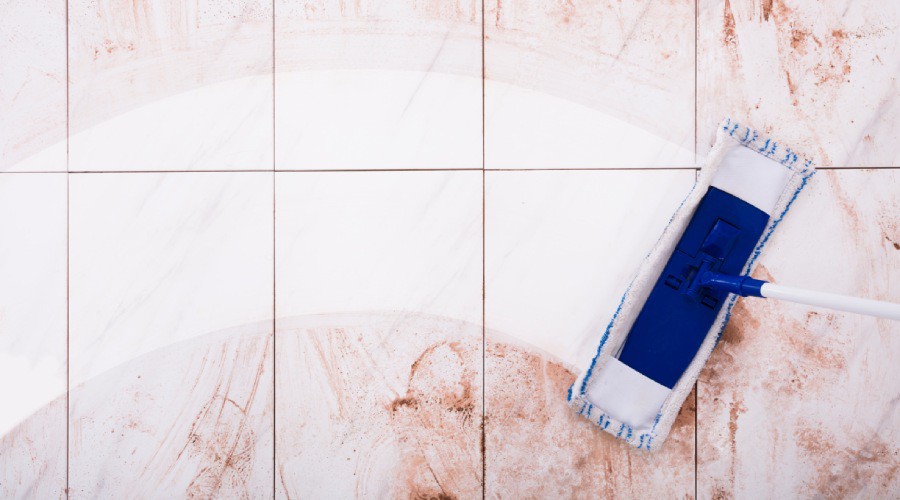
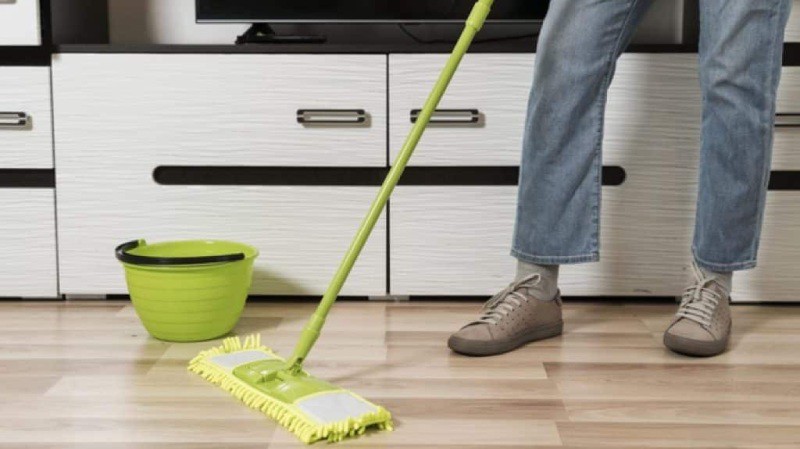
Now that you have the magic mixture that you’ll need to use for mopping, it’s time to take out the mop and start wiping away the dirt. Before you begin, it’s important to get your mop ready. If you’ve recently used your mop, you may or may not notice that there could be micro-residuals stuck to the mop.

You will need to remove the residue completely so that you can use the mixture without mixing chemicals or products. So, to do that you will need to rinse the mop head under hot water and squeeze the excess liquid from the mop. Do this a few times until the water runs mostly clear. If you get a few suds continue to rinse as much as possible.

After this, you will mop the floor with the soapy mixture. Continue mopping the area and once you’re done, go over the surface by mopping with hot water. Be sure to rinse the mop of the soapy mixture once more before doing so. This will guarantee little to no soapy residue.

5. Drying time

What is the drying process like for ceramic tiles?

Drying-time

When it comes to letting your ceramic tiles dry, it can take some time. Most homeowners who let their floors air dry usually come across the issue of someone stepping on the wet area unknowingly. You can prevent this issue by either speeding up the process with a fan turned on or you can simply mop again with a dry clean microfiber towel.

Not only will this allow some excess dirt to be fully removed but it will help get the job done as quickly as possible so you’re free to roam the room or home afterward. It is important that this floor maintenance gets done twice a week or once a week as dirt can accumulate easily when you have ceramic floor tiles.

That is not to say that having one is not advantageous, as it is easier to clean than other floor types. It also adds a layer of sophistication that brings an eye-catching look to your home.

6. Deep cleaning tile grout

What can you do if the tile grout persists?

Picture this: you move into a new home or apartment completely enthralled with the flooring plan, the square meter footage, and the look of the interiors. After moving in you realize that the ceramic tiles have a dark line in the middle that’s filled with layers of dirt that haven’t been washed in a long period. This could manifest as a frustrating ordeal if you don’t know how to properly wash ceramic tiling.

After sweeping, mopping, scraping, and vacuuming, the grout continues to persist. This calls for more intensive cleansing. For this, you will need the following items:

  • Powdered oxygen bleach
  • Spray bottle
  • Scrub brush
  • Nylon brush
  • Old toothbrush
  • Grout sealant
  • Bucket

These products will help you in restoring the musty old ceramic floor tiling into the shiny and polished version.

7. Bleach

How can you use bleach to remove tile grout?

bleach

When it comes to removing years old dirt or grime that’s accumulated on any surface, there is no better chemical to use than bleach. Bleach is a powerhouse household product that works for just about any cleaning method and does the job fairly well. For persistent grout, it is just the product you will need to get your ceramic floor looking like new again.

We recommend getting powdered oxygen bleach and mixing it with a bucket of water. Follow the directions on the bottle if necessary. This bleach is slightly different from your regular bleach as it uses another chemical compound that lacks toxicity and is generally color-safe.

Since you will be needing to use a fair amount of bleach, this helps with restoring your floor without the strong odor or reactionary hazards that come with it. You’ll be able to find this bleach at any grocery store’s cleaning aisle.

8. Applying the bleach solution

How should you use the bleach solution on the tile grout?

For the application of this mixture, you will either need a spray bottle or a scrub brush. If the tile grout has accumulated over time and is incredibly persistent, we recommend using both to get efficiently rid of the dirt. Once you’ve applied the solution, we suggest waiting 30 minutes or more so that the solution can work its magic.

The more time you wait the easier it will be in removing the excess grout from the ceramic tiles. This is due to the oxygen ions in the bleach that works for up to six hours after application. Bleach can only work if you’re patient, for this time we suggest doing something that will occupy your time so that the grout can easily melt away afterward.

This process will slowly eat away at the dirt and grime that has accumulated in your ceramic tiles. It is best to wait for longer periods if the grout is excessive. In about two to three hours you will be amazed at the transformation your interiors will have with this simple procedure.

9. Scrubbing away the dirt

What is the next step after applying bleach?

Scrubbing-away-the-dirt

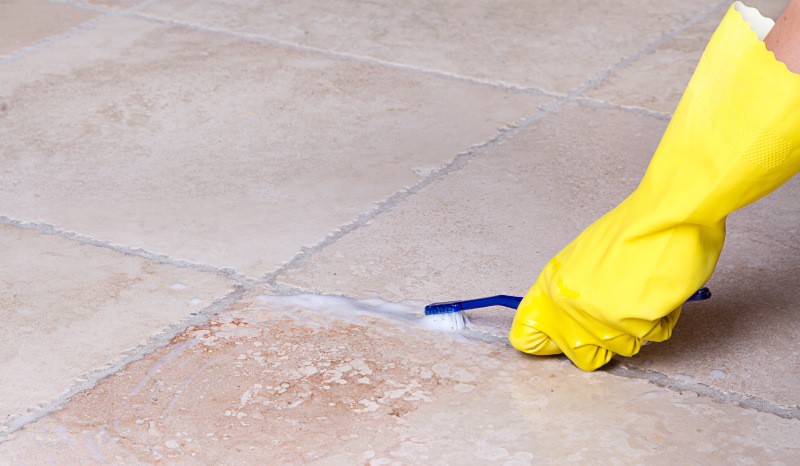
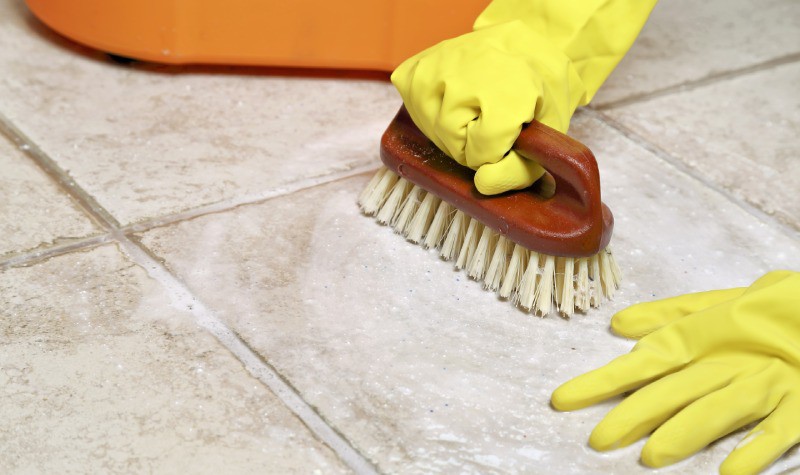
Shortly after applying bleach and having it soaked for a couple of hours or a minimum of 30 minutes, you will then use a nylon brush or old toothbrush to scrub the grout from the ceramic tiles. We recommend doing one small area at a time, this will be beneficial when it comes to accuracy and efficiency in removing the grout as cleaning larger areas will make you prone to missing a spot.

As you are cleaning, you can start soaking the dirty water with a clean towel as you continue to scrub. This will help you make sure you have gotten rid of enough grout. If you see that there is still a good amount of grout after scrubbing, you can go ahead and leave a small dollop of the bleach mixture for a longer period on the problem areas to ensure that it is completely cleansed.

10. Rinse

After scrubbing the grout, what’s the next process?

Rinse

Once you are done scrubbing away the grout and soaking the dirt with a towel, you will then rinse the area with clean water. Making sure that the floor is completely clear of any dirt or grime before finishing off with a dry microfiber or regular towel. Cleaning grout is a critical part of deep cleaning and we suggest doing maintenance on the ceramic tiles every two weeks to once a month.

For those homeowners who want to manage this extra work and prolong the cleanliness of their ceramic tile, there is also grout sealant. Grout sealant is an optimal sealer that works to keep the ceramic tiles clean so that you won’t have to repeat the maintenance process every so often.

If you don’t have powdered oxygen bleach at home you can use other household objects you have lying around like a mixture of white vinegar with either baking soda or lemon juice. However, we would advise using bleach as it is the most efficient way of removing the grout and works to completely dissolve the grout with an intensive amount of scrubbing.

TESTEST
Categories

How to Get Stains Out of Leather – Simple & Practical Tips

Improving your leather surfaces 

Thinking about getting that fancy leather couch you’ve always dreamed about? Or perhaps you’ve already purchased the leather couch and had a slight spill. You’re already thinking about the worst-case scenarios including buying a whole new couch. The truth is even though many dread the thought of cleaning persistent stains or dirt from your couch, the actual process can be quite easy if you know the right techniques or methods.

When you think about leather, you think about a luxurious or elegant material that can immediately make for an eye-catching look in your room or home. If you think of leather apparel, perhaps a fancy coat or jacket for the winter, you can embrace a more stylish look that will have your friends impressed.

However, the reality is, accidents happen. We’ve all been there, you’re eating a fancy restaurant and all of a sudden you spill some wine on your jacket. This then leads to an overload of anxiety on whether you’ll be able to get it out or shelve your coat in your closet for the rest of eternity. You think to yourself how to get stains out of leather? Fear not, there are various ways to tackle these pesky stain issues that don’t consist of hours of scrubbing.

When thinking about how to remove stains from leather, you also have to think about what type of stain it is whether it’s a water stain, wine stain, or oil stain. The difference is critical when you’re preparing to clean a couch, purse, shoe, or car seat. But more importantly, it is necessary to have certain supplies that will aid you in the quest for removing the stains off your leather product. These items include:

  • Leather primer
  • Microfiber cloth
  • Distilled water
  • Corn starch
  • Talcum powder
  • White vinegar
  • Lemon juice
  • Tartar
  • Dish soap

Having any of these items will help you get started on removing stains from leather, here are some simple and practical tips to guide you further:

1. For couches, love seats, chairs, or ottomans – add primer

Why is primer an important first step to removing stains from leather?

When it comes to leather, there is no such thing as a universal type. There are different kinds of leather, which means that there is no one way of cleaning the stains. With a variety of leather, this also means that you are required to use a protective coating called a primer to ensure that the material doesn’t get damaged.

leather-couches-stain-cleaning

There are two types of leather one is called aniline-dyed leather which also goes by unfinished leather and pigment leather which also has aniline but has a pigment coating. Both of these leathers have different characteristics that should be noted before beginning to remove the stain. For example, aniline-dyed leather looks more natural due to not having a final coat. It also tends to be more detailed in color.

When it comes to pigment leather, it isn’t soft to the touch like aniline but it does have longevity and is less likely to fade over time. When it comes to sofas, it is best to put a primer on or look at the manufacturing label to make sure that you are careful with the products you end up using.

2. Water stains

How can you remove water stains from leather?

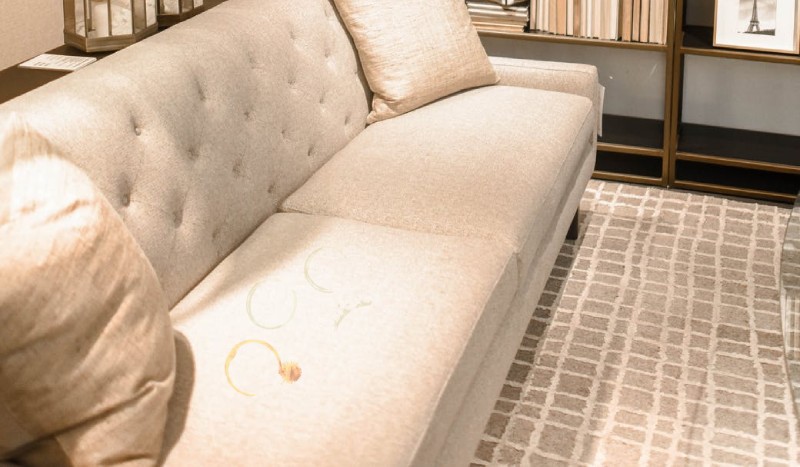
Picture this: you’re having a good time with friends sitting on your favorite leather couch, all of whom are drinking water. Perhaps one of them misplaces the water and drops it, water splashing on the couch. You’re now thinking about how intricate it will be to clean up the mess or even worse, whether you’ll need to get a new couch.

Remove-Stains-from-a-Couch

Now you may think water stains won’t leave too much residue due to it being chemical-free, however, these stains tend to leave rings that will look unsightly to guests and dampen the decorative atmosphere you’d like to have. Newly-made water stains have the possibility of being removed without too much hassle. Simply get a dry microfiber cloth to soak up the excess liquid.

When it comes to older stains, you will need to put in slightly more effort. For older stains, we recommend:

  1. Dampening a microfiber cloth with water
  2. Wipe down the stain in a circular motion, starting from the center
  3. Continue to gently wipe the stain until you can’t see the ring anymore
  4. Then you will wait till the area is dry to check if the stain is still there
  5. If so, repeat the process until it is gone
  6. Once you have removed the stain and the area is dry, we recommend using a leather stain cleaner or conditioner to finish the job.

3. Grease stains

Can grease stains be removed from leather?

Whether it’s make-up, skin products, or food products there is no helping to get a little bit of oil on your couches or purses from time to time. Although these stains are a little tough to remove, nothing a little home cleaning technique can resolve. Here are some helpful tips that will make your struggle a little less frustrating:

grease-stains-on-leather-purse
  1. Start blotting the grease from the furniture with a dry microfiber cloth, enough so that any excess grease is removed
  2. Then you’re going to sprinkle a bit of talcum powder or cornstarch on the grease stain area, make sure that it’s covered completely.
  3. If you can, let it sit overnight. If you have pets at home, put them in a separate room for as long as you can so they don’t end up ingesting the powder or make a mess.
  4. Gently wipe away the powder with a clean dry microfiber cloth.
  5. If necessary, repeat these steps to ensure that there is no stain left.
  6. To leave a finishing glow, we suggest applying leather conditioner that’s approved by the manufacturer.

If these tips don’t do the trick, then you can also try using dishwashing liquid to remove grease stains from more pigmented leather furniture. For example, if you’re using dishwashing liquid you could:

  1. Again, blot enough of the grease from the furniture using a dry microfiber cloth to get all the excess grease removed making the process work faster.
  2. Combine equal parts dishwashing liquid with equal parts water to lather the spot
  3. Use a clean microfiber cloth and dampen it with the solution created
  4. Then while working in one direction, you will gently dab the grease stain area.
  5. Grab another clean microfiber cloth but this time dampen the cloth with distilled water only
  6. You will then gently dab the area in one direction, the same as you did previously with the soapy mixture to remove it
  7. Then you will use another dry microfiber cloth to dry the area
  8. You will repeat this process until the grease stain is all gone

4. Dark stains

How can you remove dark stains from leather car seats?

When it comes to leather car seats, there is nothing more aggravating than when you get a stain, particularly a dark one at that. For some, their car is their baby, and for others, it is a means of transportation. Both types of individuals wish to keep their cars clean and shiny to impress others or for their peace of mind. Unfortunately, mistakes do happen, when they do, the one thing that some new car owners are unaware of is how to clean up their mess.

car-seat-leather-stain-cleaning

For those car owners who have never owned a car with a leather interior before, it could be a whole new world of confusion that could make any car owner sweat with anxiety. Not to worry, there is a method that will help remove the dark stains from your leather car seat. The steps needed to take to remove the stain efficiently are:

  1. Combine equal parts crème of tartar and lemon juice
  2. Dab this solution on the grease stain on the leather car seats or interior
  3. Wait approximately 10 minutes or so for the solution to take effect
  4. After ten minutes, gently work in a fresh batch of paste to be more efficient
  5. You will then take a dampened sponge and remove the paste from the leather interior
  6. If needed, after you’re done and the stain is removed, we recommend using a leather conditioner for extra shine.

5. Ink stains

How can you remove ink stains from leather furniture?

Whether it’s your kids, friends, or maybe it was you accidentally leaving your pen on the leather couch or keeping it in your back pocket, ink stains are never an easy ordeal to manage. Your leather interiors can suffer greatly from a small blot of ink if left uncleaned. It will look unsightly and give the couch a lessened appearance than what you had originally. For those who have never dealt with ink stains, using soap and water could be the first real thought that comes to your mind.

Steam-Clean

However, rubbing it with soap and water could worsen the appearance of the ink stain. Creating an even worse mess than what you started with. But where there’s a will, there’s away. Try this next method for a more effective way to remove the ink stain:

  1. Dip a cotton swab in rubbing alcohol
  2. Rub the ink stain lightly
  3. After this is done, blow-dry the ink stain
  4. If the ink stain persists, apply oil-free non-gel cuticle remover

If this method doesn’t help with removing the ink stain, there are ink-removal sticks that can be purchased for removing these pesky stains from leather. These ink removal sticks are inexpensive and sold in office supply stores for the general public, this can help remove the ink right away as it is specialized to do so.

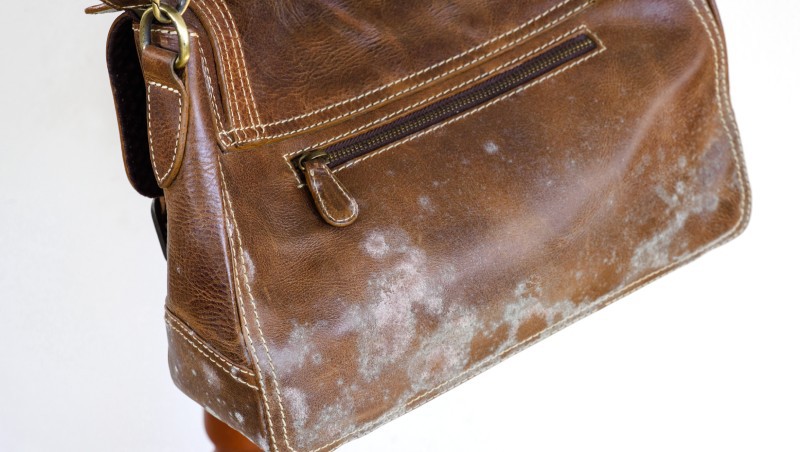
6. Mold stains

How can you remove mold stains from leather furniture?

Removing mold stains from leather furniture is a lot like removing ink stains, which means you can follow the same procedure. When it comes to rubbing alcohol, we always recommend doing a spot test to ensure that you won’t be harming the interior before rubbing the solution on the stain whether big or small.

For this, it would be best to do it in an area that is not too conspicuous like underneath the cushion seats. This will help minimize the damage if there is any. We also recommend looking at the manufacturer label to make sure if there is any objection to this solution being used. After getting rid of the mold stain, we always suggest using a leather conditioner. Not only does this helped seal in the cleanliness but it adds shiny protection that will help maintain the appearance of your leather couch.

Tips on maintaining your leather interiors (image below)

Hey, we get it, accidents happen. While these home remedy methods will help you get out of a pickle, we also believe in taking firm action to prevent these accidents from happening and keep your leather interiors looking dazzling. Here are a few simple steps you can take whether you clean daily or once a week:

1. Vacuum

Sounds simple enough right? Vacuuming is incredibly effective in removing dust, debris, or dirt from couches. Being a popular hangout spot, a couch can easily catch more dust mites than the rest of the house if left uncleaned. Preventing dust and dirt can prevent stains from forming over time, we encourage this task at least twice a month.

2. Clean or dust along the leather’s grain

Leather tends to have a specific direction in which the seams meet and the fibers move. This means that you will clean going towards that direction, you can do this by dusting with a microfiber cloth.

3. Wipe down 

It Is incredibly important to use a damp towel to wipe down the leather. We recommend using warm water with the following:

  • Hand soap
  • Dish detergent
  • Leather soap

Make sure that the towel is not soaking wet as it can leave a residue after use. Use a gentle motion to not damage the interior if it’s done too harshly, leather is a sensitive material. We encourage this task at least once a week to maintain your leather interiors.

TESTEST
Categories

12 Best Ways to Remove Sticker Residue

A sticky situation

Growing up, we all remember those fun stickers that we used to paste on the door, window, table, or just about any surface available. Stickers can be a fun way to express yourself and make others more aware of your personality. As adults, the trend continues by way of bumper stickers or wallpaper stickers to decorate your home. It’s an enjoyable hobby and aesthetic option for those who want their place or surface to look livelier.

However, the darker side to this trend is when the enthusiasm fades and you’d like to switch out the old stickers with new ones or simply remove them together.

You will notice the sticker will leave a residue that comes from the adhesive. Although it is strong enough to stick onto any surface, this same substance makes it even more difficult for some stickers to be removed from the surface completely.

Whether you placed these stickers on a wood, glass, plastic, or rubber surface, the adhesive can be strong enough to leave a residue that’s almost impossible to remove with any normal means.

This can mean hours of scrubbing away at the surface with a sponge and soap only for there to still be residue to wipe away. Then you will find yourself easily frustrated and stressed due to the level of strength you have to use to remove the residue.

So, you may ask yourself how to remove sticker residue? Fear not, there are multiple ways to remove the pesky sticker residue. To remove the residue, having any of these items will be helpful to rid yourself of the problem. This includes:

  • Scissors
  • Knife
  • Masking tape
  • Wet wipes
  • Vinegar
  • Rubbing alcohol
  • Cooking oil
  • Baking soda
  • Peanut butter
  • Mayonnaise

These ingredients could get out of that sticky situation if used properly. With this guide, we will help you rid your home or any surface of that sticky substance that your children are so fond of but have a hard time cleaning up. These are the 12 Best Ways to Remove Sticker Residue:

1. Using finger

What is the first technique you should try to remove sticker residue?

When asking yourself how to get sticker residue off of any surface, most people jump at the chance to use non-conventional methods. However, the first real method anyone should use is to attempt removing the sticker residue with their fingers.

Before attempting plucking away at the residue endlessly, there is a method that could end up being more convenient and lessening the physical exertion putting into stripping the residue.

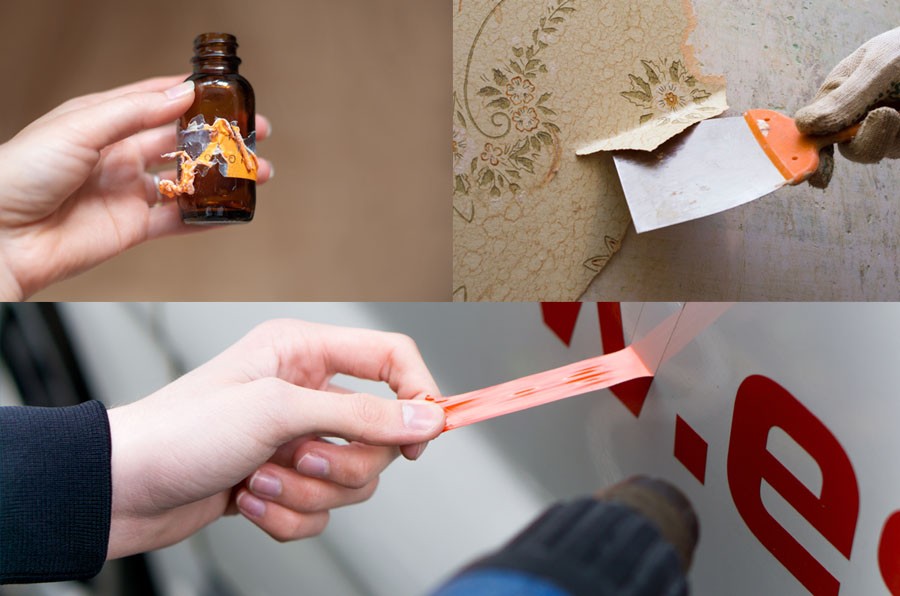
First, attempt to completely remove the sticker. Once the sticker is removed, you’re going to gently rub the finger across the residue. This will then form the residue into a little ball that is easy to strip away without breaking too much of a sweat. If there is still some residue left on the surface, try using dish soap with hot water, it can easily be wiped away.

2. Scraping the residue

Can scraping help remove the residue?

Although it may seem frivolously difficult, using the right object to scrape the sticker residue can be incredibly effective in completely removing the adhesive. The question is what sharp object is the most effective? Here are some you could find in your household:

  • Knife
  • Old credit card
  • Scissors

With some effort, these objects can be incredibly potent if used correctly. For example,

If you are using a knife, it is important to hold the blade at a slight angle against the surface so that there is no damage done besides removing the residue. If you’re using an old credit card, you will lessen the risk of damaging the surface and you can freely use it in the same manner as a knife.

Before using these objects, it is important to be extremely careful when it comes to using them on a glass or metal surface. For these surfaces, it is highly recommended to use a blunt object like an old credit card instead of scissors or a knife. The sharper objects could also be hazardous if aimed incorrectly and could result in an injury.

3. Tape it!

How can masking tape aid in removing sticker residue?

Using an adhesive object to remove another adhesive can seem pretty odd. But when you think closely, it only makes sense to use a powerful stick on an object to remove another one if it’s done correctly. This doesn’t mean you can just go out and buy duct tape or any ordinary clear tape to remove the residue.

This is where masking tape comes in handy. Although it is a sticky tape, it is not strong enough to get stuck on the surface but potent enough to remove the sticky paper on a surface. This method will work if done correctly. We recommend following the next steps:

  1. Wrap the masking tape around your index and middle finger
  2. Press against the sticker residue
  3. Start to pull away from the residue
  4. Continue pulling away until the residue sticks to the tape

If the masking tape’s adhesive starts to wear off, we recommend switching to the other side of the tape on your index and middle finger or simply use a new length of the tape. This method works easily on glass or plastic surfaces and could avoid any potential injury using a sharp object to scrape the residue.

4. The wonders of Peanut butter

How can you use peanut butter to remove sticker residue?

Many wouldn’t normally think peanut butter is an ingredient for removing any sort of sticky residue from your surfaces. But did you know if you use peanut butter wisely it can prove to be the most effective when getting rid of the sticky substance left by a sticker? This is due to its oily nature.

Simply dab a bit of peanut butter on the area with the sticky residue, wait for 15 minutes and then wipe it off. The longer you leave on the residue the easier it will be to remove the bits of paper so we recommend leaving it on for a long time.

This method works on any surface including glass, plastic, and wood. The wonder of peanut butter leaves much to be said, it can be extremely beneficial in removing sticker residue or any adhesive that gets stuck on a surface.

5. Soap or Vinegar

Vinegar

When cleaning the home, it is a household staple to own ingredients like white vinegar which have the ability to deep clean any surface from your toilet, bathtub, kitchen, living room, and bedroom. Not only can this ingredient be used to clean household surfaces and rid the house of dirt or grime but it can also remove adhesive residue.

There are many ways that you can use vinegar to remove the adhesive. The first method is to rub off the residue with vinegar, if it’s an item, we would recommend soaking the item or product in soapy water to facilitate the removal.

This method will work depending on the longevity of the adhesive, for those products that have stickers on them, this will help in removing the sticker at a much faster pace.

Soap

There is a chance that you may not even need to get to the second part of this method due to the possibility of removing the residue with soapy water alone. This method although a much more conventional way can be the catalyst in taking care of the pesky adhesive on any surface of any object.

Simply soak the object for half an hour, or more if the residue is persistent to get most of it off, and then when you remove the object from the soapy water, whatever is leftover can be removed with a damp towel.

Continue to remove the spot with the most adhesive until it comes off. This method works well for product labels or glass items that have product stickers on them.

6. Rubbing Alcohol

Can using rubbing alcohol help remove sticker residue?

Another method that you can use is rubbing alcohol. This potent ingredient can remove even the toughest sticker residue from any surface like glass, wood, and plastic.

If you don’t have rubbing alcohol in your household, you can use normal alcohol like vodka as long as the alcohol doesn’t contain any sugars or has any sweeteners. For example, Rum is known for its sweet taste so it would generally leave a stickier situation than what it was originally.

When you’re using rubbing alcohol, the best method is to dampen a towel with the rubbing alcohol and use the towel to rub the adhesive off. Make sure to check within 15 seconds of rubbing to see if the sticker residue has been rubbed off, if not continue rubbing until there is nothing left.

7. Marvelous Mayo

Can using mayonnaise facilitate the removal of sticker residue?

Much like peanut butter, mayonnaise contains oil as a compound that breaks down any adhesive. Mixed with vinegar and this ingredient has enough potency to get the job done.

However, it is important to note that this product doesn’t work on all surfaces. We recommend avoiding surfaces like wood, plastic, and cloth which are considered to be porous.

Using mayonnaise on these surfaces can lead to damage or stains, but on surfaces like glass, it would be most effective. The method requires you to simply rub the mayonnaise on the surface and then rub until the residue is completely gone.

8. Cooking oil and Baking Soda

How can a mixture of cooking oil and baking soda be used to remove the residue?

The wonders of oil continue! Another oil that works best to remove any adhesive residuals left by a sticker is cooking oil. However, like mayonnaise and peanut butter, it is always best to use on surfaces that won’t leave a stain such as glass.

Another compound that could work is using Baking soda. A prime ingredient used in every cleaning method to illuminate any surface and rid yourself of any dirt or persistent grime.

One specific method is using two tablespoons of cooking oil and three tablespoons of baking soda. When you mix these two ingredients you will make a paste that you could spread on the persistent residue on the surface.

You can use your fingers to rub the paste onto the surface and then you can remove the paste with a paper towel. Make sure that any excess baking soda and oil is removed properly to ensure that it doesn’t leave behind any residual product. If you have any leftover paste leftover, you can use it for any other part of the house to remove any other sticky substance.

9. Wet Wipes

Can you remove sticker residue with wet wipes?

For those who are having a hard time with the other methods or don’t have any of the products needed at home, wet wipes can also help remove the adhesive.

Wet wipes, sanitizing wipes, or Clorox wipes can remove sticky residue thanks to the alcohol that it contains which is proven to assist in the other methods.

10. Acetone or nail polish remover

How does acetone or nail polish remover assist in removing sticker residue? 

Generally speaking, when using stickers, most people determine that it is being used on surfaces but some children get their stickers stuck on their clothing.

Although it can be fairly easy to remove, some material can be incredibly difficult to pluck out the residual adhesive from. It can be even more difficult if the clothing has already gone through the dryer, making it almost impossible to remove.

For those difficult times, acetone can work to remove the adhesive or simply a nail polish remover. This mostly works on natural fibers. Simply rub into the acetone with a clean cloth, then wash and dry your clothing to completely remove the substance.

11. Rubber Eraser

It can seem a little odd but, can you remove sticker residue with a simple rubber eraser?

At first, it can seem questionable, but removing residue with a rubber eraser works just as well as these other methods. Due to an eraser’s rubber surface, it can gently roll off the sticker residue right away.

This method is gentle and won’t damage most surfaces like plastic, wood, glass, or cloth. Make sure to lightly brush the eraser against the residue for optimal efficiency.

12. Goo Gone or WD-40

Goo Gone

If you would like to purchase an item that was specifically manufactured to remove adhesive or pesky residue from stickers then look no further than Goo Gone.

Goo gone can minimize the endless effort it can take to remove partial residue with one simple application of the product. Just dab the product onto the surface, let it sit for a few minutes, and then wipe it away with a cloth.

WD-40

WD-40 works in similar ways. This product comes in a spray form which can lead to more precise targeting. You will spray the product onto the surface, let it soak for 10 minutes, and then wipe away with a paper towel or cloth. It’s that simple.

This method is sure to aid you in your quest for erasing the persistent annoyance of leftover sticker residue.

TESTEST
Categories

Spring Cleaning Checklist – The Ultimate Step by Step Guide

The beginning of the great cleanse

When spring comes around, birds fill the sky, flowers start to bloom, and a faint smell of freshener is in the air. That’s right, spring is known for the time of year where you vacate all of the nuisances that fill your home. This includes trash, old furniture, pests, and organize your home to be rid of the clutter.

But mostly, it’s the time for spring cleaning. What is spring cleaning you ask? Spring cleaning, in essence, is the time for thorough cleansing of your home, whereas any other week it would be a simple cleaning.

It is important to begin this process every spring, as spring generates an overwhelming amount of pollen, pests, and other allergy provoking symptoms that could deter you from your regular lifestyle. Many who know this process, are aware of the critical role that spring cleaning can have when starting the new year.

When the new year arrives, it brings in new opportunities, changes, new friends or relationships, and breathes new unexplored territory. With that being said, it’s only proper to begin the year by deep spring cleaning your home to rid the air of any past energies that reflect the old and not the new.

For new homeowners, it can be a bit complex and difficult to understand how or where to start deep cleaning. That is why it is important to keep yourself organized and write a spring cleaning checklist to keep track of your duties. A spring cleaning list can save you time squandering your home looking for what cleaning duty to perform and which room.

This list can also improve your cleaning by reassuring that you tackle specific spaces that would ordinarily be missed in a normal daily cleaning. While many homeowners hire a spring cleaning service, we’ll show you cleaning methods that you can do in your home without leaving a dent in your wallet.

Entryway

What to clean at the entrance of your home?

The beginning of deep cleaning your home means taking a look at the very front of your household. This means the entryway, a place where people regularly stomp their feet and leave their shoes, jackets, or other belongings as part of the preferable placement.

Entry-Way-Cleaning

While other homes simply have a welcome mat or a simple coat hanger, it’s still important to make sure that this area remains polished for all the guests to see. The following list is what every homeowner needs to look out for when cleaning the entryway:

  • Sweep and mop – make sure to sweep and mop the floor behind the door as this area is always being stepped on with outside shoes or can have shoes behind the door regularly.
  • Wipe – wipe down the walls and baseboards.
  • Clean – make sure to clean the door and doormat as these places usually accumulate a lot of dirt due to human touch.
  • Organize – make sure to organize the shoes behind the door as sometimes guests or family members may put their shoes in the middle of the doormat, making it a hazard for others.
  • Hang – make sure to hang up your jackets to have proper organization.

This area must be maintained so when you invite guests over, they will feel welcomed immediately as they walk in through the front door. For a more heartwarming visit, it is better to increase the level of organization at the beginning of your home to set a standard throughout.

Kitchen

What are the important places to clean in the kitchen?

Without a doubt, one of the most problematic places when it comes to cleaning is the kitchen area. Every nook and cranny can easily be filled with grease, oil, or dirt due to the porous nature that the kitchen’s structure contains.

Kitchen-Deep-Cleaning-Checklist

Cooking in the kitchen is filled with a delightful atmosphere because of the creative liberty you can take with the meals. But the aftermath of cooking is less than glamorous or delightful, whether it’s dirty dishes or simply cleaning the surrounding area where you cooked.

When it comes to daily cleaning, many new homeowners often miss certain areas that can later turn into mold or other hazardous air pathogens you wouldn’t want to breathe in. What are the areas that need the most spring cleaning you may ask? The following are some areas that you need to tackle:

  • Stovetop – one of the areas that get the most dirt is this one, due to the proximity cooking that happens here.
  • Oven – like the stovetop area, the oven starts to accumulate dirt after each use, it is important that it is cleaned and maintained
  • Microwave – heating food can lead to odor, moisture – and if you’re not careful – spillages. This appliance needs to be cleansed.
  • Kitchen cabinets – always overlooked but need to manage closely are the kitchen cabinets which are often used for dishes, seasonings, and cooking ware.
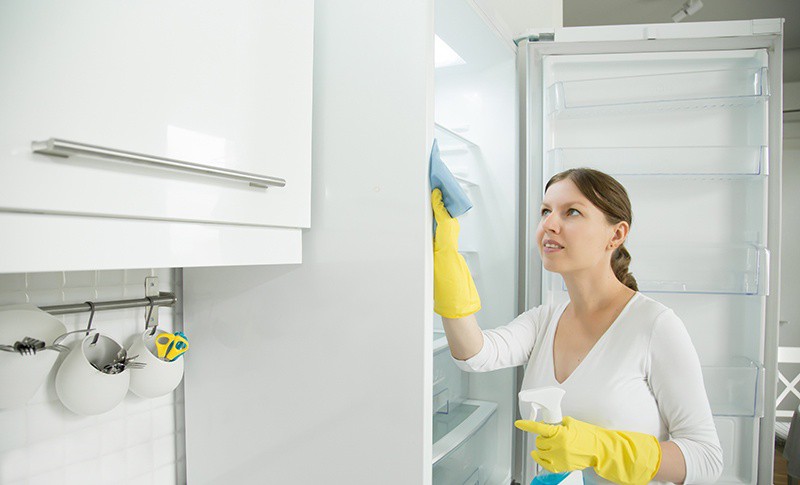
  • Fridge – it is important to clean the surface, beneath, and interior of the fridge as this is where the most bacteria can grow from. If possible, moving the fridge to vacuum and mop is essential.
  • Kitchen drain – constantly shoving bits of food down the drain can lead to clogging or foul odors if not washed properly.
  • Wipe surfaces – this includes all appliances from the fridge, microwave, toaster, stovetop, oven, and anything else being used for food
  • Wash cleaning tools – such as sponges and dishrags if they are being used to clean frequently, they need to be sanitized.

We seldom take a thorough look at our kitchen as most of the time, we tend to look at the bigger messes that occur in this part of the house. However, it is critical to not overlook this space as it can lead to more trouble than you started with.

Dining Room

What are the most important areas to clean in the dining room?

One of the most popular rooms in a home is none other than the dining room. Whether you’re having guests over, hosting a holiday event, or simply having a family get-together your dining room must stay in mint condition for a pleasant experience.

Dining-Room

Although this should be the case, many homeowners skip out on cleaning duties when it comes to the dining room area due to the significant amount of work cleaning the rest of the household takes. But when spring is just around the corner, it is time to prepare to tackle this area of the home for maximum aesthetic appeal and a more polished look.

The following is a list of areas to remember when cleaning the dining room:

  • Cabinets – the dining room cabinets sometimes hold delicate china or another décor, this area needs to be dusted and wiped down
  • Table linen – tablecloth and other seating linen need to be washed thoroughly as well as sanitized due to the high level of bacteria it tends to have.
  • Dusting – dusting the tables, chairs, cabinets, light fixtures, blinds, curtain rods, and other storage areas of the dining room
  • Polish – polish the silverware, furniture, and seating chairs
  • Wipe down – wipe down the walls, baseboards, windows, and window sills

The dining room is a critical area of the home that needs to be maintained as it is where family members get together in celebration for a warm dining experience that serves to unite all and aspire for connection. With that being said, a dull or dusty dining room will limit the happy interactions. This spring makes it a point to emphasize cleanliness in your dining room space.

Living Room

What are the areas to look out for while cleaning in the living room?

Another popular gathering place in the home is the living room area. Here family members, guests, and loved ones spend time for entertaining purposes or simply for quality time. Due to these mass gatherings, it can often be one of the most bacteria or dirt-filled places in the home.

living-room-cleaning

That is why it is critical to maintain this area and have a thorough cleansing in the springtime. Most living room areas have a wider space for social engagements or simply due to the floor planning, which means that it is easier to accumulate dust in certain areas of the room that tend to get overlooked.

The following are some spaces in the living room area that need to have a deep cleaning this spring:

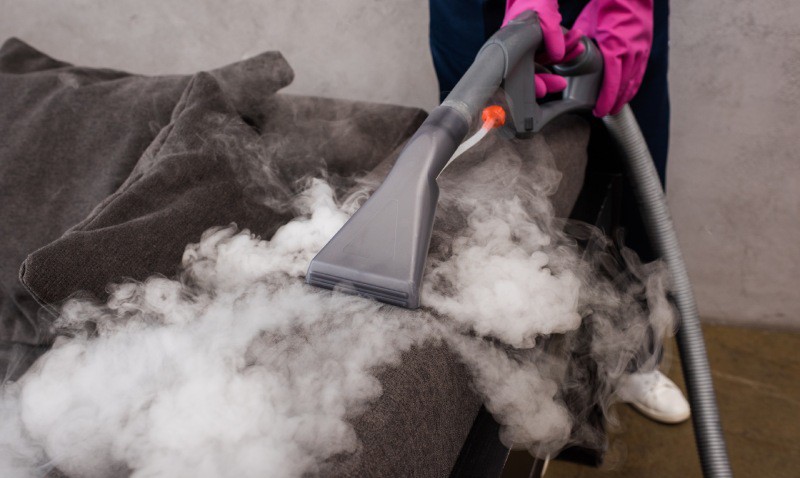
  • Deep clean – the couch cover or linen needs to be thoroughly washed or cleaned depending on the fabric type, as well as the throw pillow covers for maximum hygienic sanitation. Steam cleaning is highly recommended.
  • Vacuum – vacuum all the rugs or upholstery including the curtains as well as lamp shades
  • Dust – dust every nook and cranny in the living room area for efficiency, make sure to also give the light fixtures a thorough dusting as they can accumulate the most dust in the room
  • Mop – make sure to mop every area that has been vacuumed for a polished look that will impress guests the next time they step into the room.

This area holds the key to establishing deep-rooted connections when the family decides to sit down together and discuss any topic they choose. Perhaps it is movie night and you want to make the living room feel comfortable, spring is the perfect time to bring in a more cleanly atmosphere to this particular area.

Bedroom

What particular spaces in the bedroom have the most dust, dirt, or grime?

When it comes to the bedroom area, the haven that every homeowner sleep in, it is imperative to have this area cleaned to emphasize comfort and security. Although this is the case, the bedroom is the place that can have above average sized clutter throughout the year.

Bedroom-Deep-Cleaning-Checklist

It is important that when spring comes around, this is especially true if you have kids and pets, that your bedroom is dust-free to minimize the unexpected allergy triggers that come with it. That being said, here are some places to watch out for when cleaning this area:

  • Wash – all bedding material including the sheets, comforters, pillowcases, and blankets
  • Organize – remove all unnecessary items, clothing, or collective material that you no longer need and donate these items or throw them away.Also, make sure to go through your closet for a thorough investigation on what you need and don’t need.
  • Vacuum – flip the bed mattress to vacuum the other side if possible, then make sure to vacuum the curtains, floors, light fixtures, and carpets or rugs
  • Dust – blinds, curtain rods, window sills, and windows.

Proper cleansing of this area can update your bedroom and give it a brand-new look for the new year. Spring cleaning means out with the old and in with the new! So take time to cleanse your haven.

Bathroom

What are the areas to look out for while cleaning in the bathroom?

A hot spot for mold, bacteria, and other grime is the bathroom. The bathroom is a location that has infinite corners and areas that need cleansing. We know how hard it could be to keep up with and memorize each location that needs to be cleansed, here are a few:

bathroom-cleaning
  • Wipe down – wipe mirrors, walls, baseboards
  • Clean – bathtub, tiles, showerhead, toilet, makeup brushes, vanity, mirror, and bathroom hardware
  • Sweep and mop – the floors and any surface area of the bathroom
  • Wash – shower curtains, towels, bath mats, and replace shower liner if possible

Taking these steps and precautions can save you a lifetime of worry as well as limit any possible mold growth within your bathroom for a safe space for washing your body.

Tips For The Entire Home

What should you keep in mind when cleaning your home?

When you are cleansing your home, it is important to sanitize the following fixtures and small areas:

  • Door handles or knobs
  • Air vents
  • Light fixtures and light switches
  • Walls and baseboards
  • Curtains and drapes

Although these areas of the home are seldom cleaned due to their minimal appearance in the home. They must get cleansed to maintain your home as well as add extra emphasis in your living space that makes for an eye-catching look for your guests. This spring, make sure that your home has a dazzling makeover that will set the standard for the rest of the year.

TESTEST
Categories

How to Clean Glass Top Stove – Simple Guide

A stylish upgrade to your kitchen 

Who remembers gas-powered stovetops? Now a thing of the past, these stoves were always hard to manage due to their risky nature as well as hard to clean surface.

However, nowadays many have upgraded to a more futuristic stovetop, switching out gas-powered to a glass top. This adds an ultra-stylish appeal that easily makes your kitchen look from a dull or worn-out space to a brilliantly defined aesthetic.

But many who are eager to purchase these glass top stoves, don’t look into what it’s like to maintain them. This leads to continuous stains due to inefficient cleaning that could be extremely difficult to scrub away if you’re not using the right products. For those new homeowners, this could also cause incredible stress as they are seldom used to deep cleaning a kitchen, even less a glass top stove.

So, you may ask yourself, how to clean electric stovetop? Although it may seem difficult, various techniques range from a glass cooktop cleaner to baking soda and other home materials. With an extensive categorical list of cleaning solutions, you will need some products to help you remedy your situation including:

  • Baking Soda
  • Hydrogen Peroxide
  • Distilled White Vinegar
  • Microfiber Cloths
  • Bucket
  • Toothbrush
  • hydrogen peroxide
  • Razor Blade scraper

These products will make miracles happen when you have the toughest of stains. Don’t fret! Even the biggest spills can be cleaned with just a little effort. We’ve all been there, you may have been prepping for a big dinner party and somehow spilled some food or burnt the stovetop due to excess heat.

Some homeowners end up calling a home cleaning service, but for those that don’t have the dough, we suggest looking into our glass-top stove cleaning tips to polish up your kitchen or simply to clean up the mess that has been made.

1. Back to basics

Emphasize on simplicity 

Although when many ask themselves, “How to clean glass stovetop?” They imagine that they will be scrubbing away for hours or have to get fancy stove cleaning products that are way over their budget.

clean-glass-stovetop

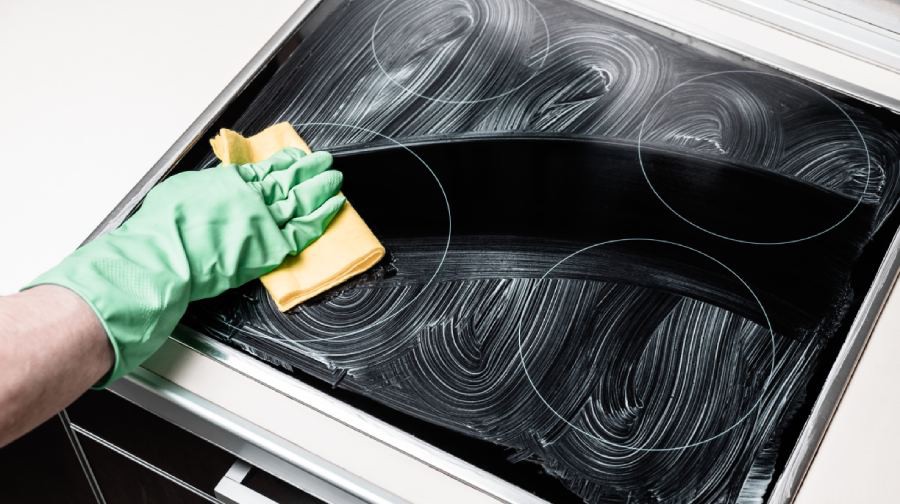
The truth is, that less is more. For those new glass stove top owners, it can be easy to Put away your wallet and focus on strategy. The following a step-by-step guide to simple cleaning method for glass stovetops:

  1. Turn off your stove before cleaning – for those who have handled any stovetop before, you realize that the stove isn’t fully cooled down when it’s turned off. It’s important to wait until the stove is completely cooled before cleaning it, otherwise, you’ll end up with a bigger stain than you originally had.
  2. Don’t use excess cleaner or product – when it comes to cleaning, always start with a bit of product as any leftover residue can be a problem when you start cooking.
  3. Make sure to follow the product’s instructions – a common mistake that a lot of new homeowners tend to make is using a product without knowing exactly how to use it, ending up with several more mistakes than they originally intended. It’s also a good idea to use more gentle cleaners rather than harsh ones, try using organic products or products around the home.
  4. Try not to scrub too hard – we know how tempting it could be to scrub away the burnt area of a glass stove, however, this can lead to scratches or other aesthetic faults. For this issue, it would be best to use soft tools for example a sponge or a microfiber cloth.

2. The magic of baking soda

How to use baking soda for glass stove cleaning

In the cleaning world, many know the magic that baking soda has when it comes to leaving your home brighter and more polished. Baking soda mixed with water can dissolve even the toughest of stains or grease.

The-magic-of-baking-soda

The use of baking soda will also act as a scrub without needing to use a sponge to scrape any burned areas around the glass stove. The following is an easy way to remove any grease or burned stains around your glass stove:

  1. Spread a good amount of baking soda all over the burnt area on the glass stove or the general vicinity.
  2. After that soak a towel in dish soap and hot water
  3. Then place the towel over the baking soda for approximately 15-20 minutes or longer for the baking soda to set in
  4. Once the 15-20 minutes are up, rub the baking soda into the stains on the glass stove. Use a circular motion, and remember to be gentle with the rubbing motions.
  5. You will then clean up any baking soda residue and use another microfiber cloth to shine the area that was cleaned

Baking soda can be used by combining many other products. A popular combination is baking soda and distilled vinegar. Another way to clean your glass stovetop is to use this combination with the following steps:

  1. Remember to wait for your glass stovetop to completely cool off, you wouldn’t want any vinegar or baking soda to burn into your stove.
  2. With a spray bottle filled with distilled vinegar, spray the entire burned area and surface of the glass stovetop
  3. Sprinkle baking soda onto the top of your glass stove
  4. Then you dip a microfiber towel into hot water
  5. Then like the prior guide, you will place the towel on top of the baking soda and vinegar mixture for 15-20 minutes
  6. You will then remove the towel and rub out the baking soda with a clean microfiber cloth
  7. You will continue these steps until the burned or stained areas are completely gone, then you will wash away the glass stove and pat it dry.

3. For the tougher stains

How would you be able to get rid of hard stains?

After completing the above-mentioned strategies, some stains continue to persist. Don’t sit there and continuously use up the entire bottle of distilled white vinegar or a carton of baking soda.

Other options could lead to an easier scrub where you don’t have to exert all your physical force. You also won’t have to think about replacing your glass stovetop any time soon. All you will need is the following:

  • Baking Soda
  • Dish Soap
  • Hydrogen Peroxide

After you have acquired these three ingredients, you’re going to:

  1. Squeeze dish soap onto the burned area or all over the glass stovetop
  2. Afterward, you will sprinkle baking soda on top of the dish soap
  3. Drop a tablespoon or two of hydrogen peroxide onto the mixture
  4. After this use a dish scrubber or a hand scrubbing tool to scrub in the mixture onto the burned part or the stained area of the glass stovetop
  5. Once it is scrubbed off, let the solution sit for approximately three minutes before wiping them off.

Razorblade it

If you’ve just about had it with trying those baking soda mixtures without getting any results, don’t lose faith, there’s still plenty of other options. For example, this next strategy will loosen the burned areas and stains all with the use of a razor blade or scraper tool.

However, we strongly advise you to read the manufacturer’s instructions before doing so. This can save you from accidentally ruining the glass stove top if the instructions are adamantly against it. The following is how to clean glass top stove burnt-on with a razor blade or scraper tool:

  1. Again, make sure that the stove is completely turned off and cool before beginning to clean so that there are zero hazards.
  2. To loosen the burned areas of the glass stovetop, it is important to spray a bit of distilled white vinegar and let it sit for ten minutes or so.
  3. After letting it sit for a little while, you’re going to delicately scrape the burnt residue.
  4. For accurate use, we advise to wield the scraper tool as follows: point the blade at a slight angle away from the glass stovetop so that it is as flat as possible.
  5. It is critical to avoid using the corners of the scraping tool so that you don’t damage the glass material.
  6. After making sure you are holding the scrape correctly, gently start scraping the debris until it starts to come off the glass.
  7. Once you have done this on any burned areas, you will go ahead and wipe the debris clean with a microfiber cloth.
  8. If any stain persists, repeat all the steps until the residue comes off.

This strategy not only helps remove even the toughest of stains with ease, but it also helps deep clean your glass stovetop leaving it polished and brand new for continued use. While it may seem dangerous, it’s extremely efficient and easy to manage for any new homeowner.

4. Dos and Don’ts

Don’t use bleach!

Although it may initially sound like a good idea, bleach products can be extremely harmful when it comes to glass stove tops due to their delicate nature. Using bleach could mean leaving a stain or damaging the exterior of the glass stovetop.

final-thought

Many homeowners use bleach in their bathrooms, kitchen, living room, and general living space to erase any stains or bacteria that accumulate in any corner of the home. However, due to the powerful abrasive nature of bleach, it can damage a gentle surface.

Do not use abrasive cleaners

It may be tempting to use a metal pad to clean your stove if you’re extremely frustrated and want to make that burned area or stain disappear. If you’re a new homeowner, it is a logical conclusion to buy a tool that you’ll be able to remove the stained surface quickly so you choose a tough abrasive cleaner.

This ends up ruining your glass stove even further, so not only will you remove the stain but can potentially damage the class and leave some cracks if it’s done too aggressively. You must be as gentle as possible even when it comes to the cleaning process for a glass stovetop.

Do use a sponge and or/ microfiber cloth to clean

When it comes to cleaning a glass stovetop, the gentler tools are perfect for diminishing the stains or burns. Using a soft brush, sponge, or microfiber cloth with whatever concoction you decide to use will be as efficient as using a more abrasive tool as long as you use it correctly.

While many are unsure of the concept of these tools, just think, would you use a tool that can potentially scratch glass or surface or safely remove the stain with the proper ingredients as well as tools? The answer is to always play it safe when it comes to glass.

Do clean the bottom of your pots and pans

When it comes to maintaining a glass top stove and continuing to practice stain prevention, it is important to get to the foundation of the problem. Often, when we forget to wash the pots and pans, there is a circular layer of gunk that remains at the very bottom of these cooking tools.

We’ve all been there, sometimes we get tired or we don’t have the time to clean the tools at the time. However, this could then lead to burnt stains on the glass stove top the very next time you cook if you continue to use the pots and pans that are dirty. That is why it’s important to clean them every time.

For example, if the pot or pan has accumulated grease on the bottom, it will leave aluminum cooking rings on the glass stovetop. Sometimes it can be removed with a glass cooktop cleaner, other times you will spend an entire day trying to scrape off the excess gunk. Choose the smarter route and clean the bottom of the cooking tools.

Importance of maintaining your stove

When you factor in all of these cleaning strategies, you will have yourself a polished glass stovetop that will wow guests and make for an innovative appliance in your kitchen. It’s important to continue maintaining your glass stovetop in order to lessen the ageing effects so you don’t have to purchase a new one any time soon.

TESTEST