Categories

Simple Guide to Deep Clean Linoleum Floors

One of the sturdiest floor types

If you have an older home or live in an older building in general, chances are you have linoleum flooring. Many new homeowners who discover the flooring type to be linoleum tend to scrounge for ways to adopt new flooring plans whether it’s removing the linoleum or putting fake store-bought flooring.

However, many fail to disregard the value that linoleum flooring can have as one of the sturdiest floor types there are. Linoleum flooring can generally last up to 40 years if taken care of properly. It can also be easy to maintain, as the pigments or coloring of the linoleum is not just on the surface but within the thickness of the material.

This makes it easy to cover up any scratches or slight damages made to the linoleum whereas other flooring materials like tiles, vinyl, and laminate plans cannot be covered as easily. For those who are looking for an eco-friendlier flooring plan, linoleum is the perfect biodegradable and renewable material to have for your interiors.

Having all of these benefits, you may be wondering how to deep clean linoleum floors? You’ll be surprised at how easy it can be once you learn the right strategy, methods, and cleaning solutions to use for this specific flooring material.

Cleaning linoleum in itself is not very taxing and can be cleaned daily by sweeping or mopping. Although this is the case, some homeowners delay the cleaning process due to the overwhelming nature of cleaning a new type of flooring material like linoleum. This will eventually lead to an accumulation of dust and dirt that could in turn make the process more difficult.

This is where deep-cleaning comes in handy, a more in-depth cleansing process that will serve to rid your home of all bacteria, dust mites, and other unsanitary particles. Before you go and call a home cleaning company to spend your money, follow our simple guide to deep clean linoleum floors!

Gather The Materials

What products should be used to clean linoleum floors?

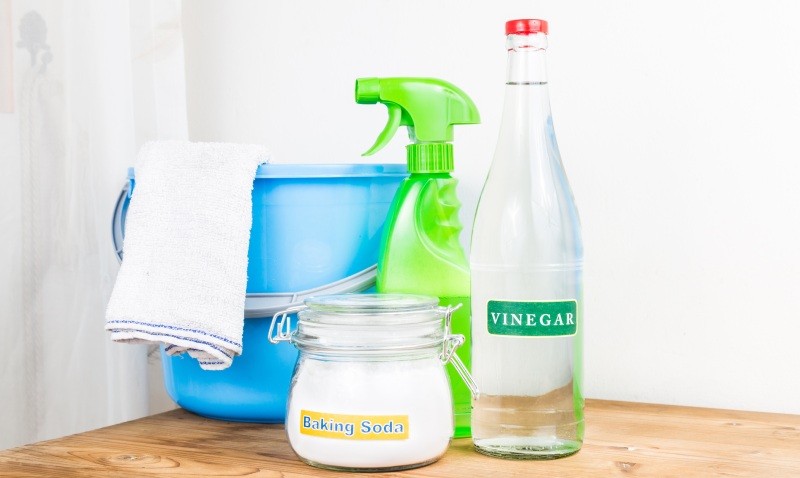
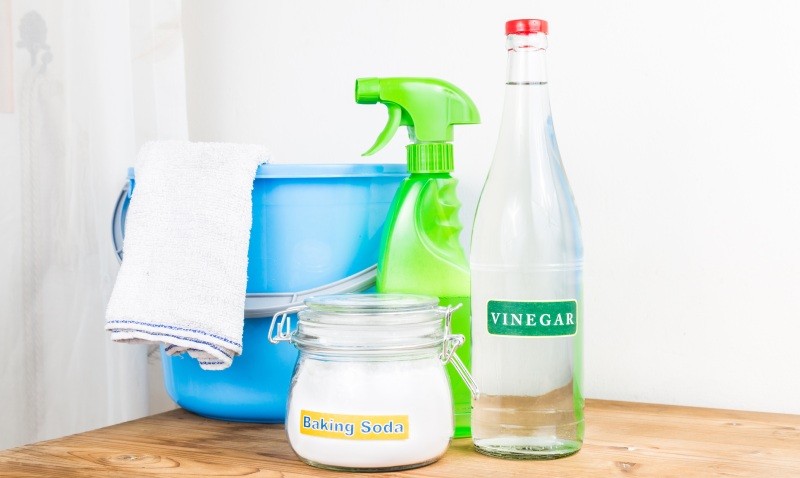
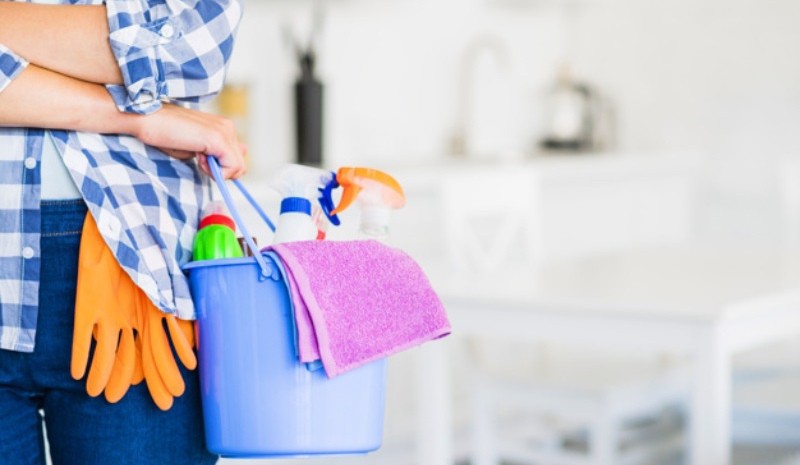
Before jumping straight to cleaning with just any regular cleaning product, remember that there are household products right in your kitchen cabinet that can help with cleaning that won’t leave your home smelling like chemicals. Here are some products you will need for some of the cleaning strategies we will suggest:
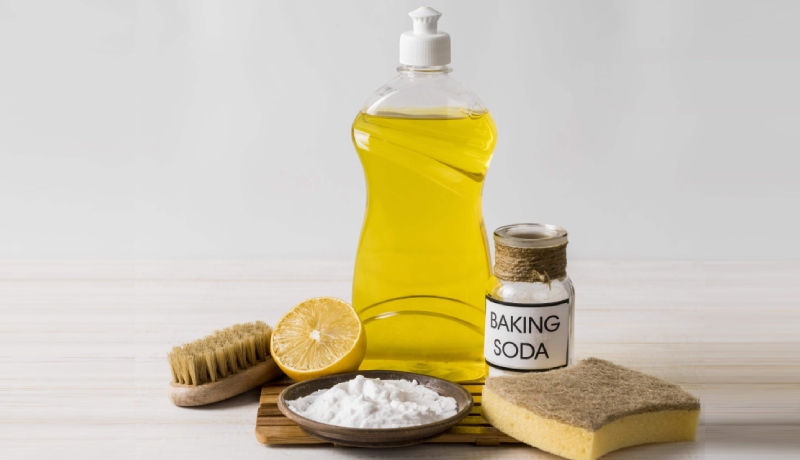
 

baking soda


  • Dish soap
  • Vinegar
  • Baking Soda
  • Castile soap
  • Vacuum
  • Soft-bristled brush
  • Bucket
  • Old towels
  • Borax
  • Linoleum floor cleaner

These products will make a world of a difference to decades-old linoleum flooring. Guests will marvel at the appearance of your floor plan when they see the spotless shine to it after it’s deeply cleansed.

The differences will be day and night as deep cleaning will not only serve as sanitization but also maintenance that will improve the durability of linoleum. Although chemical products pack a punch, we often recommend more neutral products like vinegar and baking soda as they will lessen the chances of allergies or burning your eyes.

Vinegar and Baking Soda

How do vinegar and baking soda work to deep clean linoleum floors?

Before you get down to scrubbing, you’ll need to clear out the debris and loose dirt on the floor. For this part, you will need to vacuum. You can also sweep the floors; however, we believe the best way to get all of the debris is to vacuum so that you get even the smallest dust particle or bacteria.
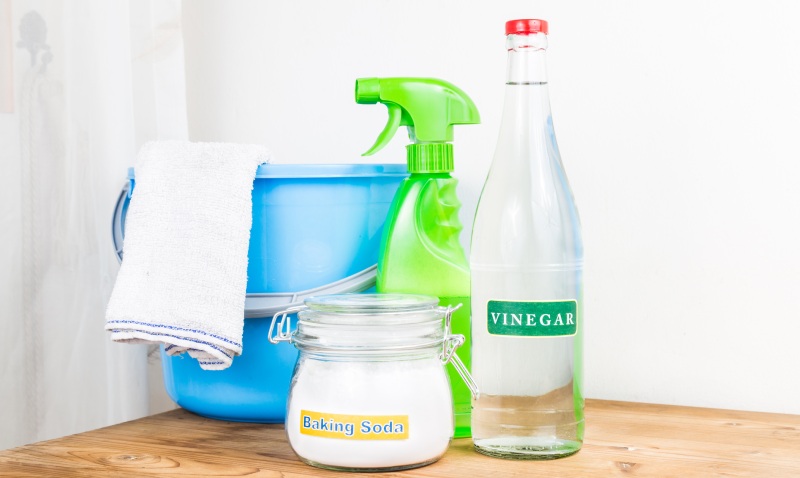
White Vinegar as a Disinfectant Method

Once you have vacuumed the surface entirely, it’s time to get down to business! First up, we have the powerhouse combination of vinegar and baking soda. This solution is guaranteed to break down any bacteria, dirt, grime, or dust mites in the surrounding area. The following are steps needed to use this solution effectively:

  • Combine – you will start by combining 1-2/3 cups of baking soda, two tablespoons of vinegar, and half a cup of water. Mix the solutions well so that there are no lumps.
  • Spray bottle – Add the solution to an empty spray bottle, make sure that the spray bottle is empty so that it doesn’t mix with any other liquid.
  • Distribution – Spray each area of the floor, separate it into sections for easier distribution. Make sure to leave the solution on for approximately five minutes so the dirt can dissolve easily. 
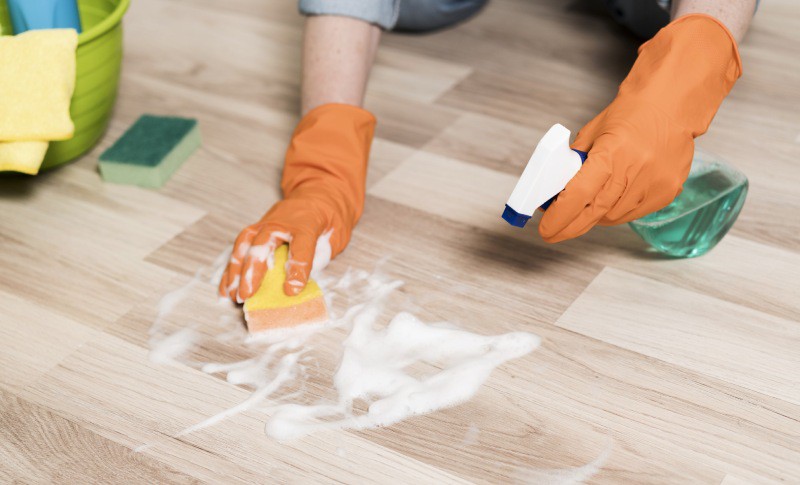
  • Mop – After waiting five minutes, take a damp mop and dip it into warm water, use this to go over the area. Make sure to go over any small corners and crevices as these particular areas are riddled with dust or bacteria. 

After this, you will wait ten more minutes before stepping foot on the tile so that it has time to air dry. If there is any remaining odor from the vinegar it will disappear after an hour.

Dish Soap and water

Can dish soap and water properly sanitize linoleum floors?

So, you’re thinking about giving your linoleum floor a deep cleansing and so you end up doing research, looking for a linoleum floor cleaner. Not only do most chemical-based cleaners cost a fortune, but some tend to be less than effective. Meanwhile, there is a method that will cost you less than three dollars.
Disinfect Kitchen Sponges

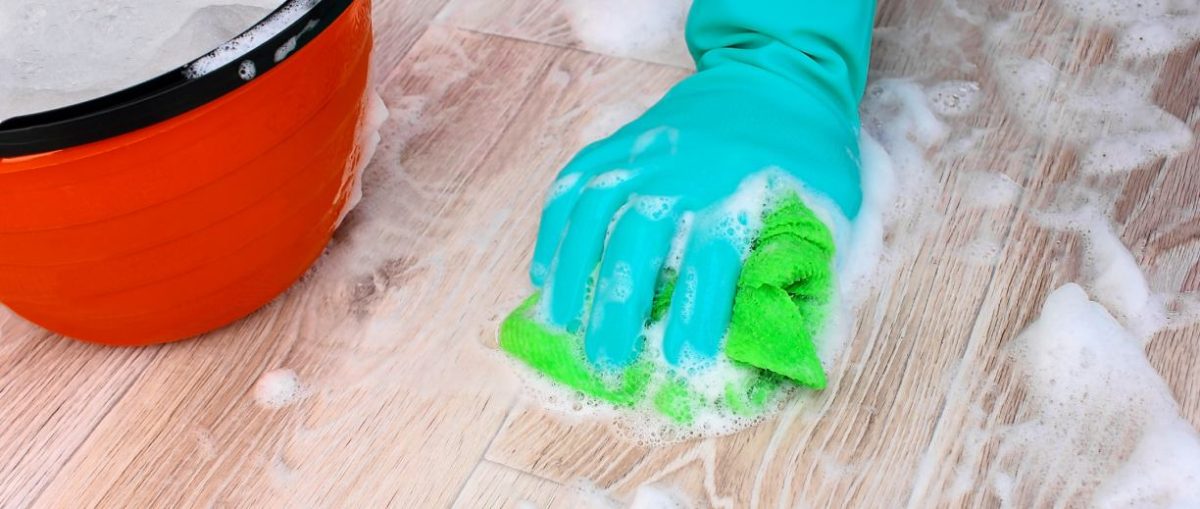
For this method, you will only need dish soap, water, and a bucket. Although many regard dish soap as being less potent than other cleaners, any experienced cleaning professional will tell you otherwise. The following are the steps for the application process:

  • Mix  First, you will add 4-6 drops of soap into an empty bucket, then you’ll fill the bucket with warm water. You can use one or one and a half gallons of water.
  • Mop – Dip a mop into the bucket, mix the solution with the mop until there are suds. Wring the mop so that there is no excess water so that the floor isn’t soaked.
  • Lather – When mopping, we suggest working at the corners and crevices first, then slowly working your way back so that you don’t step on an area that has already been mopped.
  • Clean water – Go over the floor with clean water, make sure the mop has no residue from the solution so that it only distributes the water. Use the same path you took the first time so you don’t accidentally leave footprints on the floor. 
  • Air dry – After the solution has been completely rinsed off, allow the linoleum floor to air dry completely. 

This method is the easiest one as you don’t need to use several products but just plain old dish soap to wash away all of the bacteria and dirt stuck to your floors. You can also spot clean with a sponge if there is a persistent stain or dirt streak on the surfaces.

Vinegar, Baking Soda, and Dish soap

What is a combination that is sure to work for deep cleaning linoleum flooring?

Arguably the best linoleum floor cleaner combination is when you mix vinegar, baking soda, and dish soap. This solution packs a punch that will not only sanitize your floor thoroughly but leave zero dirt or grime residue behind.
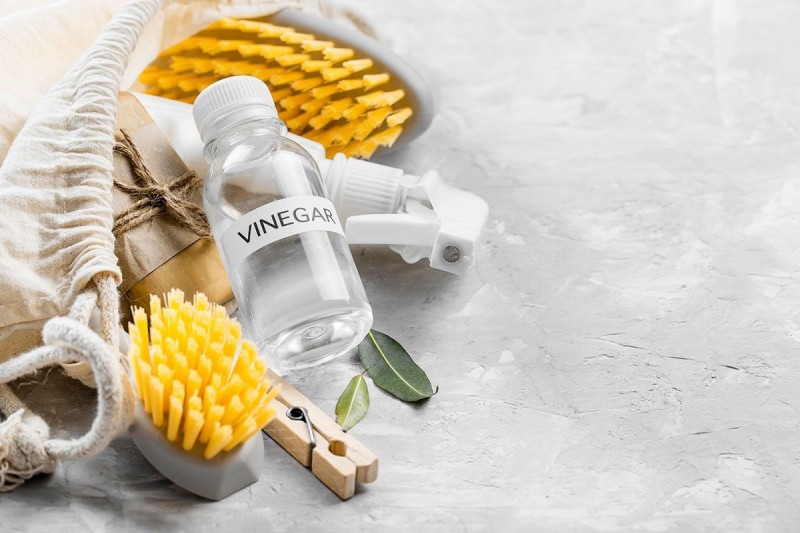
White Vinegar

First, you will need to make sure that the floor is vacuumed or swept. Remember that leaving any loose dirt or debris on the floor before mopping with a cleaning solution will ensure even more dirt streaks than before, that is why it is necessary to clear out these microscopic dirt particles beforehand.

The following strategy is how you should combine and distribute this solution so that it will be most effective:

  • Layout – Layout the baking soda by sprinkling it on the floor, make sure to get the corners and crevices.

  • Combine – Start by combining one gallon of hot water, one cup of vinegar, and a few drops of dish soap.

  • Mop – Fill a bucket with hot water and use a mop to clean the floor with the mixture. If there is any persistent or stubborn dirt, use a scrub brush to clean those areas thoroughly.

  • Clean – After you have mopped the floor with the mixture it is time to mop once again but with clean water to remove the solution and residue.

  • Dry – Dry the floors using a microfiber towel or older towels.

Not only should this method deep clean your linoleum floors but it will leave a shine like no other. This strategy also works well for the maintenance of your linoleum floors so that the chances of durability are heightened.

Borax and Water

Are borax and water a powerful solution for deep cleaning linoleum floors?

Borax has been known in cleaning circles as a powerful go-to method for getting rid of everything from grout to pests. It has chemical properties that maximize its usage for sanitizing your floors as well as helping to remove any stubborn stains on your floors. Using this product to deep clean will easily restore your floors from dirty and dull to clean as well as spotless.
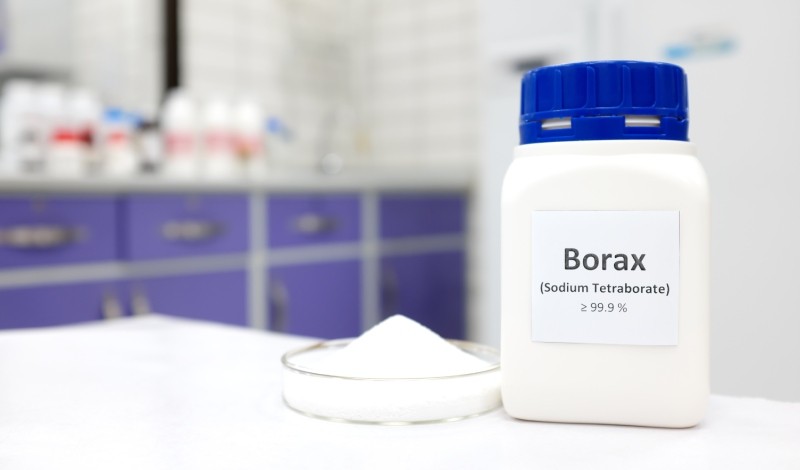
Borax

We recommend being cautious when handling borax as it is a powerful chemical that can be harmful if touched or ingested, for that reason it is necessary to use gloves and keep away from children or pets. To use borax and water, you will need to follow these steps:

  • Combine – First, you’re going to mix two tablespoons of Borax powder with one gallon of warm water.

  • Mop – Use a mop to stir the solution so that the powder dissolves and there are no clumps of powder. Make sure to wring the mop so there’s no excess liquid sticking to the mop.

  • Wash – Start mopping the floors and apply strength to the dirtier areas of the floor. Once the floor has been mopped, go over it again one more time except for this time with warm water to rinse away the solution.

Borax works for all kinds of grime like grout, mildew, mold, and stains. But that’s not all, borax can clear away any pest issues you may have. So, if your house tends to bring in ants, roaches, spiders, or any multi-legged friend then borax will clear away these nuisances besides being a successful deep cleaning formula.

Castile Soap and Water

How can you use castile soap and water to deep clean linoleum floors?

When talking about a safe and eco-friendly way of cleaning, castile soap is rarely ever not mentioned. Made from vegetables, castile soap is less of a danger than other chemical-based floor cleaners. Whether you choose odorless or with light citrus and peppermint scent, you will find that this soap is as easy to use as dish soap when it comes to cleaning.
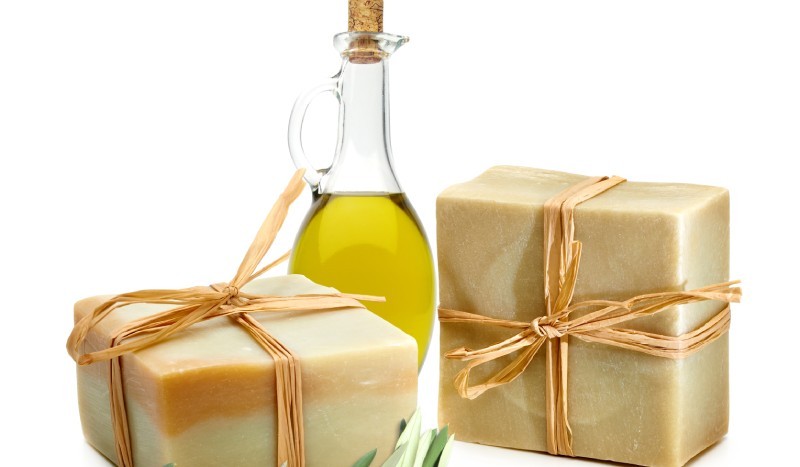
Castile-Soap

The following steps are recommended for deep cleaning with this combination:

  • Combine – After you’ve obtained a bottle of castile soap, pour two tablespoons into a bucket of hot or lukewarm water.

  • Mop – Take a mop and dip it into the bucket, swirl around the solution slowly so there aren’t too many suds. Once you wring the mop, go ahead and distribute the solution evenly using the mop.

  • Apply pressure – Make sure to apply pressure in the mopping process so that the solution is effective. When the linoleum floor has been properly cleaned, rinse out the solution from the bucket and use clean water to mop one final time.

It may take some time for the solution to disperse completely so we suggest rinsing the floor twice. This will leave your floors looking polished and like new.

Maintenance tips for Linoleum floors

What are some helpful tips when it comes to cleaning linoleum floors?

After following this simple guide for deep cleaning linoleum floors, you’re ready to breathe new life into your interiors. However, to elongate your clean floors and emphasize their already durable nature, we suggest using the following tips and tricks to follow.

  • Sweep – Although you may not think so, loose debris and dirt can hinder linoleum floors little by leaving stains or scratches. Sweeping will help avoid these small aesthetic imperfections.

  • Less liquid is more – When it comes to mopping or using cleaner products, using water or liquid is almost unavoidable. In any case, we recommend using as minimal liquid as possible. Using a wrung-out mop and dry mop instead of soaking wet should help.

  • Avoid ammonia – We recommend not using any ammonia-based cleaners as they can slowly damage the Ph in your linoleum flooring.

  • Use warm or cool water – Do not use extremely hot water when you are mopping linoleum floors as it can result in moisture damage.

  • Do not use latex or rubber-backed rugs – When it comes to using rugs to protect your floors, some homeowners invest in latex or rubber-backed rugs so that it doesn’t move. But when it comes to linoleum floors, it could stain them. Go for natural backings instead.

Now that you’re aware of what to do and what not to do when you have linoleum floors, you can keep your home looking spotless and worthy enough to impress guests or family members alike.

TESTEST
Categories

How to Clean Shower Curtain and Liner at Home

Whether you’re cleaning the toilet, shower, or sink one can make the proper deductions that the bathroom area can be a host for bacteria if not cleaned properly. High levels of moisture from taking hot or warm showers can lead to mold and other germs that stick to the surrounding environment.

One of the biggest problem areas is the shower curtain and liner. Many homeowners end up either removing these shower counterparts in exchange for new ones or scrapping the shower curtains for shower doors. Both of these options are incredibly costly and will leave a dent in your wallet.

For those new homeowners who don’t have experience in cleaning duties, we got you covered. The importance of having clean shower curtains and liner is critical when maintaining your bathroom area, bacteria can immediately make your bathroom a less appealing place to be in or to use when you glance at yellow stains or overwhelming mold.

Picture this: you decide to have a get-together with friends, so you invite them over to your home. Before this gathering, you give your home an inefficient cleansing. Believe it or not, there will be a guest who ventures into your bathroom and notices the small details.

This will eventually put off any guest from returning to your home or using your bathroom. Maintaining your home is not only aesthetically pleasing for guests but also puts into question your health and wellbeing. A good start to cleaning your bathroom is cleaning shower curtain and liner, this task is also extremely easy when you have the right strategies.

While many homeowners simply end up hiring a laundry service, we’ll show you a few ways and strategies on how to clean shower curtains.

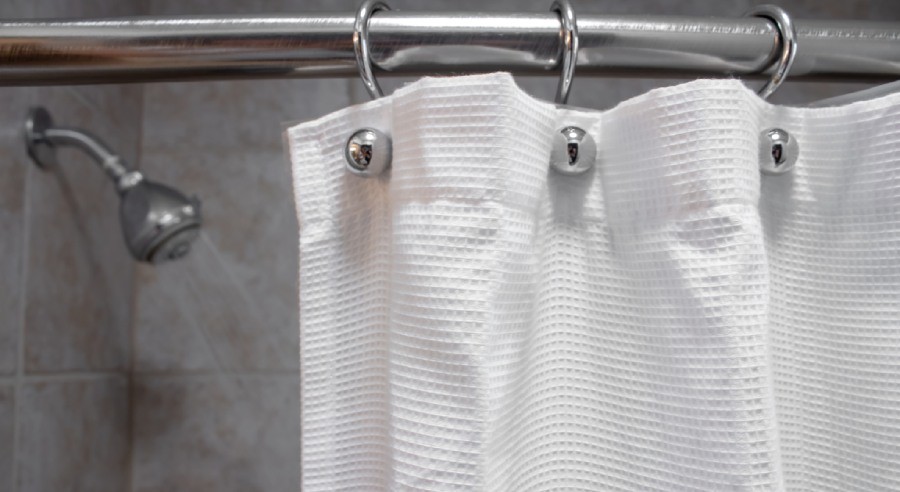
For Cloth Shower Curtains

What is the best way to clean shower curtains made of cloth?

Cloth shower curtains are a bit more complex to cleanse than plastic curtains so for this next strategy, you will need to get detergent and white vinegar.

For-cloth-shower-curtains

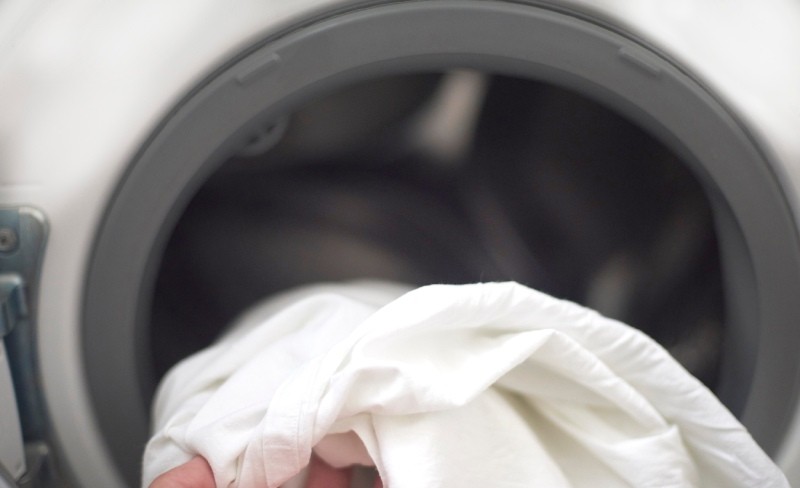
We suggest using white vinegar as it not only removes tough bacteria-ridden stains but also washes away any leftover odor. Luckily you will be able to let the washing machine do the work with the following steps:

  1. Remove shower curtains from the rings: although this is a no-brainer, many new homeowners can accidentally remove shower curtains with the rings on.
  • Start your washing machine and use the warm water setting: A high temperature can have anti-bacterial benefits for your shower curtain.
  • Add a small amount of detergent and one cup of vinegar: With this powerhouse combination, you’ll be able to rid yourself of any stains or smelly odors attached to the shower curtain.
  • Put in the shower curtains: The washing machine must be on a gentle setting to not ruin the cloth.
  • Air dry: When it comes to cloth curtains, it is favorable to have them air dry so there aren’t any loose threads or discoloration. Place the shower curtains back into the rings and let it air dry.

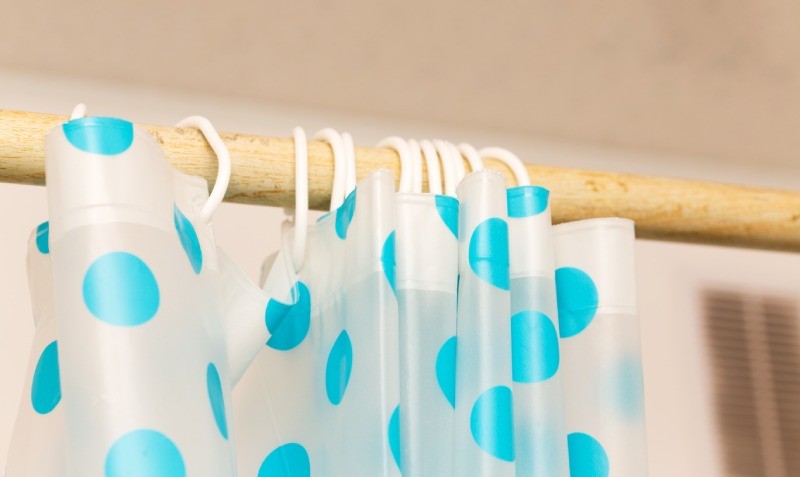
Plastic Shower Curtain

How do you clean plastic shower curtains?

Before going straight to the washer, first, you will need to inspect your plastic shower curtain to spot any mold, spores, or mildew.

Plastic-Curtain

It is important that if your shower curtain has any of these bacterial areas to tackle them with bleach or a similar solution like vinegar with baking soda. Simply using detergent might not cut it when it comes to more serious conditions like these.

When it comes to plastic shower curtains, you can use a washer to clean them, however, it is necessary to follow these steps to ensure that the shower curtains stay properly intact:

  1. Remember to always have it on the cool setting: hot or warm water tends to melt the plastic.
  • Add in some bath towels: This will keep the shower curtains from swooshing around too much which could end up also ruining them if done too hard.
  • Never put the plastic shower curtain in the dryer: as we mentioned earlier, any form of heat can result in melted plastic, so you must keep the plastic shower curtain as far away from the dryer as possible.
  • Air dry: last but not least you will need to hang it back up on the shower curtain rod so it will air dry or hang it up outside for some time until it is slightly damp.

Shower Cleaner Liner

What is the best way to clean the shower cleaner liner?

The shower cleaner liner can have even dirtier areas than the shower curtain since it tends to be closest to the shower making it an inevitable hot spot for mold due to the high levels of moisture and warmth.

Shower-Liner

Most homeowners end up discarding the shower liner every month and buying a new one, often resulting in a costly expense that can be avoided. For the shower curtain liner, you will need to:

  1. Remove the curtain liner from the shower curtain rod: you will also be able to wash the shower curtain liner in the washing machine.
  1. Remember the bath towels: Bath towels are the best way to ensure that the shower liner is completely cleansed in the washing machine.
  1. Always on gentle setting: It is a critical step needed to avoid damaging the shower liner in the washing process.
  1. Air dry: Hang the shower liner back on the curtain rod to dry.

If the shower liner has mold, mildew, or persistent stains you can also give it the bleach treatment. You can also add half a cup to one cup of baking soda mixed in with the detergent before washing the liner, this will help boost the probability of removing the problem areas efficiently.

Once it is in the rinse cycle, you can add half a cup or one cup of distilled white vinegar. This will help lessen any odors that it also may have.

A Faster Cleansing

 What is a good strategy for a quick cleansing for shower curtains?

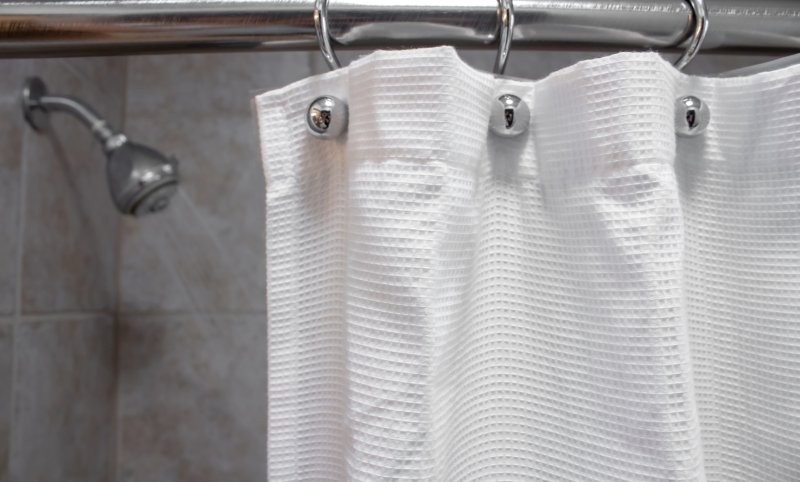
 If you ever find yourself needing to expedite the cleaning process due to unforeseen circumstances such as an impromptu visit from guests or family. We’ve all been there, a visit from the in-laws or those spontaneous friends who like to drop in, then as soon as they step into your home with judging eyes, they see an unkempt mess of a space. White-Vinegar-as-a-Disinfectant-Method For those who have some time before the visit, fret not, you can wash the shower curtain at the least to prep the bathroom by following these steps:
  • Mix one part white vinegar to four parts water: After mixing the solution, pour into an empty spray bottle.
  • Extend the shower curtain: Make sure that the shower curtain is extended to its full length before spraying the solution to get every part.
  • Spray the solution on the bathtub side: The inner side of the shower curtain is usually the grimiest so it is necessary to spray this area mostly.
  • Scrub the bottom if stains are persistent:  Some stains are particularly more difficult to remove than others, for those we recommend using a brush or sponge to loosen the dirt or grime.
  • Rinse the curtain:  The final step is rinsing the curtain with either a handheld showerhead, a bucket of water, or a spray bottle filled with water. Make sure to rinse from the top-down, getting all areas of the curtain.

After this you will extend the shower curtain so that it can air-dry, to mask any lingering odors it is recommended to use an odor-free freshener spray. Using vinegar and water is a powerhouse combination as vinegar breaks down any mold or grime easily. This should help you steer clear from any judgmental eyes from visitors.

Deep Clean Solution

What are some ways to deep clean a shower curtain and liner?

Many homeowners decide to skip out on shower curtain cleaning duties due to their unawareness or laziness.

Deep-Clean-Curtain

The dirt and grime eventually accumulate for months, this could lead to foul odors or mold which will make the bathroom look even more unsightly. In terms of health, mold can lead to sickness or allergic reactions. This is why it is especially important to maintain your shower curtain.

However, fear not, if you find yourself dreading the abnormally grimy state of your shower curtain then there is a deep cleaning method that can work well against the stubborn dirt or stains. Here are the steps:

  • Hand washes: to get some of these stains out, you can hand wash and scrub the shower curtains in the bathtub or sink.
  • Baking soda: we cannot stress enough the magic of baking soda, you will use a quarter cup of baking soda and a small amount of detergent
  • Odor-free freshener: to mask any odor, either use an odor-free freshener or vinegar rinse to completely disperse any foul smells.
  • Air dry: No matter which way you wash your shower curtain, air drying is the only way to dry your shower curtain to avoid damage that could occur in a drying machine.

The alternative to this deep cleaning method is to wash it in the washing machine, which will be less of an effort, however, it can be less efficient as it doesn’t spot treat the shower curtain or liner.

In this case, you can spray a vinegar and water solution on the stubborn areas before putting the shower curtain in the washing machine. This will assist in removing the stains or dirtier areas completely after removing them from the machine.

We also suggest throwing the shower curtain in with some towels if it’s plastic to keep the curtain from sticking together and not washing properly. When it comes to this deep cleaning method, we suggest putting a warm or hot setting on the machine as the heat will likely kill any bacteria.

Once it is clean, you can go ahead and let it air dry like the previous method as well. These methods are sure to do the trick when you’re faced with a shower curtain that hasn’t been cleaned in weeks or months.

Tips For Shower Curtain Maintenance

What are some tips when it comes to maintaining your shower curtain?

If you want to avoid having to deep clean your shower curtain or make too much of an effort trying to scrub away the stains, we suggest some of these tips that will avoid your shower curtain getting dirty on a weekly or monthly basis.

  1. Keep your shower curtains extended: This will help the shower curtain fully dry in between showers, when it is bunched up the leftover moisture will lead to mold.
  • Swap bar soaps for body wash:  Many are unaware of this little-known fact, but bar soaps tend to cause more grime build-up in the shower than body wash.
  • Odor-free freshener: When it comes to keeping your shower curtain in great shape, you will also need to tackle the odor problem every week by spraying or applying an odor-eliminating freshener of your choice.
  • Exhaust fan: Some homeowners have an exhaust fan in their showers which can help lower the humidity that arises when taking a shower. Running the exhaust fan is a must and can decrease the chances of mold.

Other than these tips, it is critical to clean your shower curtain on a weekly or biweekly basis to avoid more serious issues such as mold, mildew, or overflowing bacteria.

When you wash shower curtain, you’ll have one less area of the shower to worry about. Naturally, since the shower curtain and liner are a hot spot for bacteria, you will decrease the risk of it spreading throughout your bathroom. Now, you can save those twenty to thirty dollars you would spend on a month-to-month basis on new shower curtains and you can say hello to a clean mildew/mold-free shower space.

TESTEST
Categories

8 Simple Ways to Clean Glass Shower Doors

An upgrade to your bathroom

Nowadays, homeowners are leaving behind shower curtains and shower liners in favor of glass shower doors. This update to any bathroom will immediately bring refinement and style to your home. Glass shower doors can immediately turn your frumpy or dull bathroom into a magnificently modern space.

However, when it comes down to home cleaning, glass shower doors can be tricky if you’re new to having them. Many homeowners make the mistake of cleaning glass shower doors the way they would clean glass windows. It is a bit trickier than that, this is especially the case due to the high level of bacteria that lurk within the bathroom space. High levels of moisture can lead to mold, grime, and other dirt that will slowly accumulate if not dealt with eventually.

It is not only important to maintain your bathroom’s appearance for aesthetic reasons but also health reasons as well. Your shower space is meant for meditational purposes, a place to relax and cleanse your body as well as your mind. If your shower space is dirty or grimy, it can turn what would be a relaxing space into a horror show.

The first thing you’ll need to do is round up the tools and materials needed to clean your glass shower doors, it’s okay if you don’t have all of these materials as only some can be sufficient to sanitize your space. You will need the following:

  • Spray bottle
  • White vinegar
  • Baking soda
  • Glass cleaner
  • Microfiber cloth or towel
  • Scrub sponge
  • Razorblade scraper
  • Hydrogen Peroxide
  • Rubbing alcohol
  • Peppermint essential oil
  • Lemon
  • Vodka
  • Ammonia

It is important to make sure that the bathroom area of the home is clean. Updating your bathroom with glass shower doors will automatically boost the aesthetic look, it is your job to keep it looking that way. The following are 8 Simple Ways on how to clean glass shower doors.

1. Vinegar and Water

How do mixing vinegar and water help in the removal of bacteria, dirt, or grime?

Those who are familiar with the powerhouse combination of water and vinegar know the effectiveness of this solution when it comes to getting rid of bacteria or odors. Not only is this solution fairly inexpensive and affordable, but it can help restore your glass shower doors to their original state without the use of harsh chemicals.

White-Vinegar

The following are the steps on how to use this solution:

  1. Make the solution: Mix one part white vinegar (distilled or normal) with three parts warm water.
  2. Spray bottle: To distribute the solution evenly, you will pour this liquid into the spray bottle.
  3. Spray: Spray onto the shower glass doors, make sure to get all the corners and small crevices of the doors as that is where the bacteria, dirt, or grime tend to accumulate the most.
  4. Rinse: Rinse the area with warm water using a showerhead, different spray bottle, or a bucket to get the solution off thoroughly.
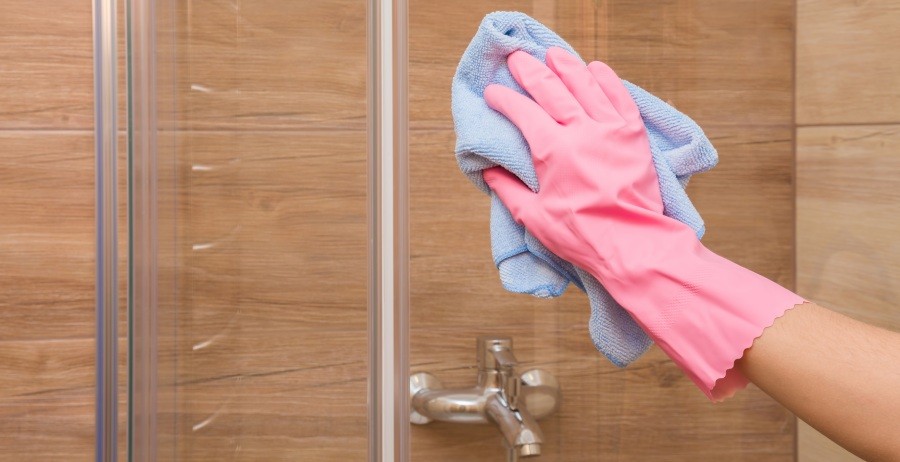
  5. Wipe: use a microfiber towel to wipe the area clean and dry, that or any towel or cloth you have.

If there are harder to remove areas, we suggest using a sponge or soft scrub brush to remove these persistent spots. One particular problem is soap scum if you happen to use bar soap, it starts to accumulate in the shower often.

Soap scum usually leaves residue and can be very hard to clean. However, vinegar and water can make for a breakthrough solution to this pesky issue.

2. Vinegar and Dish Soap

How can I use vinegar and dish soap to wash the glass shower doors?

Another combination that can be equally as effective is vinegar and dish soap. Match the bacteria-melting powers of vinegar with the sanitary effectiveness of dish soap and you have yourself a solution that will break down dirt in a matter of minutes.

These next steps will aid you in cleaning your glass shower doors:

  1. Combine: start by mixing equal parts dish soap with white vinegar.
  2. Pour: Put the mixture in a spray bottle, sponge dispenser, or lather it with a sponge.
  3. Scrub: use a sponge to scrub the glass shower doors, making sure to get all the small areas including creases, crevices, and everything in between.

3. Baking Soda and Vinegar

How do baking soda and vinegar help in cleaning glass shower doors?

The vinegar chronicles continue! This time, a mixture of baking soda and vinegar packs a powerful punch when it comes to ridding your glass shower doors of all impurities. Baking soda is a household ingredient that can serve a purpose when it comes to cleaning.

White-Vinegar-as-a-Disinfectant-Method (1)

Using this combination will help get rid of the dirt and grime as well as deeply penetrate any stain left from soap scum. Vinegar will take care of any odors that stick around due to these pesky aesthetic nuisances.

First, you’ll need to combine half a cup of baking soda and white vinegar to make a paste-like substance. Next, you will wipe down the shower glass door with the paste, for this, you can use a sponge to dab the paste and lather it over the glass.

After this step, you will let it sit for 10-15 minutes. Remember the longer you let this paste sit, the better it will be at penetrating the dirt and grime making it easier to remove.

You will then wipe it off with a wet cloth or paper towel. Make sure to dry the glass door completely so there is no leftover residue.

This method can be used to clean other parts of the bathroom as well, and it is one of the most effective methods to rid yourself of any grime.

4. Lemon and Water

How can lemon and water help with removing dirt, mildew, or mold on glass shower doors?

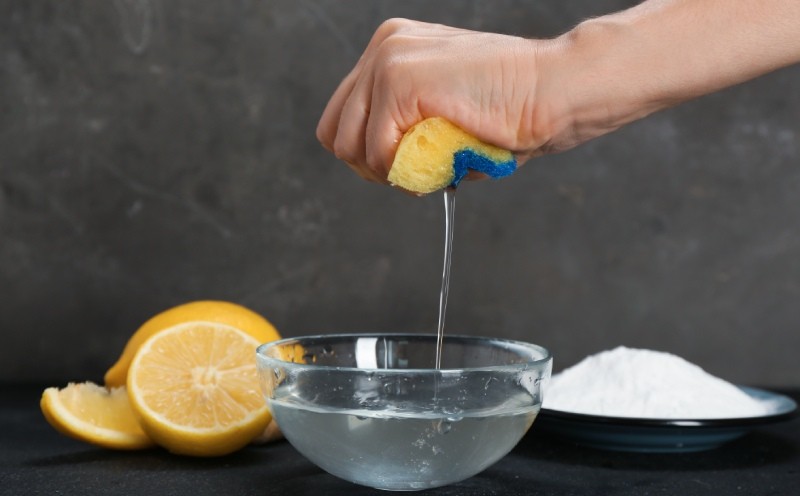
Lemon has always paved the way when it comes to simple and affordable cleaning solutions. With its unbelievable cleaning properties that stem from its citric acid component, it packs a revolutionary and practical solution for cleaning your glass shower doors.

Lemon-and-Water

Aside from its sanitary benefits, it will leave your home smelling delightful after a swift cleaning. The following is a method using lemon and water to disintegrate any bacteria on your glass shower doors:

  1. Prepare: This solution will require two to three lemons, squeeze them out into a container to get the juice. About three tablespoons are needed.
  2. Water: Add one cup of distilled water to the mix.
  3. Pour: Next you will take the solution and pour it into an empty spray bottle so that you can spread the mixture evenly. Make sure to shake the solution so it will mix thoroughly.
  4. Spray: Spray your glass shower doors, make sure that you get the creases and corners of the glass door as these areas are usually the first to accumulate dirt.
  5. Soak: Let the mixture soak on the glass door for about five-ten minutes.
  6. Wipe: Next you will take a microfiber cloth and wipe away the solution, make sure that all the solution is completely gone so there is no leftover residue.

Incorporating this solution onto your glass shower doors will mean instant sanitation and shine that will be sure to impress any guest that steps into your bathroom.

5. Hydrogen Peroxide and Rubbing Alcohol

How can hydrogen peroxide and rubbing alcohol remove bacteria from glass shower doors?

If you have been having a hard time with the more natural-based ingredients, it’s time to step it up a notch! Next, we’ll cover two ingredients that are bound to do the trick when it comes to recovering your glass shower doors back to their original state. Remember when you first purchased the shower glass doors?

Completely brimming with elegance and shine, it made a transformational update to your bathroom’s aesthetic. But along the way, build-up due to soap scum or mold from the consistent moisture develops around the corners of your glass shower doors.

This ends up converting your once-perfect glass shower doors into the dulled-out subpar version. Not to worry, we have just the method to revamp your doors and get them to look as brilliant as they did before:

  1. Combine: Mix half a cup of hydrogen peroxide with an equal amount of rubbing alcohol, for extra effectiveness add one tablespoon of dishwasher rinse aid or one teaspoon of liquid dish soap.
  2. Pour: Next you will get an empty spray bottle and pour the solution inside, make sure to add a bit of water to dilute it.
  3. Mix gently: make sure to stir the ingredients gently to not cause the solution to get foamy.
  4. Spray: You will then spray down your glass shower doors evenly and throughout. Spray as much as possible to get all the muck out of the doors.
  5. Rinse: Once it has soaked for a good amount of time, you will rinse it with a showerhead or bucket of water. If there is any leftover grime, you can use a sponge or razor blade scraper to get the bits out of the glass door.

This method should work to get any stubborn stains or odors out of your glass shower doors with complete efficiency.

6. Ammonia and Water

How can the combination of ammonia and water accomplish cleaning glass shower doors?

When it comes to cleansing your bathroom space, simply using an ammonia-based cleaning solution can do the trick. Cleaning your bathroom space with ammonia will mean that you will need to make sure that it is diluted with water as it is a strong and odorous chemical.

This solution can be especially effective when it comes to water streaks or water droplet marks that are hard to remove. First, you will mix two tablespoons of ammonia with warm distilled water, then you will pour it into an empty spray bottle.

After this, you will spray the glass shower doors thoroughly making sure you got all areas including the corners and crevices. Once you’ve let the solution sit for approximately three to five minutes you will wipe away the solution with a dry clean microfiber towel. This method will prove to be resourceful against any stubborn marks and bacteria stuck to your shower doors.

7. Peppermint and Vodka

How can a mixture of peppermint and vodka help remove stains, dirt, or bacteria from glass shower doors?

Although this cleaning solution may sound a little obscure, you’d be surprised at how incredibly effective it can be when it comes to cleansing your bathroom space. Whether you’re deep cleaning your glass shower doors or simply giving them a daily scrub, this combination is sure to work well.

Simply mix half a cup of vodka with one cup of water. Then you will add ten drops of peppermint essential oil to the mixture. After this, you will pour the mixture into an empty spray bottle and spray the solution throughout your glass door. We recommend doing this after every time you step out of the shower as the high level of moisture will make it easier to remove the dirt and grime.

After ten to fifteen minutes you can go ahead and rinse your doors with a showerhead or bucket of water. You can either do this daily or weekly to suit your needs.

8. Glass Cleaner for Shower Glass Doors

Can a glass cleaner for shower doors be effective in removing grime?

If all else fails and your shower door still has a lot of muck, dirt, mildew, mold, or mildew stuck to it, we suggest finding a glass cleaner for your shower glass doors. The reason it can be hard to remove some water stains or watermarks in your shower area is due to the hardness of the water in your area.

Harder water is primarily made up of components such as higher levels of calcium and magnesium, as well as other minerals. This later can be a problem as homemade cleaning solutions prove less than effective when it comes to removing basic stains or marks. That is why it may be easier to find a non-abrasive cleaner on the market that can tackle these issues more effectively.

To sum it all up (image below)

It is important to remember that how we maintain our bathroom and home says a lot about who we are as people. If you clean your glass shower doors daily or at least weekly, you are bound to have an easier time removing any gunk that sticks to the surface.

Keeping this up, you’ll notice that you will get a lot more compliments from visitors and loved ones as well as keeping up a sanitary environment free of any risks to your health.

TESTEST
Categories

12 Simple Ways to Remove Stains from The Wall & Ceilings

A Tangible Solution for a Pesky Problem

Ever look around your house and find yourself staring at an age-old stain on your wall or ceiling wondering, “How did that get there?” you’re not alone.

Hey, we get it, stains happen. Whether you are trying to be extra careful or you simply had a rough day, stains tend to leave an unsightly appearance in your home. In any case, you’re left to wonder “How to get stains off walls?”

It may appear simple, but it tends to be quite difficult. The first thing you try will be the scrubbing option. This method will not only make you exert more energy than you have but it could end with unsatisfactory results.

Let’s face it, we don’t all have hours and hours to waste on one solitary stain, do we? It could even take days if you’re stuck using the same archaic strategy. It could even destroy your wall’s paint if you scrub too aggressively.

Usually, if you have a white wall, these stains tend to be even more noticeable as time goes on. You’ll go home and see a big sign pointing to your mistake every day if you don’t take care of this issue.

Not to worry, where there’s a will, there’s away. Even though the matter at hand may seem difficult, it can be quite simple if you use the right strategies but even more so the right tools and chemicals.

We’ll show you how to clean wall stains and better yet how to get marks off walls without removing paint. This is our list of 12 simple ways to remove stains from the wall and ceilings, so you won’t have to endure having to explain to your guests how the accident occurred time after time.

1. Tools Needed


What are the products and tools needed to remove stains from walls and ceilings?

As we mentioned previously, having a pesky stain problem needs to be tackled with the right products and tools. Some of these items can be found in any household and others be bought at your local grocery store.

White-Vinegar

Since we will go through various methods and strategies, you do not need to have all of these products but only some necessary ones that will get the job done.

These items are critical when it comes to properly remove the stains on the wall, the items include:

  • Two buckets
  • 2 gallons of warm water
  • Liquid detergent
  • Vinegar
  • Baking Soda
  • natural sea sponges
  • Clean white microfiber cloth
  • Paint roller
  • Spray bottle
  • Duster
  • Vacuum
  • Cornstarch

If you already have some of these tools in your home, we recommend cleaning them thoroughly before use. It can be extremely damaging to use tools that haven’t been cleaned as they can worsen the stain.

Worried about needing to go out and spend money on cleaning utilities? Not to worry, most of these items are affordable so you won’t have to lose a chunk of your wallet.

2. Grease Stains

How can you remove grease stains from the wall?

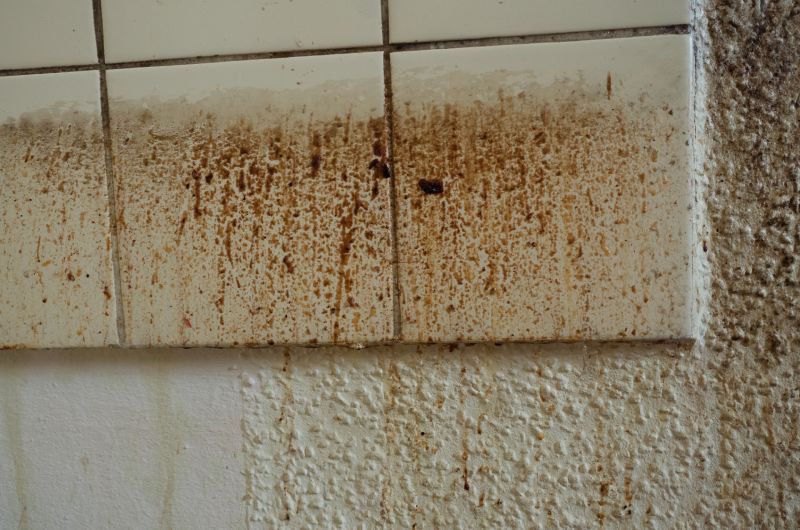
If there is any stain that tends to be persistent, it’s grease stains. Typically, grease stains happen around the kitchen area due to the amount of grease used to make foods. These stains end up becoming increasingly visible over time.

Grease-Stains

Putting an object in front of it can hide the stain but if you end up moving out or simply wanting to re-decorate the kitchen, the stain will deter you from your original plans. So, you ask yourself “how to remove grease stains from painted walls?”

First, you will need to gather your supplies. Start by grabbing a clean microfiber cloth or normal cloth, grease-fighting cleaner of your choice, or dawn dish soap (or vinegar), and a sponge. The following are the steps needed to take to remove the grease stain:

  1. Generously wipe the area – If the stain is fairly new, make sure to get any excess oil off with a clean cloth
  2. Apply a grease-fighting cleaner – You can use equal parts vinegar and soup or dish soap with hot water, just mix and lather it over the stain
  3. Scrub the area – grab a sponge or if not a clean cloth and start scrubbing the area gently. Make sure that the brush or cloth is moist with some of the cleaning solutions of your choice
  4. Rinse the spot – remove the solution with a clean damp cloth
  5. Drying time – dry the area as much as possible so there is no danger of growing mold.

This method will help in removing the grease stain from a wall or ceiling, if it does not remove the stain entirely, simply repeat the process a few times for efficiency.

3. Water Stains

How to remove water stains from painted walls?

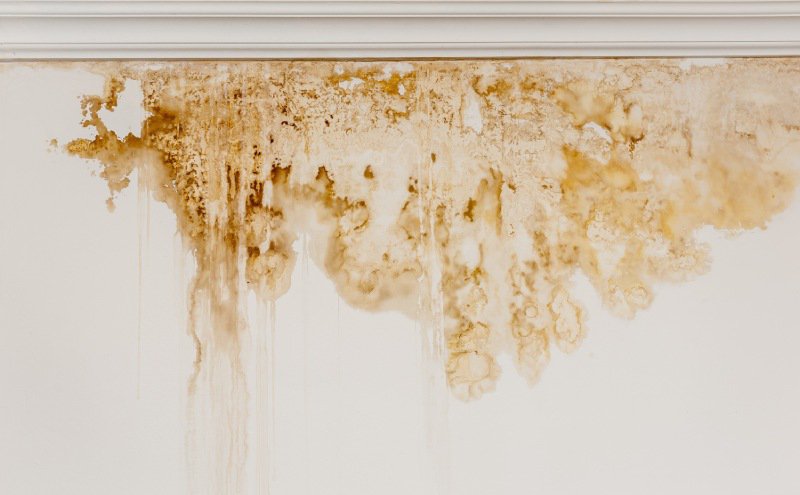
Water stains prove to be a detrimental accident that can end up in repainting a huge portion of the wall if the stain is big enough. This could be a serious problem if you can’t quite find the right paint to blend with the rest of the wall. Your kitchen will end up looking less than appealing and any guest that gets a tour of the house will immediately take notice.

Water-Stains

So, if you’re asking yourself “how to remove water stains from painted walls?” don’t fret, it is much simpler than you thought. Here you will need a bleach product and water. You will mix ten percent bleach with about ten percent water to make a solution. Put the solution in a spray bottle, and then spray the stained area.

 Let the solution soak the stain and wait for it to dry. Then you will spray once again, we recommend that you repeat this process about five or six times. This will enhance the effectiveness of the method and reducing the water stain until it has completely disappeared.

4. Preventing Water Stains

How can I prevent water stains from happening?

Usually, water stains come from a much larger problem which can include leakage slipping through from the plumping system. This problem usually occurs from a water source and can usually be found in a kitchen or bathroom area. Leaving a water stain for too long can end up not only discolor your wall but also leave behind a foul smell.

To take care of this lingering issue, it would be best to call a plumbing service to take a look at the source problem. This will help stop the possibility of a second or third water stain from occurring.

5. Oil Stains

How do oil stains occur?

Much like grease, oil is a very well-known stain that lingers beyond its occasional spillage. Like grease, oil leaves behind dark discoloration that lessens the look of your home thereby lessening social interactions or possible home visits.

Oil-Stains

 Whether it’s from an accidental slab of butter hitting the wall in the kitchen or simply laying your head against the wall and allowing your oily hair to touch the wall can easily imply a new oil stain.

6. Oil Stain Removing Strategies

How to remove oil stains from your wall?

Don’t grab that bucket of paint just yet! Oil stains can be tackled with various methods. First, you must gather the supplies you’ll need: grease cleaner, white vinegar, dish soap, baking soda, flour, or cornstarch.

You won’t need all of the supplies, as one or two of these products will suffice. Next, depending on the materials you have you will use one of the following strategies:

  • To remove with white vinegar: pour a bit of vinegar onto a dry sponge and start rubbing the stain. Due to the acetic acid compound, vinegar can break down oil or grease.
  • Dish soap strategy: Think about it, your dish soap can clean the grease off of pots and pans in your kitchen, imagine what it can do for your walls? Just soak a cloth in hot water, squeeze some excess water, then dip the edge of the cloth in dish soap. Scrub away afterward.

7. Persistent Oil Stains? Try This!

Want to know more ways to remove oil?

Baking soda: This powerhouse of a chemical not only washes away years of dirt but can be just the miracle you need to remove oil stains. Simply add one part baking soda and one part water to make a paste, next spread the paste over the stain. After letting it sit for some time, remove it with a wet cloth. Repeat if necessary.

Flour or cornstarch: Like baking soda, you’re going to make a paste with flour or cornstarch and spread it evenly on the stain. Leave for several minutes, then wipe away, and voila! The oil stain is gone.

8. Water Drip Marks

How do water drip marks occur?

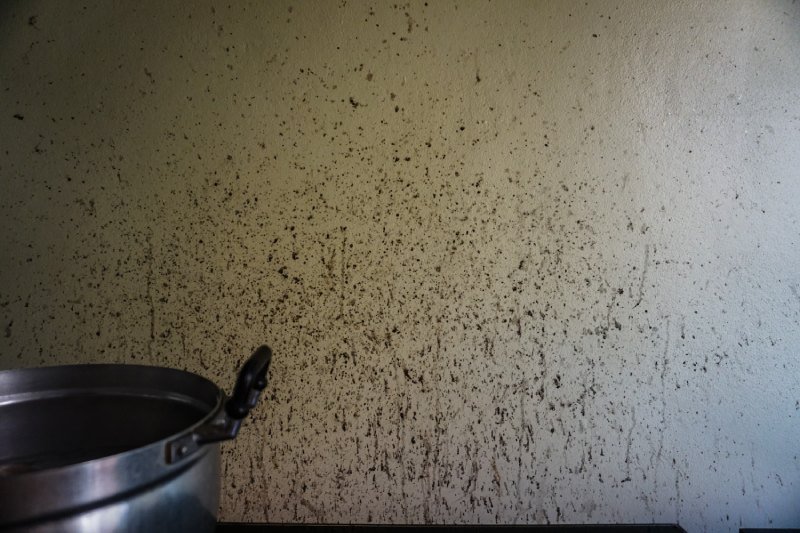
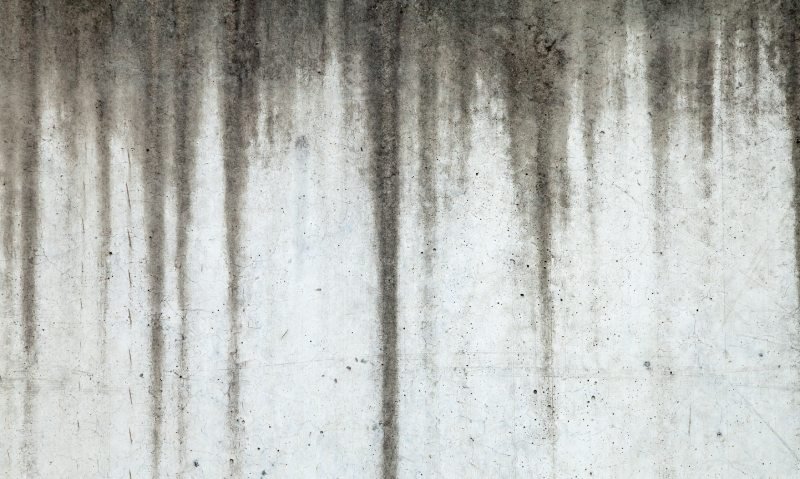
If you think water stains can be a nuisance, wait till you witness water drip marks. Equally if not more so irritating, water drip marks tend to occur in the bathroom or in really moist areas where water droplets will form from the moisture and start dripping down.

Water-Drip-Marks

Normally, water droplets can either disappear after the moisture is gone or will, unfortunately, remain there even after it’s dry. These marks tend to be incredibly unsightly if left there over time, it can lead to discoloration and even mold.

9. Water Drip Mark Removing Strategies

Asking yourself how to remove water drip marks from painted walls? Easy!

You can start by gathering a few supplies like dish soap and a mild cleaner. Then mix these two products in a warm bucket of water. Get a clean rag and apply this solution to the water drip marks on the wall, rinse the walls afterward and the final step is to let it dry.

For this method, we suggest cleaning by working your way upwards against the droplet stains instead of downwards. This will prevent your cleaning solution from causing another water drip mark. If this method doesn’t work, you can also try using a baking soda solution.

Combine 1 cup ammonia, ¼ cup baking soda, and then 1 gallon of warm water, once you stir this solution you will fill up an empty spray bottle with it. You will then spray the affected area and start removing it with a moist sponge. This should take care of any residual marks leftover without damaging your walls.

10. Color Stains

Is there a way to remove color stains from walls?

For those homeowners that have children living in their household, it can be excruciatingly painful when they cause a ruckus and damage the interiors of your home during playtime. This can be evident when you find color stains on their walls that have no business being there.

wall-color-stains

You may be wondering “how to remove color stains from walls?” Luckily color stains tend to be easier to remove than other stains and could be dealt with by using a baking soda paste.

Simply mix one-part baking soda with two parts water, then apply it to the color stain on the wall or ceiling using a clean cloth, toothbrush, or a sponge. You will then rub the area gently so as not to damage the paint. Remove by wiping the excess paste with a clean wet cloth. You will repeat accordingly if there are still residual stains on the wall.

11. Picture Frame Spots

How can you remove picture frame spots from the wall?

When it comes to documenting your memories, nothing is more gratifying than having a precious moment framed in your home. But what happens years later if you decide to move to another home? all of a sudden you remove the picture frame only to find that the spot the picture frame was in has lightened since it hasn’t been touched.

This can feel frustrating as you would like the moving process to go smoothly. So, you end up wondering “how to clean picture frame spots off the wall?” Not to worry, there is also a method for getting rid of these unsightly placements as well. Make sure to remove all picture frames and objects in the surrounding environment as you will want to make sure no other picture or object gets damaged in the cleaning process.

Then you will mix ½ cup ammonia for every gallon of water. You can increase the amount of solution you combine if you are cleaning several spots at once to be more efficient. Before applying the solution, we recommend wiping the wall with a clean cloth to get rid of loose dirt or dust.

You will then submerge a sponge into the solution or a clean cloth and test a small area of the spot. It is important to test this first before applying all of the solutions.

If there are no secondary effects or damage, you will then apply the solution over the entirety of the area. Scrub gently with a soft bristle brush to remove the spots. You will then wipe the area clean. Repeat this process if necessary, to remove all residual spots.

12. Cleaning Tips – How to Upkeep Your Wall or Ceiling

How could you do maintenance so your wall doesn’t end up having stains or spots?

Now that we’ve shown you how to remove stains from painted walls, we will go over some preventive measures that will help you clean your walls or ceiling and keep stains or spots away. Here are some suggestions:

  • Dust – with a duster, make sure to dust your walls and ceilings once a month at the least.
  • Spot treatments – Treat the spots as soon as you see them appear with soap and water or dish soap.
  • Avoid touching – touching the walls with your hands can lead to oil stains or grease stains if you are not careful
  • Keep home insulated – Avoid too much moisture building up in your bathroom or home by opening a window now and then.

These tips will benefit you long term if you hope to keep your home stainless or spotless. For those who have a hard time keeping their home clean due to their hectic schedule, you can request home cleaning services to help.

TESTEST
Categories

How to Clean a Toilet – A Easy & Practical Cleaning Tips

Uncharted waters

Needless to say, the bathroom can be one of the most calming rooms in the house. This is largely due to the practical use it has when it comes to being a sort of relief system for the body in general.

Keeping the bathroom clean is a priority in many households due to this simple fact. No one wants to go into a bathroom and see an infestation of dirt or bacteria lying around.

When you go into a public restroom and see complete chaos, it could speak volumes of the building’s maintenance. The same could be said about a friend or loved one’s bathroom, if you walk into a grimy bathroom it can immediately be off-putting.

The most important part of the bathroom, you could say, is the toilet. The toilet is a necessary daily tool for relief that needs to be kept to ensure our health and wellbeing.

For many, the toilet is known as a “throne” to which only royalty can sit upon. Would you want royalty to be covered in a bacteria or mold-filled mess? I think not. But many aren’t aware of the steps on how to clean a toilet or to generally clean a toilet seat. This is when everyone starts to pick up the phone and call their local home cleaning services as an emergency for their help.

We’re here to tell you that you can put your wallet away and follow our easy and practical tips that will help ensure that your toilet will be stain-free, bacteria-free, and dirt-free in a matter of a few minutes or less than an hour. Not only will your toilet look aesthetically pleasing but you will feel safer sitting on the toilet without wondering if you will get ill.

1. Prepping the Supplies

What are the tools needed to clean the toilet?

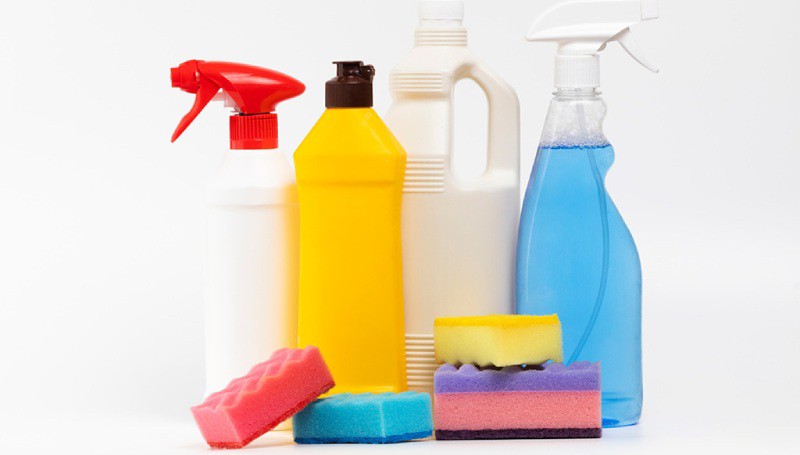
Before starting your journey through the cleaning process, you must first wield the right tools. Some of these materials are accessible and some will need to be bought at your local market or grocery store.

Soap-and-Detergent

However, it is critical to be prepared as these tools will help in the cleaning process and without them, you will more than likely lessen the cleanliness or leave bacteria behind due to the inefficient cleaning method.

Some of these tools serve different methods so you will not need to have all of them but if you feel the need to try a variety of ways each time you clean the toilet to test the efficiency, having extra materials can’t hurt! Here are some tools that will be useful for cleaning your toilet:

  • Waterproof rubber gloves
  • Toilet cleaner
  • Vinegar
  • Sponge or scrub
  • Toilet brush
  • Disinfectant spray
  • Microfiber cloth or towel
  • Pumice stone
  • Paper towels
  • Bleach or Clorox cleaner
  • Disinfectant wipes

Some of these tools contain alcohol or bleach which can be damaging to the eyes or skin if you don’t have the proper safety gear. It is critical to have rubber gloves as well as opening a window if possible so the air doesn’t circulate in a closed space making it easier for it to get in your eyes or lungs.

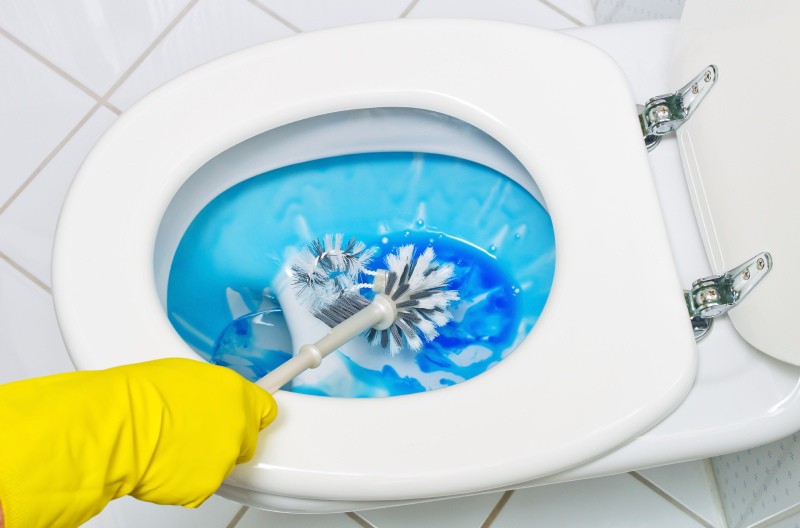
2. Disinfecting Your Toilet – Toilet Bowl Cleaner

What is the first step when it comes to cleaning the inside of your toilet?

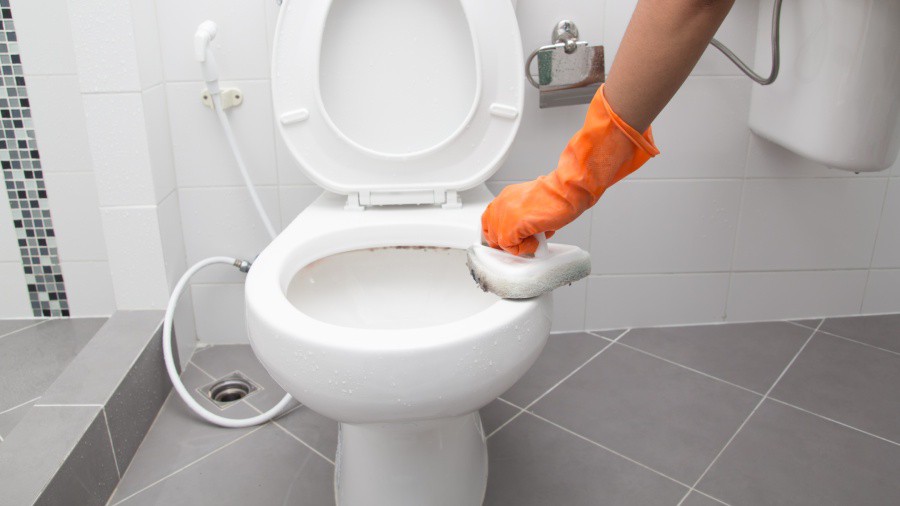
The first step in making sure that your toilet is bacteria-free is to disinfect the inside. Relatively anyone can agree that the inside of your toilet is by far one of the most bacteria-filled areas in the entire home.

Toilet-Bowl-Cleaner

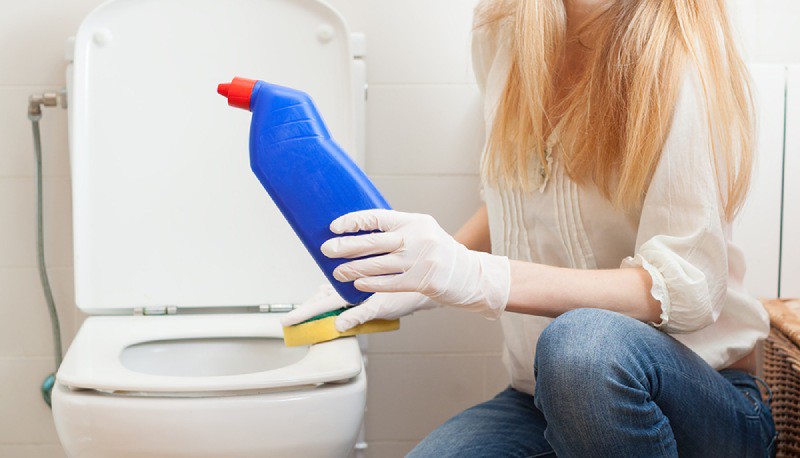
If the toilet isn’t cleaned at least once a week it can lead to foul odors and stains. This is not only unsightly but it can be dangerous when it comes to being in close contact. So, you may ask yourself how to clean toilet stains? The first step when it comes to cleaning a toilet is to apply toilet bowl cleaner.

We suggest leaving it to soak as it will be more efficient in removing any persistent stains as well as odor. For those who don’t have toilet bowl cleaner in their household, don’t fret! Good ole vinegar works just as well.

Vinegar is a powerhouse ingredient when it comes to removing odor. When it comes to toilet odors, you’ll need this potent solution to get rid of the foul stench. Simply just pour one cup of vinegar into the toilet.

After you pour the solution, you could go ahead and use your toilet brush to swish it around and get the walls of the toilet as well. It is important whether you’re using toilet bowl cleaner or vinegar that the inside of the toilet is thoroughly soaked. This will not only neutralize bacteria but also common sicknesses and viruses.

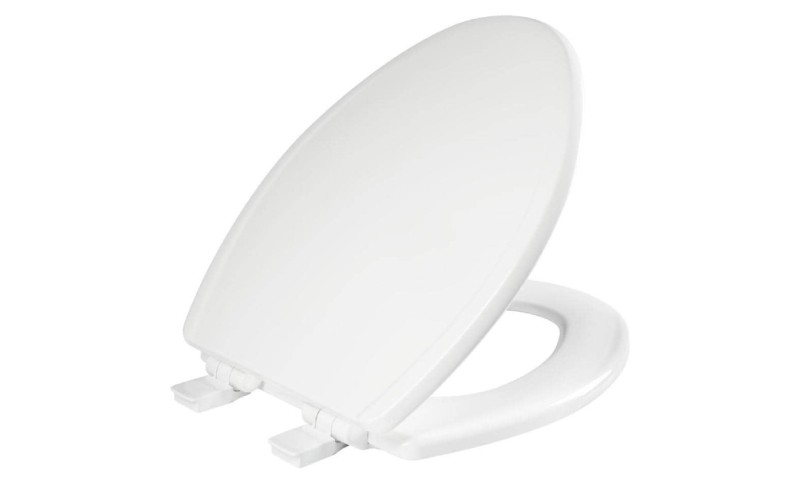
3. Tackle The Exterior – Start With the Lid

How can you clean the toilet lid?

While you’re waiting for the inside of the toilet to soak, you can work on the outside. For this, you will need a bathroom disinfectant cleaner spray or some sanitizer wipes. If the toilet is in a bad state or you haven’t cleaned the toilet in some time, we recommend doing a wipe down with wet paper towels.

Start-With-the-Lid

This will help moisten the surface and make it easier to later scrub. We recommend spraying down the toilet from the base to the top. Remember to clean even the smaller areas that usually get overlooked, like the area between the tank lid and the toilet. Also, tackle the tank itself as this area is particularly filled with bacteria due to being connected directly to the sewer line.

Make sure to clean the lid thoroughly. We recommend cleaning one side at a time, spray the exterior lid and leave it soaking for some time, wipe it down with a microfiber towel when it has been soaked for 10 minutes or more. Then when you’re wiping down the interior lid leave it to soak for more time as this side usually gets filled with more bacteria.

4. Tough Spots – How to Handle the Persistent Areas

How do you clean the tough stains and years old bacteria on the toilet surface?

Picture this: you invite your close friends, relatives, or loved ones to your home. You decide to clean the bathroom lightly to get your home ready for the get-together. However, once you start cleaning you realize that no matter how hard you scrub with soap and water some stains can’t be removed from the toilet.

How-to-Handle-the-Persistent-Areas

Chances are if you’ve had a toilet for quite some time, you know that water rings and stains can be as unsightly as they sound. If any of your guests were to see these stains, not only would it cause you extreme embarrassment but they would immediately be put off and decide to not pay any more visits.

If you’re not used to cleaning your bathroom, it’s almost unavoidable that you’d run into tough stains as simply refreshing the bathroom and doing surface cleaning won’t cut it. When it comes to tackling these persistent obstacles, you have to be ready with the more potent cleaning chemicals and material.

For these stains, we recommend a pumice stone or bleach. Pumice stones are volcanic rocks that are light and soft. These stones are helpful to gently remove any surface stains on porcelain toilets without damaging the exterior. Not only is it abrasive but it works to clean just about any stain without using too much force.

When it comes to bleach, it is important to use protective gear so it doesn’t get on your skin or eyes. Bleach can automatically remove stains as long as you leave it to soak. We recommend leaving the chemical solution for about 15-20 minutes for more effectiveness. Then just flush and repeat if necessary.

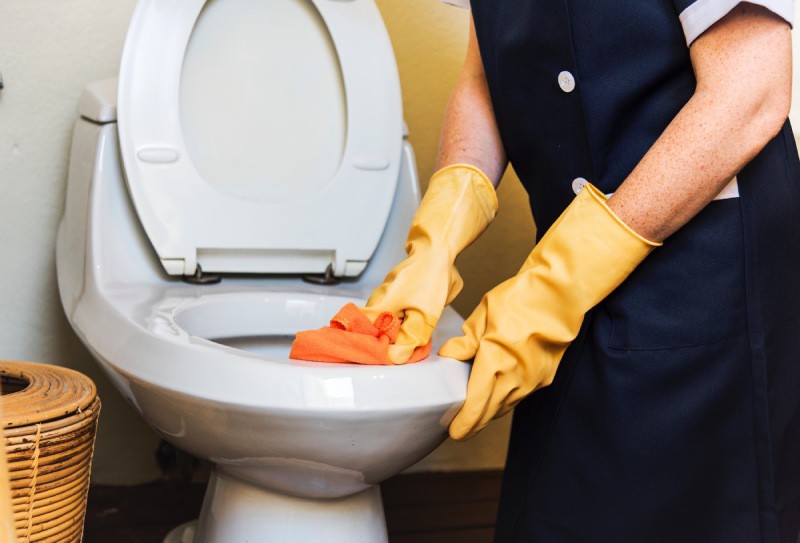
5. The Toilet Handle – The Dirtiest Part of The Toilet

Why is it important to clean the toilet handle?

Many may not be aware of the fact that the toilet handle is a hot spot for bacteria. This is due to the many hands that have touched the toilet handle and the closeness the handle is to the toilet tank, making it easy for bacteria to latch on. Although it is a small space, it is important to tackle this area as anyone who may touch it will immediately be contaminated.

Toilet Cleaning

It is common knowledge that bacteria can cause sickness and illness, but is also aesthetically unpleasing to touch a surface that hasn’t been cleaned thoroughly. While many individuals usually sanitize the handle with sanitation wipes, we recommend also vigorously wiping with a disinfectant cleaner or bathroom cleaner so that the bacteria are efficiently gone.

After putting disinfectant, do not wipe it down with water. Instead, just wipe with a paper towel so that the solution can still be on the surface making it more difficult for bacteria to flourish in this area. Make sure to throw away the used paper towels immediately instead of leaving them in the trash as they can harbor more bacteria if left alone.

6. Take It Apart If Needed!

What is the easier way to clean the toilet seat and tank lid?

Some homeowners who have newer model toilets can also take apart some of the toilet pieces so that you can clean the parts thoroughly. For example, to clean the lid, you would usually need to lift it or let the solution sit for a while without touching it. Some family members, relatives, or loved ones may not realize it and sit on the cold seat filled with the disinfectant solution.

However, if you take apart the toilet seat you could easily wash it and place it back if needed. This also goes for the tank lid and the other hardware that can be taken apart. Pay very special attention to the small creases between the lid and the toilet as these areas usually go unnoticed. Once you’ve cleaned the unattached toilet hardware, put it back safely in its place making sure all the nuts and bolts are tightened.

Leaving a screw loose can be an accident waiting to happen, we suggest double checking each item placement thoroughly.

7. A Necessary Toilet Maintenance Schedule

How often should you clean the toilet?

We understand how hard it can be to do your due diligence and clean the bathroom let alone the toilet. Whether you’re too tired from work or you have to take care of kids, maybe even do other house chores, we know cleaning can be a drag for most people. However, cleaning isn’t only for making the home look aesthetically pleasing or visually appealing.

It is a necessary responsibility to ensure the safety and wellbeing of your family or for yourself. By continuing to leave the toilet uncleaned, not only will you welcome dirt and debris but also an accumulation of harmful bacteria that can produce sickness or worse.

If you have a hard time remembering to clean your toilet, we suggest putting up notes or alarms on your phone as a reminder. This will establish the habit of doing it every other week or every two weeks. We suggest cleaning the toilet at least twice a month for best practice.

When you pick up this habit of cleansing your toilet, you will find it easier than it was the first time as there will be less effort in removing stains.

Actively using vinegar or a toilet bowl cleaner can also help in avoiding any clogging. Thus, not only will cleaning help the surrounding area of the toilet but it will also help in keeping the plumbers away.

Toilet Cleaning Tips – What Else is Important to Know?

  • For really difficult stains – use a stiff bristle brush
  • Make your toilet bowl cleaner with – one cup baking soda, one cup bleach, and one cup of salt
  • Clean your bathroom tools, brushes, cleaner, and towels used for maximum sanitation as well as for reuse
  • Clean the toilet scrubbing brush often as leaving it in the watery holder can lead to mold if left alone.
TESTEST
Categories

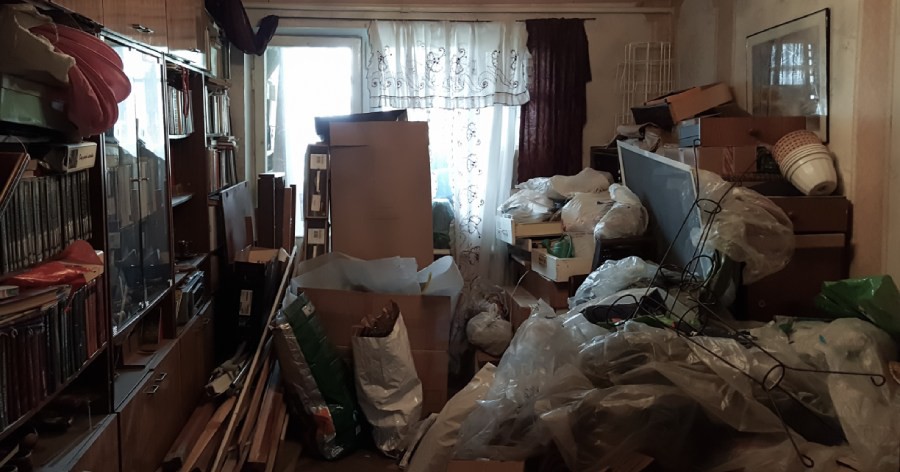
8 Ways to Clean a Hoarder’s House – Simple Checklist

Unlocking the secret to change 

In our lifetime, we’ve all known a couple of people or maybe one person that has dislikes the idea of throwing away precious heirlooms or memorabilia.

Whether this is due to their resistance to change or simply because some are more materialistic than others, this can lead to an abundance of clutter that makes any home look unsightly and incredibly messy. Individuals with this tendency are called hoarders.

Picture this: You walk into your friend or relative’s home for a gathering and your friend asks you to help create a lively environment that will be more accommodating to guests.

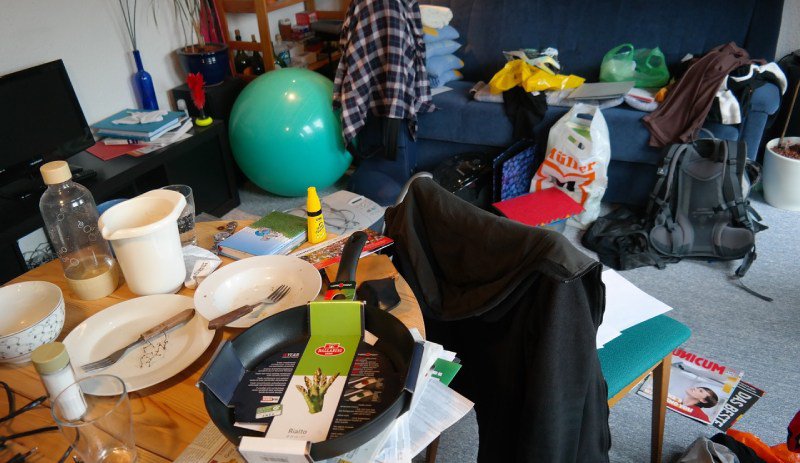
If your friend is a hoarder, this can turn into a nightmare right out of a movie. You keep asking yourself how to clean a hoarder’s house but the truth is if you go about it in a disorderly fashion, it will only serve to frustrate and stress you out even more.

Throwing away items seems easy but when it comes time to throw away heirlooms or objects that have a meaningful background to the owner, the topic can lead to heightened sensitivity from the owner. It is important that when you help in clearing a hoarder’s home that you work with the owner to ensure that the more meaningful items are kept in a more suitable place that won’t obstruct the hallways or clutter the home.

Cleaning a neglected house means that you will need to be organized in your approach as it will facilitate the clean-up faster. For this, we recommend making a hoarding cleaning plan so that cleaning can go more smoothly.

Removing clutter from room to room can take a lot of time if you’re not efficient or have no prior awareness of how to go about this task. Many will hire a home cleaning service, but for those who want to find out how to make this project faster here are 8 ways to clean a hoarder’s house:

1. Take It One Room At a Time!

Why is it easier to clean one room at a time as opposed to cleaning every part of the home at the same time?

When cleaning any home, many make the unfortunate mistake of deciding to clean many spaces at the same time. Not only can this lead to exhaustion due to the overwhelming abundance of tasks that every room can have, but also because you are misusing your energy and will probably leave some areas without cleaning.

Take-It-One-Room-At-a-Time

It is important to note that when you are working on a hoarder’s house, there will be tons of areas that need to be touched as it is likely that they are scattered or the hoarder doesn’t keep track of the items he collects in his home.

When you clean one room at a time, we recommend you order the rooms in terms of importance starting from the dirtiest and most cluttered room to get past the most difficult part.

2. Cleaning Supplies and Storage Boxes

Why is it important to have cleaning supplies and storage boxes when cleaning a hoarder’s home?

Cleaning a home means you will be emptying tons of objects and materials. This would also mean that due to removing these pieces, it could factor in a lot of dust and dirt which would need to then be tackled by cleaning. Before entering the war zone, it is wise to not be empty-handed.

cleaning-supplies-products

We recommend stocking up on cleaning supplies as well as bringing storage boxes to put away all the clutter and mess. Here are some of the cleaning supplies needed:

  • Boxes
  • Trash Bags
  • Cleaning mask (as it will get dusty)
  • Duster
  • Broom
  • Mop
  • Bucket
  • Step ladder
  • Vacuum Cleaner
  • Garbage can

It is extremely important that when you’re cleaning a hoarder’s home to have the appropriate cleaning gear on as there will be times where you will need to remove years of untouched objects that probably contain dirt, dust, or bacteria.

If there are big objects that need to be disposed of like furniture or other bigger items it is important to have a garbage bin or dumpster in your nearby area to easily dispose of these pieces. Otherwise, it will be an issue to remove them later on after cleaning as it will continue to take up space and spread bacteria to the clean environment.

3. Deep Clean After Removing Clutter

Why is it important to deep clean after throwing away and removing clutter?

When you’re emptying your home, the number one thing you can expect is a large amount of dust. There is no avoiding it as you will be uncovering layers and layers of untouched spaces that will more than likely have bacteria, dust, as well as grime.

Deep-Clean-After-Removing-Clutter

It is important to be able to deep clean every area that storage is removed in so that these layers of grime can also go along with it. This will restore the home and transform the hoarder’s living space as if it were brand new.

We also recommend making a cleaning checklist to make sure that each room is thoroughly looked at and cleaned. With all of the hustle and bustle, it can be difficult to have your focus fixated on everything at the same time. It would be beneficial to keep a list handy so when it comes time to deep clean, you’re aware of what needs to be touched without wasting time.

4. Be Careful of Hazards and Mold

Why is it important to take proper safety precautions when cleaning a hoarder’s home?

Cleaning a home filled with all sorts of objects, materials, and things can be excruciatingly painful if you aren’t careful. A house filled with objects can likely be messy and even have storage laying on the floor. Due to the unkempt nature of the home, there is a possibility that you could step on an object unknowingly or accidentally trip on one.

Be-Careful-of-Hazards-and-Mold

For this reason, we suggest clearing out the objects in your home one room at a time. With your full focus on where you step, you will need to execute this cleaning project as safely as possible. We also suggest being careful with mold damages to the home.

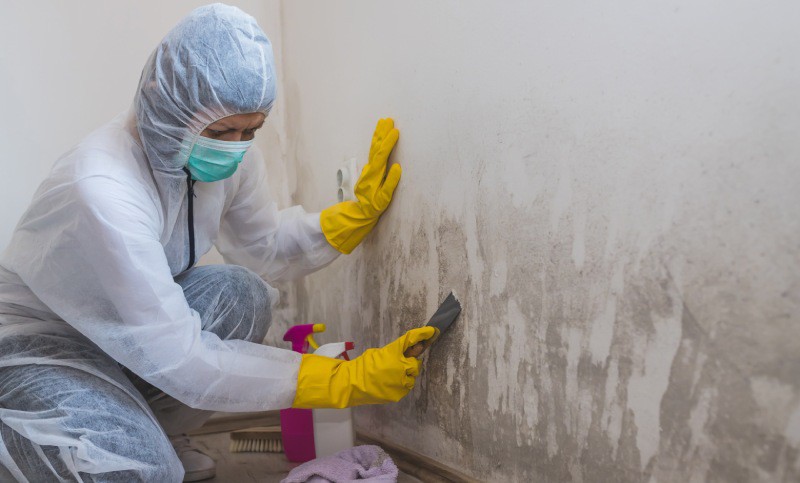
When it comes to a hoarder’s home, the one thing you are destined to find in untouched spaces is mold. This is due to the accumulation of antiques or heirlooms that may not have gotten cleaned in a considerable amount of time.

That is why we suggest using a face mask for you and other people on the cleaning team so that the contaminated air doesn’t affect your lungs or breathing system. If you find mold, we recommend you take the following actions to prevent any damage:

  1. Do not touch – don’t try to remove the mold
  2. Wear a mask – wear a ventilator mask at all times
  3. Call a mold remedying company – best to leave this to professionals
  4. Overwhelming mold – make sure to seal off any room that is prone to mold infestation

When it comes to other cases such as pest infestations, it is important to locate where the infestation is coming from to tackle this issue.

5. Organize a Team to Help

Why is it important to have more than one person helping to clean a hoarder’s home?

Organizing a team can make cleaning in any house a slightly easier and quicker way to get done with such a laborious task. This is especially the case when it comes to a hoarder’s home. Due to the amount of work it takes to clear out an extremely cluttered and dust-filled home, it can be strenuous for those who decide to tackle this project alone.

Make-Home-Cleaning-a-Group-Activity

Although it may be hard to find eager helpers, we recommend asking a friend, relative, or acquaintance to help to fasten the tasks. There will also be moments where cleaning and organizing may require heavy lifting that wouldn’t be a wise idea to leave to one person to handle.

When you assemble a team, you can not only acquire the extra help needed to progress further but you can also improve your organizational methods. One or two people can help with moving the objects to different rooms if needed, while another team of people can go ahead and discard the items that need to be thrown away.

For those who have a hard time asking others for help, you can always hire professionals to come help whether it be a cleaning team or movers that can assist with the boxes so that you don’t have to worry about the excess weight or straining your back by moving the boxes alone.

6. Salvage The Necessary Items

How can you handle removing the necessary items from the throwaway items?

Believe it or not, one of the biggest hurdles when it comes to removing storage from a hoarder’s home is separating the necessary items from the items that are no longer needed.

Eliminate-Clutter

Hoarders are synonymous with sensitivity when it comes to their materials as they have kept building on their collection due to the meaning that some of these items have in their lives or at least their perspective.

The person who is in charge of separating the items that are needed from that the items that need to be discarded also must work with the hoarder and persuade him/her to acknowledge that some of the items can be removed.

This takes a great deal of patience and resolve so that you can successfully get this job done without any hesitance from the hoarder. Once it’s discussed, you can start separating the necessary items from the items that need to be thrown away into piles.

For this task, we recommend that you look at the value of the object versus the practicality of it. If the object is an antique that brings a lot of meaning currently to the hoarder’s home, we suggest keeping those items and storing them in a more organized space. If the object is no longer meaningful and isn’t currently of value to the hoarder, we recommend throwing this item away.

7. Always Start With The Smallest Room

Why is it better to start with the smaller room when cleaning a hoarder’s home?

The smallest room in the house is easily the easiest room to build up clutter on. This is due to the size and the minimal occupancy that it can have. Since that space is smaller, the number of objects is likely to be more pronounced in this area.

Usually, the smallest rooms in a home tend to be the bathrooms. The bathroom is typically the place where you least have to worry about valuable items as it is more structured for practical use. This will also boost the team morale as it will influence a sense of progression due to the amount of thrown-away objects in this space.

After cleaning this room, it is important to sanitize the area and deeply clean as much as possible as the bathroom is the most likely place to be filled with bacteria or mold.

8. Empty All Rooms Before Cleaning

Why is this a helpful strategy when it comes to cleaning a hoarder’s room?

Although it may seem counter-intuitive, the strategy of emptying the rooms before cleaning and organizing is more progressive as it will help to limit the search for all items in the room. This is a time managing method that will help advance the project that will aid in doing a more efficient job.

Empty-All-Rooms-Before-Cleaning

To thoroughly clean each room afterward can be impossibly difficult if there is furniture or boxes in the way, this strategy will help in getting a good deep cleaning done so that it will be spotless and fresh.

The Final Result

Can these simple steps help clean a hoarder’s home more efficiently?

So, you ask yourself how to go about cleaning my hoarding room without having a plan or a list to go by. Well, the answer is simple, you can’t or rather it is impossibly complicated to do so.

By following this list of simple steps, you will easily make these tasks go by quickly as opposed to taking two or three days to dissolve all of the clutter and all of the dirt or dust.

Once everything is accomplished the home will be transformed from a dirty mess to a polished and minimalistic home of their dreams.

TESTEST